
Photography Tips
Beginner Photography Camera Guide: How to Choose the Perfect First Camera
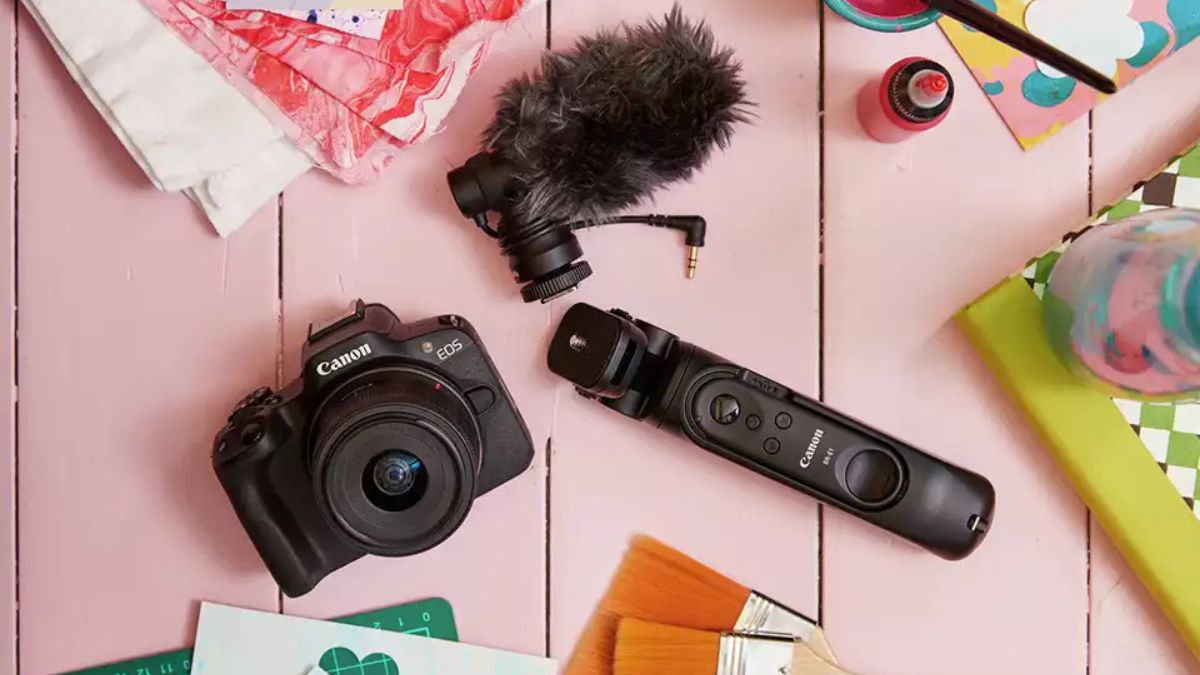
Starting photography is exciting, but choosing your first camera can feel overwhelming. With so many brands, models, and features available, finding the right beginner photography camera often becomes the biggest challenge for new photographers.
The good news is that you don’t need the most expensive camera to take great photos. Modern entry-level cameras offer impressive image quality, easy-to-use controls, and room to grow as your skills improve.
This guide explains everything beginners need to know before buying their first camera, including important features, camera types, common mistakes, and practical buying tips.
What Is a Beginner Photography Camera?
A beginner photography camera is a camera designed to help new photographers learn photography fundamentals while producing high-quality images.
These cameras typically offer:
- User-friendly controls
- Automatic shooting modes
- Manual settings for learning
- Good image quality
- Affordable pricing
- Expandable lens options
The ideal first camera balances simplicity and performance. It should be easy enough for everyday use while providing enough creative control to help you improve.
Why a Dedicated Camera Is Better Than a Smartphone
Smartphone cameras continue to improve every year. However, dedicated cameras still offer significant advantages.
Better Image Quality
Larger image sensors capture more light, resulting in:
- Sharper images
- Better low-light performance
- Improved dynamic range
- More natural background blur
Greater Creative Control
Dedicated cameras provide manual settings for:
- Aperture
- Shutter speed
- ISO
- Focus control
- White balance
Interchangeable Lenses
Most beginner cameras allow lens changes, making it easier to photograph different subjects.
For example:
- Wide-angle lenses for landscapes
- Telephoto lenses for wildlife
- Prime lenses for portraits
- Macro lenses for close-up photography
Types of Cameras for Beginners
Understanding camera categories makes choosing easier.
DSLR Cameras
Digital Single-Lens Reflex cameras have been popular for years.
Benefits include:
- Excellent battery life
- Large lens selection
- Optical viewfinder
- Strong durability
Drawbacks:
- Larger size
- Heavier weight
Mirrorless Cameras
Mirrorless cameras have become the preferred choice for many new photographers.
Benefits include:
- Lightweight design
- Fast autofocus
- Excellent video capabilities
- Compact size
Drawbacks:
- Shorter battery life on some models
- Higher pricing in certain systems
Compact Cameras
Compact cameras feature fixed lenses and portable designs.
Benefits include:
- Easy operation
- Lightweight
- Travel-friendly
Drawbacks:
- Limited upgrade options
- Less flexibility
Camera Type Comparison
| Camera Type | Best For | Main Advantage | Main Limitation |
|---|---|---|---|
| DSLR | Learning photography fundamentals | Long battery life | Larger size |
| Mirrorless | Modern photography and video | Compact design | Can cost more |
| Compact | Casual photography | Easy portability | Fixed lens |
| Bridge Camera | Zoom photography | Large zoom range | Smaller sensor |
Best Features to Look for in a Beginner Photography Camera
Before buying, focus on features that genuinely improve your experience.
Sensor Size
Sensor size affects image quality more than megapixels.
Common sensor types include:
- Full Frame
- APS-C
- Micro Four Thirds
- 1-inch sensors
For most beginners, APS-C sensors provide an excellent balance between quality and affordability.
Autofocus Performance
Reliable autofocus helps capture sharp images consistently.
Look for:
- Face detection
- Eye detection
- Fast tracking
- Multiple focus points
Image Stabilization
Image stabilization reduces blur caused by hand movement.
This feature becomes especially useful when:
- Shooting handheld
- Using zoom lenses
- Photographing in low light
User-Friendly Controls
A beginner-friendly camera should have:
- Easy menus
- Guided modes
- Touchscreen controls
- Customizable settings
Recommended Camera Features by Photography Goal
| Photography Goal | Recommended Feature | Why It Matters |
|---|---|---|
| Portraits | Eye autofocus | Keeps subjects sharp |
| Landscapes | High dynamic range | Captures more detail |
| Travel | Lightweight body | Easier carrying |
| Sports | Fast continuous shooting | Captures action |
| Video | 4K recording | Better video quality |
| Low Light | Larger sensor | Improved image quality |
How Much Should Beginners Spend?
Many new photographers assume they need expensive equipment.
In reality, a quality beginner setup can fit several budgets.
Entry-Level Budget
Ideal for casual learners.
Includes:
- Camera body
- Kit lens
- Memory card
Mid-Range Budget
Offers additional features such as:
- Better autofocus
- Improved build quality
- Faster performance
Long-Term Investment Budget
Suitable for users who plan to pursue photography seriously.
May include:
- Additional lenses
- Tripod
- Camera bag
- External flash
The best strategy is to invest in learning and practice rather than spending everything on a camera body.
Beginner Photography Camera Buying Checklist
Use this checklist before making a purchase.
| Buying Factor | What to Check |
|---|---|
| Sensor Size | APS-C or larger preferred |
| Lens Availability | Future upgrade options |
| Weight | Comfortable to carry |
| Battery Life | Suitable for your usage |
| Autofocus | Fast and accurate |
| Video Features | If video is important |
| Budget | Include accessories |
| User Reviews | Real-world performance |
Best Camera Brands for Beginners
Several trusted manufacturers offer excellent beginner-friendly models.
Canon
Known for:
- Easy menus
- Strong lens ecosystem
- Reliable autofocus
Nikon
Popular for:
- Excellent image quality
- Comfortable ergonomics
- Durable construction
Sony
Recognized for:
- Advanced autofocus
- Compact mirrorless systems
- Strong video features
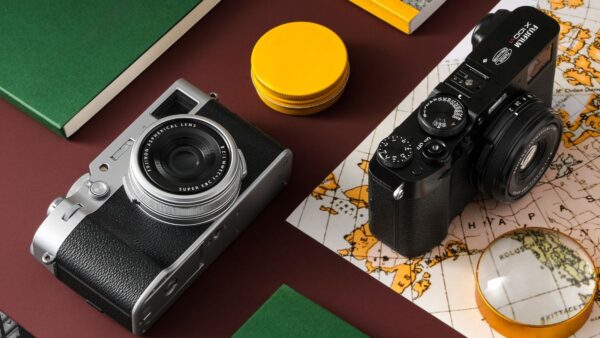
Fujifilm
Loved for:
- Attractive camera designs
- Color science
- Creative shooting experience
Panasonic
Great choice for:
- Hybrid photo and video creators
- Travel photography
- Compact systems
Common Mistakes Beginners Make
Avoiding these mistakes can save money and frustration.
Buying Too Much Camera
Many beginners purchase advanced cameras with features they rarely use.
Instead:
- Focus on usability
- Prioritize learning
- Upgrade later if necessary
Ignoring Lenses
The lens often impacts image quality more than the camera body.
A good lens can dramatically improve results.
Chasing Megapixels
More megapixels do not automatically mean better photos.
Factors that matter more include:
- Sensor quality
- Lens quality
- Lighting
- Technique
Forgetting Accessories
Budget for essentials such as:
- Memory cards
- Camera bag
- Extra battery
- Cleaning kit
Best Practices for Learning Photography
Once you buy your first camera, focus on skill development.
Learn the Exposure Triangle
Master:
- Aperture
- Shutter speed
- ISO
These settings form the foundation of photography.
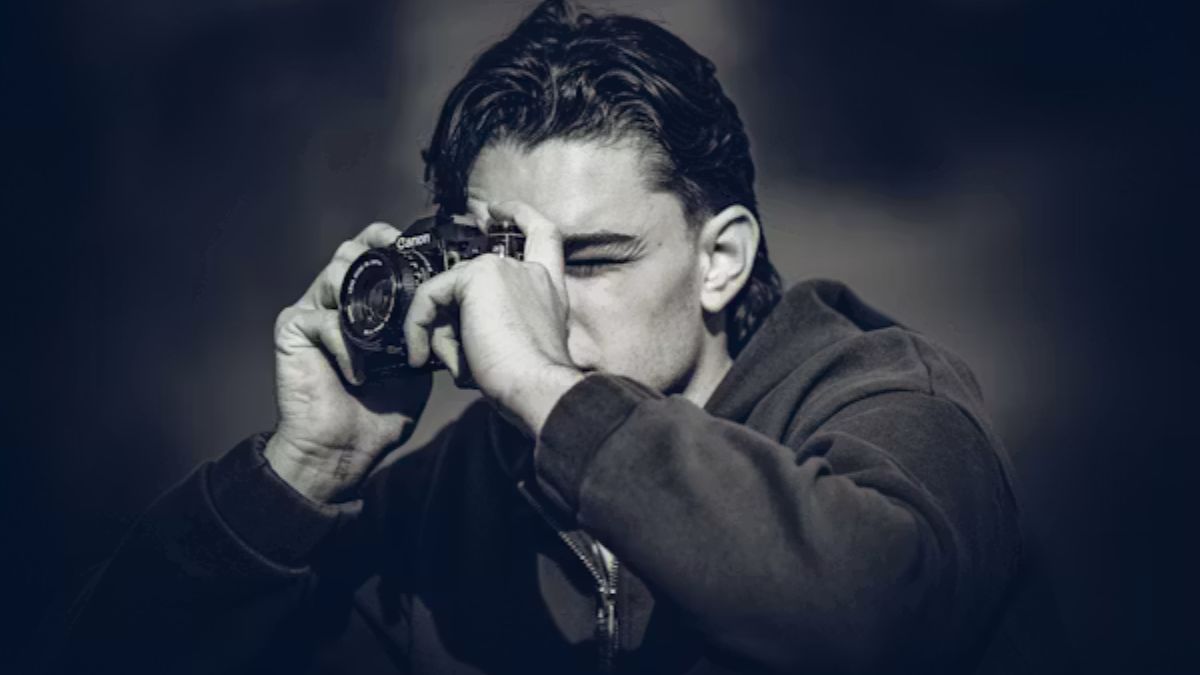
Shoot Regularly
Practice improves photography faster than reading specifications.
Try photographing:
- Landscapes
- Portraits
- Street scenes
- Nature
- Architecture
Study Light
Lighting influences image quality more than camera equipment.
Pay attention to:
- Golden hour
- Window light
- Shadows
- Direction of light
Review Your Photos
Analyze:
- Sharpness
- Exposure
- Composition
- Color balance
Small improvements compound over time.
Pros and Cons of Buying a Beginner Photography Camera
Pros
- Better image quality than smartphones
- Greater creative control
- Interchangeable lenses
- Faster autofocus
- Room for growth
Cons
- Additional cost
- Learning curve
- Extra gear to carry
- Maintenance requirements
When Should You Upgrade Your First Camera?
Many photographers upgrade too soon.
Consider upgrading only when:
- Your current camera limits your creativity
- You need faster performance
- You require specialized features
- Professional work demands it
Until then, focus on improving your skills. A talented photographer can create amazing images with entry-level equipment.
Conclusion
Choosing the right beginner photography camera doesn’t have to be complicated. Start by identifying your goals, setting a realistic budget, and focusing on features that genuinely improve your photography experience.
Whether you choose a DSLR, mirrorless, or compact camera, the most important factor is getting out and practicing regularly. The best camera is the one you enjoy using and take with you often.
As your skills grow, you’ll better understand what features matter most and when it’s time to upgrade. Until then, focus on learning composition, lighting, and exposure. Those skills will improve your photography far more than any piece of equipment.
Frequently Asked Questions
1. What is the best beginner photography camera?
The best option depends on your budget and goals. Most beginners benefit from an entry-level mirrorless or DSLR camera with an APS-C sensor.
2. Is a mirrorless camera better than a DSLR for beginners?
Mirrorless cameras are often easier to carry and offer modern autofocus features, while DSLRs provide excellent battery life and value.
3. How many megapixels do beginners need?
Most beginners only need 20–26 megapixels. Sensor quality and lens performance matter more than megapixel count.
4. Should I buy a camera kit lens?
Yes. Kit lenses are affordable, versatile, and perfect for learning photography basics.
5. Can a beginner use manual mode?
Absolutely. Learning manual mode helps you understand exposure and develop stronger photography skills over time.
/ You May Also Read /
Challenges of Photography: Common Obstacles Every Photographer Faces and How to Overcome Them
Black and White Animal Photography: A Complete Guide to Capturing Powerful Wildlife Image
Photography Tips
Portraits and Photography: Your Complete Guide to Capturing Stunning Images in 2026
Whether you’re just picking up your first camera or you’ve been shooting for years, the world of portraits and photography never stops evolving. In 2026, the rules have shifted — lighting tools are smarter, editing software is more powerful, and the expectations of viewers are higher than ever. But the fundamentals? Those remain timeless.
This guide covers everything from essential gear and lighting setups to posing psychology and post-processing. By the end, you’ll have a clear, actionable framework for taking portraits that genuinely connect with people — not just technically correct shots, but images with real emotional weight.
What Are Portraits and Photography — and Why Do They Matter?
Portrait photography is the art of capturing a person’s personality, mood, and essence through a single image. Unlike landscape or product photography, portraits put a human being at the center — which means you’re juggling technical skill, interpersonal connection, and creative vision all at once.
At its core, portrait photography asks one question: how do I make this person feel seen? The answer involves much more than a good camera.
Types of Portrait Photography
Understanding the major portrait styles helps you choose the right approach for each client or creative project:
- Environmental portraits — subject photographed in their natural setting (workplace, home, outdoors)
- Studio portraits — controlled lighting, neutral or intentional backgrounds
- Candid portraits — unposed, spontaneous moments that reveal authentic emotion
- Fine art portraits — conceptual, often heavily stylized, driven by a creative narrative
- Headshots — professional-use portraits for actors, executives, and business profiles
Portrait Photography Styles at a Glance
| Style | Best For | Lighting Approach | Key Equipment |
| Studio Portrait | Commercial, headshots | Controlled flash or continuous | Softboxes, backdrop, reflector |
| Environmental | Editorial, personal branding | Natural + fill flash | Portable speedlight, diffuser |
| Candid | Documentary, street | Available light | Fast prime lens (35mm–50mm) |
| Fine Art | Gallery, creative projects | Dramatic, sculptural | Full manual control, color gels |
| Headshots | LinkedIn, acting portfolios | Even, flattering | 85mm lens, clamshell lighting |
Essential Camera Gear for Portrait Photographers in 2026
You don’t need the most expensive gear to shoot beautiful portraits. But choosing the right tools makes the job significantly easier — and the results noticeably better.
The Best Lenses for Portrait Work
Lens choice shapes everything from background compression to skin rendering. Here’s what working photographers actually use:
- 50mm (standard) — versatile, natural perspective, great for environmental portraits
- 85mm (portrait classic) — flattering compression, beautiful bokeh, ideal for headshots
- 135mm (telephoto) — stronger compression, useful for candid and editorial work
- 24–70mm zoom — flexibility for run-and-gun sessions
In 2026, mirrorless systems from Sony, Canon, and Nikon dominate the professional portrait world — primarily for their autofocus tracking and eye-detection systems, which take the guesswork out of sharp eyes on moving subjects.
Lens Comparison for Portrait Photography
| Focal Length | Perspective Distortion | Background Separation | Best Use Case |
| 35mm | Slight wide distortion | Low | Environmental, group shots |
| 50mm | Natural, true-to-life | Moderate | General portraits, lifestyle |
| 85mm | Flattering compression | High | Headshots, beauty, fashion |
| 135mm | Strong compression | Very high | Editorial, candid street work |
| 70–200mm zoom | Variable | High at 200mm | Events, weddings, versatility |
Portrait Photography Lighting: The Make-or-Break Factor
Ask any experienced photographer what separates a good portrait from a great one — lighting will come up every single time. Light defines shape, sculpts the face, and sets the emotional tone of an image.
The Classic Three-Point Lighting Setup
This foundational setup works in virtually every studio situation:
- Key light — your main, dominant light source, placed at roughly 45° to the subject
- Fill light — reduces harsh shadows on the opposite side, usually softer or at lower power
- Rim/Hair light — placed behind the subject to separate them from the background
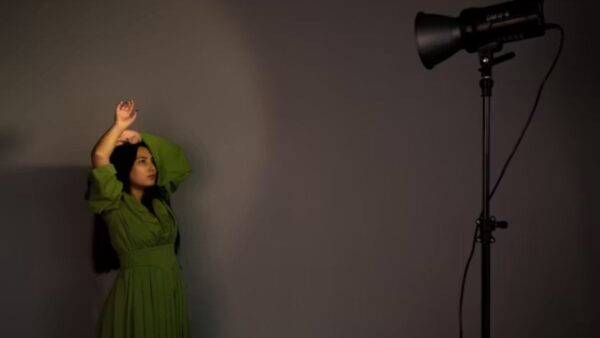
Natural light is equally powerful when you know how to use it. A large north-facing window acts as a giant softbox, producing even, flattering light that beginners often underestimate. The golden hour — the first and last hour of sunlight — adds warmth and dimension that’s hard to replicate artificially.
Posing Psychology: Getting Natural Expressions From Your Subjects
Technical perfection means little if your subject looks stiff or uncomfortable. This is the part of portrait photography that separates photographers with great cameras from photographers with great portfolios.
How to Direct Subjects Naturally
- Start with conversation, not commands — let people relax before you shoot
- Give motivations, not poses (“think about something that made you laugh recently”)
- Use action-based direction: “walk toward me slowly” or “look away and glance back”
- Keep energy light and positive — your mood is contagious on set
- Shoot continuously during transitions — the best expressions happen between poses
The goal isn’t a perfect pose. It’s a genuine moment captured in a controlled environment. When subjects forget the camera exists, that’s when the real magic happens.
Post-Processing Portraits: Editing Without Overdoing It
Modern editing tools give portrait photographers extraordinary power — which also means extraordinary temptation to overprocess. The best-edited portraits look like they needed no editing at all.
A Simple Portrait Editing Workflow
- Set exposure, white balance, and basic tone in Lightroom or Capture One
- Adjust skin tone using HSL sliders — target orange and yellow channels
- Dodge and burn gently to enhance facial dimension
- Apply subtle frequency separation for skin retouching in Photoshop if needed
- Color grade with split-toning or LUTs — keep it cohesive with your overall style
- Export at the correct resolution for the intended use (print, web, social)
Resist the urge to smooth skin until it looks plastic. Clients appreciate natural retouching — they want to look like the best version of themselves, not like a different person.
Pros and Cons of Portrait Photography as a Career
Pros
- High demand across commercial, editorial, and personal sectors
- Deeply rewarding creative work
- Flexible working hours and locations
- Strong income potential with specialization
- Continuous skill development and creative growth
Cons
- Competitive market requires strong differentiation
- High initial gear investment
- Client management can be demanding
- Income can be irregular, especially early on
- Physical demands of long shooting days
Common Portrait Photography Mistakes to Avoid
- Shooting at too wide an aperture — f/1.2 can miss your subject’s eyes entirely; f/2–f/2.8 is usually the sweet spot
- Ignoring the background — distracting elements behind the subject kill an otherwise good shot
- Not building rapport — jumping straight into shooting before the subject is relaxed shows in every frame
- Over-relying on Photoshop — get it right in camera; heavy retouching creates more problems than it solves
- Inconsistent focal length choices — switching lenses mid-session disrupts your visual consistency
- Neglecting catchlights — eyes without catchlights look flat and lifeless; position your light source accordingly
Best Practices for Stunning Portrait Photography
- Always focus on the nearest eye — sharp eyes are non-negotiable in portraits
- Shoot in RAW format for maximum editing flexibility
- Use a tethered shooting setup for client-facing sessions
- Develop a consistent editing style that defines your brand
- Study classic portrait painters — Rembrandt, Vermeer — for lighting inspiration
- Review your work critically; cull ruthlessly and only show your strongest images
- Keep a simple contract and clear communication to set client expectations
Conclusion
Portrait photography is one of the most rewarding disciplines in the visual arts. It demands technical skill, emotional intelligence, and a genuine curiosity about people. Whether you’re shooting a family session in the park or a commercial campaign in a controlled studio, the fundamentals outlined in this guide will serve you at every level.
Start with what you have, learn the light, build real connections with your subjects, and develop an editing style that’s genuinely yours. The rest — the gear upgrades, the client list, the recognition — follows naturally when the work is honest and consistently excellent.
Frequently Asked Questions
1. What camera settings are best for portrait photography?
For most portrait situations, use a wide aperture between f/1.8 and f/2.8 for background blur, a shutter speed of at least 1/125s to avoid motion blur, and auto ISO capped at 3200. In bright conditions, ISO 100–400 will give you the cleanest results.
2. What is the best lens for portrait photography?
The 85mm prime lens is widely considered the gold standard for portrait photography. It offers natural facial compression, beautiful background separation, and flattering rendering. The 50mm is also excellent for environmental portraits where you want more context in the frame.
3. How do I make portrait subjects look natural and relaxed?
Spend the first 10–15 minutes of any session in conversation before picking up your camera. Give action-based direction rather than rigid poses. Play music, keep the mood light, and shoot continuously — the most genuine expressions happen between intentional poses.
4. What lighting setup should I use for indoor portraits?
For indoor portraits without a studio setup, position your subject near a large window with the light coming from the side. This creates natural, directional light. Use a white foam board or reflector on the opposite side to fill in shadows. This approach is free, effective, and looks professional.
5. How do I build a portrait photography portfolio from scratch?
Start by offering free or discounted sessions to friends, family, and local community members. Focus on one or two specific styles to develop a cohesive look. Post consistently on Instagram or your own website. Reach out to local businesses for headshot work — it’s a fast way to build both your portfolio and income simultaneously.
/ You May Also Read /
Photography in the Studio: Essential Tips and Setup Guide for Better Shots
Family Photography: Best Poses, Locations & Expert Tips for Stunning Shots

If you’ve ever typed “photography places near me” into Google at 11pm while restlessly scrolling through someone else’s stunning landscape shots, you’re not alone. The UK is absolutely packed with breathtaking locations — and honestly, a lot of the most photogenic spots never show up on the usual tourist maps. From forgotten industrial ruins to fairytale coastal villages, Britain hides its best backdrops in plain sight.
This guide cuts through the obvious choices. No Big Ben. No Edinburgh Castle. Instead, you’ll discover ten genuinely underrated locations scattered across England, Scotland, Wales, and Northern Ireland — each one worthy of a dedicated shoot.
Why the UK Is a Photographer’s Dream Destination
Before diving into the list, it’s worth appreciating just how diverse the British landscape is. In a single day, you can move from chalk cliffs to ancient forest, from moorland to medieval market town. The ever-changing weather — as frustrating as it can be — creates moody skies and dramatic lighting that photographers in sunnier countries would kill for.
The seasons matter enormously here too. Bluebells carpet woodland floors in late April. Heather turns Scottish hillsides purple in August. Autumn transforms the Lake District into something from a painting. Timing your visit can completely transform a location.
What Makes a Location “Hidden Gem” Worthy?
A hidden gem photography location typically shares a few traits:
- Low footfall — fewer people means cleaner compositions and no waiting for strangers to move
- Unique character — something visually distinctive that separates it from generic landscapes
- Variable shooting conditions — fog, golden hour, and seasonal changes all dramatically affect the mood
- Accessibility — ideally reachable within a reasonable drive or public transport journey
Top 10 Hidden Gem Photography Locations Across the UK
1. Dunnottar Castle, Aberdeenshire, Scotland
Perched dramatically on a North Sea headland, Dunnottar is the kind of ruin that makes you question whether you’ve walked into a fantasy novel. The clifftop position means you can shoot from the beach below at low tide for a jaw-dropping wide-angle composition, or work the headland path for elevated framing. Dawn light here is extraordinary.
Best time to visit: October to February for dramatic skies and low crowds.
2. Puzzlewood, Forest of Dean, Gloucestershire
Used as a filming location for Merlin and Star Wars, Puzzlewood is an ancient mossy woodland of twisted rock formations and gnarled trees. Shooting here feels like stepping into a different century. Overcast days — counterintuitively — work brilliantly because the flat light reduces harsh shadows under the dense canopy.
Best time to visit: Autumn for golden leaf colour; spring for vivid green moss.
3. Birnbeck Pier, Weston-super-Mare, Somerset
Unlike its better-known neighbour down the coast, Birnbeck Pier is delightfully derelict — a Victorian seaside structure slowly being reclaimed by nature. Rusted ironwork, peeling paint, and sea-bleached timber create textures that abstract and architectural photographers adore. Shoot at low tide to access the causeway and include the rocky foreshore.
Best time to visit: Winter mornings for low mist and no visitors.
4. The Lost Gardens of Heligan, Cornwall
Rediscovered in the 1990s after decades of abandonment, Heligan is a genuine treasure. Ancient kitchen gardens, jungle walks, and a walled garden bursting with heritage vegetables give photographers an extraordinary range of subjects — all within a few acres. The “Mud Maid” sculpture, made from earth and living plants, is unlike anything else in the UK.
Best time to visit: Spring through early summer for peak planting season.
5. Sycamore Gap, Northumberland (Hadrian’s Wall)
A single sycamore tree growing in a natural dip along Hadrian’s Wall became one of the most photographed trees in Britain — and for good reason. The symmetry of the landscape and the historic wall trailing either side make for a composition that practically frames itself. Note that as of late 2023, the tree was unfortunately felled by vandals, but the location itself remains a powerful landscape subject.
Best time to visit: Any season — winter snow and summer wildflowers both transform it differently.
6. Fingal’s Cave, Isle of Staffa, Scotland
Accessible only by boat from Mull or Iona, Staffa rewards the effort tenfold. The hexagonal basalt columns forming the cave entrance are a geological wonder — and the light bouncing off the water inside creates an ethereal blue glow that feels almost supernatural. A wide-angle lens is essential.
Best time to visit: May to September when boat trips run regularly.
7. Portmeirion, North Wales
An Italianate village built on the Welsh coast between 1925 and 1975, Portmeirion is surreal, colourful, and wildly photogenic. Pastel buildings tumble down a hillside toward the Dwyryd estuary. It’s equal parts Amalfi Coast and folly architecture — and outside of peak summer, you can often shoot with very few people around.
Best time to visit: Early morning in spring or autumn.
8. Tulip Fields, Lincolnshire
Between April and early May, commercial tulip fields near Spalding and the surrounding Fenland area blaze with rows of red, yellow, and pink flowers stretching to the horizon. This is one of the UK’s best-kept seasonal photography secrets. Wide-angle shots capturing the geometric rows are stunning, and macro work on individual blooms is equally rewarding.
Best time to visit: Last two weeks of April — timing varies slightly each year.
9. Marsden Rock, South Tyneside
A dramatic free-standing sea stack on the South Tyneside coast, Marsden Rock has a resident seabird colony and a cave accessible at low tide. The contrast of red-orange sandstone against a stormy North Sea sky is genuinely thrilling. It’s also remarkably accessible — with a pub literally built into the cliff face nearby.
Best time to visit: Autumn and winter for wild seas and dramatic skies.
10. Wistman’s Wood, Dartmoor, Devon
One of the most atmospheric places in England, Wistman’s Wood is an ancient dwarf oak woodland at high altitude on Dartmoor. The trees are gnarled and twisted, draped in thick moss and lichen, growing through and around enormous granite boulders. Misty mornings make this look like a scene from a Celtic myth. A wide-angle lens and a tripod are essential.
Best time to visit: Autumn to early winter for mist, colour, and soulful light.
Location Comparison at a Glance
| Location | Country | Best Season | Difficulty to Reach | Unique Feature |
|---|---|---|---|---|
| Dunnottar Castle | Scotland | Autumn/Winter | Easy (drive) | Clifftop sea ruin |
| Puzzlewood | England | Autumn/Spring | Easy (short walk) | Ancient twisted woodland |
| Birnbeck Pier | England | Winter | Easy (coastal walk) | Derelict Victorian pier |
| Fingal’s Cave | Scotland | Summer | Hard (boat only) | Hexagonal basalt columns |
| Portmeirion | Wales | Spring/Autumn | Easy (drive) | Italianate fantasy village |
| Wistman’s Wood | England | Autumn/Winter | Moderate (moorland hike) | Dwarf oak and granite |
| Tulip Fields | England | Late April | Easy (drive/walk) | Mass floral colour rows |
| Marsden Rock | England | Autumn/Winter | Easy (coastal path) | Sea stack and cave |
Essential Gear for UK Location Photography
You don’t need an enormous kit bag, but a few items will dramatically improve your results at these types of locations.
| Gear Item | Why It Matters | Recommended For |
|---|---|---|
| Polarising Filter | Reduces glare, deepens sky contrast | Coastal & waterfall shots |
| Tripod | Enables long exposures in low light | Woodland, caves, dawn/dusk |
| Weather-Sealed Camera Body | Protects in rain and coastal spray | All UK outdoor locations |
| Wide-Angle Lens (16–24mm) | Captures scale and foreground interest | Landscapes, caves, ruins |
| ND Filter (6 or 10 stop) | Smooths water, extends exposures | Piers, rivers, waterfalls |
| Waterproof Bag Cover | Essential in British weather | Every location listed here |
Pros and Cons of Shooting at Hidden Gem UK Locations
Pros:
- Fewer crowds mean cleaner compositions and no photobombing strangers
- Unique, less-seen imagery helps your portfolio stand out
- Many hidden gems are free to access
- Changeable British weather creates genuinely dramatic and moody lighting
- Varied landscapes mean you can specialise or experiment across genres
Cons:
- Some locations require careful planning around tides, seasons, or boat schedules
- Remote locations can involve significant walking on uneven terrain
- Less instagrammed spots can mean fewer scouting resources available online
- Weather unpredictability can scupper a planned shoot
- A few locations (like Staffa) have limited access windows each year
Common Mistakes Photographers Make at These Locations
1. Shooting at the wrong time of day Midday light is flat and unflattering for landscape and architectural work. Golden hour — the hour after sunrise and before sunset — transforms almost every location on this list.
2. Ignoring tide tables for coastal spots At locations like Marsden Rock and Birnbeck Pier, low tide opens up entirely different compositions. Always check tide tables before you go.
3. Overlooking the foreground Strong foreground interest anchors a landscape shot. Rocks, flowers, puddles, and leading lines all do heavy lifting in a composition.
4. Not checking seasonal timing The tulip fields are a two-week window. Bluebells last roughly three weeks. Miss the timing and you’ve missed the shot.
5. Over-editing for drama UK landscapes are naturally dramatic. Heavy-handed HDR processing or hyper-saturated edits often undermine the natural mood these places already carry.
Best Practices for Getting Great Shots at Hidden UK Locations
- Scout on Google Earth or satellite view before visiting — understand the lay of the land before you arrive
- Arrive before golden hour — set up while there’s still enough light to navigate safely
- Shoot in RAW format — the dynamic range in dramatic UK lighting requires maximum editing headroom
- Check the weather forecast for clouds, not just rain — partly cloudy skies create far more interesting light than clear blue skies
- Bring a backup battery — cold British weather drains batteries significantly faster
- Respect the environment — don’t trample vegetation for a shot, and leave locations exactly as you found them
Conclusion
The UK doesn’t shout about its best photography locations — it tucks them away behind hedgerows, along coastal paths, and up moorland tracks waiting for the people willing to look a little harder. Whether you’re chasing misty Highland ruins, ethereal ancient woodlands, or the surreal colour of a Fenland tulip field, there’s something on this list for every style and skill level.
The best part? You don’t need to travel far. Brilliant, genuinely extraordinary photography spots are almost certainly within a few hours of wherever you are right now. Pack the tripod, check the tide times, set your alarm for an hour before sunrise — and go find them.
Frequently Asked Questions
1. What are the best photography places near me in the UK for beginners?
For beginners, accessible locations with clear subjects and easy parking work best. The Lost Gardens of Heligan, Portmeirion, and the tulip fields of Lincolnshire are all excellent starting points — they’re visually rich, manageable to navigate, and don’t require specialist equipment or tidal planning.
2. Do I need a permit to photograph at UK heritage sites?
Most outdoor heritage sites managed by organisations like the National Trust or Historic Environment Scotland allow personal photography freely. Commercial photography — including shoots for paid clients or licensed stock — may require a permit. Always check the specific site’s policy before a professional shoot.
3. What is the best time of year for landscape photography in the UK?
Autumn (October to November) and spring (April to May) offer the most photogenic conditions — vibrant colour, variable skies, and lower visitor numbers. Winter provides dramatic light and atmosphere but requires careful preparation for cold and wet conditions.
4. How do I find hidden gem photography locations near me?
Beyond this guide, explore Ordnance Survey maps for footpaths leading to unusual terrain, search local photography Facebook groups and Flickr pools, and use Google Earth satellite view to scout interesting landscape features before visiting in person.
5. What camera settings work best for UK landscape photography?
A good general starting point is aperture f/8–f/11 for maximum sharpness across a scene, ISO 100–400 to minimise noise, and shutter speed adjusted for light conditions. For moving water, use a slower shutter speed (1/4 to 2 seconds) with a tripod and ND filter. Always shoot in RAW.
/ You May Also Read /
Photography Locations Near Me: Best UK Spots to Visit in 2026
Photography in the Studio: Essential Tips and Setup Guide for Better Shots
Introduction
If you have ever wanted total control over how your images look, photography in the studio is where that journey truly begins. Unlike outdoor shooting, a studio gives you the power to shape every single element — the light, the background, the mood — exactly the way you envision it.
That level of creative control is exciting. But it also comes with a learning curve. You need to understand how artificial light behaves, how to position your subject, and which camera settings to reach for. Get those fundamentals right, and your images will look polished, professional, and purposeful.
This guide walks you through everything — from building your first studio setup to nailing your exposure every time. Whether you are a beginner starting from scratch or an enthusiast ready to level up, there is something here for you.
What Is Photography in the Studio?
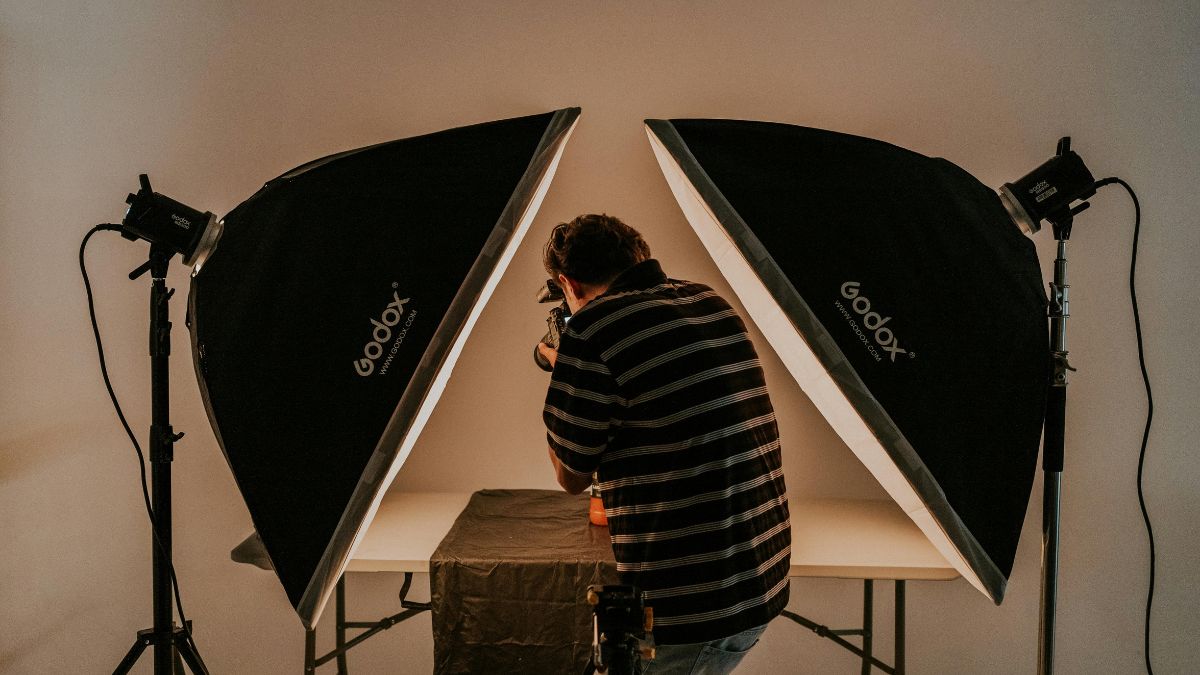
Studio photography refers to any image captured in a controlled indoor environment, specifically designed for photographic work. It removes all the unpredictability of outdoor shooting — no harsh noon sun, no sudden wind, no strangers wandering into the frame.
At its core, a studio setup relies on three things: a light source (or multiple), a background, and enough space to work freely. Everything else — props, reflectors, backdrops — builds on top of that foundation.
Types of studio photography
Studio shooting covers a surprisingly wide range of subjects. Knowing which type you are working in helps you make smarter equipment and lighting choices.
- Portrait photography — headshots, editorial, and lifestyle portraits
- Product photography — e-commerce, commercial, and still-life
- Fashion photography — editorial, lookbooks, and advertising campaigns
- Food photography — menu shoots and brand content
- Fine art photography — conceptual and creative personal projects
Setting Up Your Studio Space: A Photography in the Studio Starter Guide
Before you fire a single flash, the physical space needs to be right. A cramped, cluttered room will limit your creativity and cause technical problems. You do not need a massive space — but you do need a functional one.
Minimum space requirements
For portrait work, aim for at least 10×12 feet of usable floor space. Product photography can be done in a much smaller area — even a tabletop setup on a kitchen counter can work beautifully with the right lighting.
| Photography type | Recommended studio size | Key requirement |
| Headshots / portraits | 10×12 ft minimum | Space for subject + background separation |
| Full-body fashion | 15×20 ft or larger | Room to back up for wide framing |
| Product / still life | Tabletop (4×4 ft surface) | Controlled light table or sweep |
| Food photography | 6×8 ft minimum | Overhead shooting angle access |
| Pet photography | 12×15 ft recommended | Non-slip flooring, safety space |
Essential studio gear to start with
You do not need the most expensive kit. Start with the essentials, learn them deeply, and then expand. Here is a solid starter list for most studio photographers.
- A strobe or continuous light source (speedlight, monolight, or LED panel)
- A softbox or umbrella modifier for diffused light
- A seamless paper backdrop (white, grey, and black cover most needs)
- A sturdy backdrop stand system
- At least one reflector or fill card
- A light meter (optional but highly recommended)
- Gaffer tape and sandbags for safety
Lighting Techniques That Actually Work
Lighting is the single most important skill in studio photography. Unlike natural light, which you chase and adapt to, studio light is something you build. That means getting it wrong is entirely avoidable — once you understand the basics.
Classic portrait lighting setups
| Lighting pattern | Light position | Effect / best for |
| Rembrandt lighting | 45° above, to the side | Dramatic triangle shadow — moody portraits |
| Loop lighting | Slightly above, 30–45° off-axis | Flattering, natural look — most commercial work |
| Butterfly lighting | Directly above the subject | Glamour look, emphasizes cheekbones |
| Split lighting | 90° directly to the side | Bold, graphic — editorial and artistic shoots |
| Broad lighting | Light on the near side of face | Wider face appearance — softens features |
Using modifiers effectively
A bare flash is harsh and unflattering for most subjects. Light modifiers change the quality of that light — making it softer, more diffused, and far more pleasing.
- Octaboxes produce beautiful, even, wrap-around light ideal for close-up portraits
- Strip boxes create narrow, directional light perfect for rim lighting or product edges
- Umbrellas are affordable and spread light broadly — great for larger group shots
- Beauty dishes give a punchy, slightly contrasty light popular in fashion and beauty work
- Gels add color — use them to change background hues or add creative color tones to skin
Camera Settings for Studio Work
Many photographers get the lighting right but struggle with camera settings when moving indoors. The good news is that studio shooting actually simplifies your exposure decisions considerably.
Recommended starting settings for flash photography
Studio flash is a frozen moment of light. That means your shutter speed does not affect exposure in the traditional sense — the flash duration does. Here is where to start.
- Shutter speed: Set to your camera’s sync speed (typically 1/160s to 1/250s)
- Aperture: Begin at f/8 for portraits, adjust flash power to match
- ISO: Keep it at your base ISO — usually 100 or 200 — for the cleanest files
- White balance: Set manually to match your flash (around 5500K for most strobes)
- Shoot in RAW format for maximum editing flexibility
Pros and Cons of Studio Photography
Pros
- Full control over lighting, background, and environment
- Weather-independent — shoot any day, any season
- Consistent, repeatable results for commercial clients
- Distraction-free environment focuses attention on the subject
- Easier post-processing with clean, predictable exposures
- Ideal for building a professional portfolio
Cons
- High upfront cost for lights, stands, and modifiers
- Can feel artificial or stiff without good direction
- Limited space restricts certain creative concepts
- Requires technical knowledge to set up correctly
- No natural environmental context for documentary work
- Power requirements and heat from continuous lights
Common Mistakes to Avoid
- Forgetting background separation. Placing your subject too close to the backdrop causes unwanted shadows to fall on it. Keep at least 4–6 feet between subject and background.
- Ignoring ambient light. Even in a studio, windows and overhead room lights can affect your exposure and color temperature. Always control or eliminate ambient light sources.
- Shooting wide open every time. A shallow depth of field is useful in some contexts, but studio work often benefits from stopping down to f/8–f/11 for sharp detail across the subject.
- Using only one light and no fill. A single bare light source creates harsh shadows. Add a reflector or a second, weaker fill light to balance things out.
- Not tethering your camera. Shooting tethered to a laptop lets you review images on a large screen instantly, catching focus issues and lighting problems before your subject leaves.
Best Practices for Studio Photography
- Test your lighting before your subject arrives. Fire a few test shots on a stand-in and refine your ratios, so you spend shoot time capturing great images — not troubleshooting.
- Use a grey card or colour checker to set a custom white balance. This makes colour grading in post dramatically faster and more consistent across a full shoot.
- Label your lighting setups. After a shoot, write down what worked — modifier type, distance from subject, power setting, and camera position. This becomes an invaluable personal reference library.
- Communicate clearly with your subjects. A relaxed, well-directed person always looks better on camera. Spend the first few minutes of every shoot building rapport before picking up the camera.
- Master one lighting setup completely before adding complexity. Loop lighting with a single softbox and a reflector can produce stunning results. You do not need five lights to make great studio photos.
Conclusion
Photography in the studio opens up a world of creative possibilities that outdoor shooting simply cannot match. Once you understand the relationship between light, subject, and camera, you will find that a studio is not a limiting place — it is a liberating one.
Start small. Get one light, one modifier, and one backdrop. Shoot often, review critically, and adjust. The technical knowledge will come naturally with practice, and so will your personal style.
Your studio does not need to be perfect from day one. It just needs to be a space where you can experiment, learn, and grow. That is where great photography always begins.
Frequently Asked Questions
1. What equipment do I need to start photography in the studio?
At a minimum, you need a light source (a single monolight or speedlight), a softbox or umbrella modifier, a backdrop, and a backdrop stand. A DSLR or mirrorless camera with a standard lens completes the basic kit. You do not need expensive gear to start producing professional-quality images.
2. What is the best camera setting for studio photography?
For studio flash photography, start with ISO 100, aperture f/8, and shutter speed at your camera’s sync speed (usually 1/160s–1/250s). Set white balance manually to match your flash (around 5500K). Shoot in RAW. Adjust aperture or flash power to control exposure rather than changing the shutter speed.
3. How much space do I need for a home photography studio?
For basic portrait work, a room of at least 10×12 feet provides enough space for a subject, a seamless backdrop, and a light positioned at the correct distance. Product photographers can work in much smaller spaces. The key is ensuring enough room between your subject and backdrop to avoid shadow spill.
4. Is continuous lighting or flash better for studio photography?
Flash (strobe) lighting is generally preferred for portraits because it is more powerful, produces less heat, and freezes subject motion. Continuous LED lighting is easier to learn because “what you see is what you get” — great for beginners, product photography, and video. Many photographers use both depending on the project.
5. How do I avoid harsh shadows in studio portraits?
The most effective ways to soften shadows are: use a large softbox or umbrella modifier instead of bare flash; move the light closer to the subject (larger light source = softer shadows); add a fill light or a white reflector on the shadow side; and ensure adequate distance between the subject and the background so shadows don’t land on it.
/ You May Also Read /
Portraits and Photography: Your Complete Guide to Capturing Stunning Images in 2026
Family Photography: Best Poses, Locations & Expert Tips for Stunning Shots
-

 Photography Tips5 hours ago
Photography in the Studio: Essential Tips and Setup Guide for Better Shots
-
Photography Tips5 hours ago
Portraits and Photography: Your Complete Guide to Capturing Stunning Images in 2026
-

 Photography Tips5 hours ago
Photography Locations Near Me: Best UK Spots to Visit in 2026
-
 Photography Tips5 hours ago
Photography Places Near Me: Top 10 Hidden Gems in the UK You Need to Shoot
-

 Lifestyle2 weeks ago
Family Photography: Best Poses, Locations & Expert Tips for Stunning Shots
-
 Photography Tips5 hours ago
Challenges of Photography: Common Obstacles Every Photographer Faces and How to Overcome Them
-

 Lifestyle5 hours ago
Aura Photography Near Me: Complete Guide to Finding the Best Aura Photography Experience
-

 Photography Tips5 hours ago
Drone Photography Near Me: How to Find the Best Aerial Photography Services in Your Area