
Photography Tips
Portraits and Photography: Your Complete Guide to Capturing Stunning Images in 2026
Whether you’re just picking up your first camera or you’ve been shooting for years, the world of portraits and photography never stops evolving. In 2026, the rules have shifted — lighting tools are smarter, editing software is more powerful, and the expectations of viewers are higher than ever. But the fundamentals? Those remain timeless.
This guide covers everything from essential gear and lighting setups to posing psychology and post-processing. By the end, you’ll have a clear, actionable framework for taking portraits that genuinely connect with people — not just technically correct shots, but images with real emotional weight.
What Are Portraits and Photography — and Why Do They Matter?
Portrait photography is the art of capturing a person’s personality, mood, and essence through a single image. Unlike landscape or product photography, portraits put a human being at the center — which means you’re juggling technical skill, interpersonal connection, and creative vision all at once.
At its core, portrait photography asks one question: how do I make this person feel seen? The answer involves much more than a good camera.
Types of Portrait Photography
Understanding the major portrait styles helps you choose the right approach for each client or creative project:
- Environmental portraits — subject photographed in their natural setting (workplace, home, outdoors)
- Studio portraits — controlled lighting, neutral or intentional backgrounds
- Candid portraits — unposed, spontaneous moments that reveal authentic emotion
- Fine art portraits — conceptual, often heavily stylized, driven by a creative narrative
- Headshots — professional-use portraits for actors, executives, and business profiles
Portrait Photography Styles at a Glance
| Style | Best For | Lighting Approach | Key Equipment |
| Studio Portrait | Commercial, headshots | Controlled flash or continuous | Softboxes, backdrop, reflector |
| Environmental | Editorial, personal branding | Natural + fill flash | Portable speedlight, diffuser |
| Candid | Documentary, street | Available light | Fast prime lens (35mm–50mm) |
| Fine Art | Gallery, creative projects | Dramatic, sculptural | Full manual control, color gels |
| Headshots | LinkedIn, acting portfolios | Even, flattering | 85mm lens, clamshell lighting |
Essential Camera Gear for Portrait Photographers in 2026
You don’t need the most expensive gear to shoot beautiful portraits. But choosing the right tools makes the job significantly easier — and the results noticeably better.
The Best Lenses for Portrait Work
Lens choice shapes everything from background compression to skin rendering. Here’s what working photographers actually use:
- 50mm (standard) — versatile, natural perspective, great for environmental portraits
- 85mm (portrait classic) — flattering compression, beautiful bokeh, ideal for headshots
- 135mm (telephoto) — stronger compression, useful for candid and editorial work
- 24–70mm zoom — flexibility for run-and-gun sessions
In 2026, mirrorless systems from Sony, Canon, and Nikon dominate the professional portrait world — primarily for their autofocus tracking and eye-detection systems, which take the guesswork out of sharp eyes on moving subjects.
Lens Comparison for Portrait Photography
| Focal Length | Perspective Distortion | Background Separation | Best Use Case |
| 35mm | Slight wide distortion | Low | Environmental, group shots |
| 50mm | Natural, true-to-life | Moderate | General portraits, lifestyle |
| 85mm | Flattering compression | High | Headshots, beauty, fashion |
| 135mm | Strong compression | Very high | Editorial, candid street work |
| 70–200mm zoom | Variable | High at 200mm | Events, weddings, versatility |
Portrait Photography Lighting: The Make-or-Break Factor
Ask any experienced photographer what separates a good portrait from a great one — lighting will come up every single time. Light defines shape, sculpts the face, and sets the emotional tone of an image.
The Classic Three-Point Lighting Setup
This foundational setup works in virtually every studio situation:
- Key light — your main, dominant light source, placed at roughly 45° to the subject
- Fill light — reduces harsh shadows on the opposite side, usually softer or at lower power
- Rim/Hair light — placed behind the subject to separate them from the background
Natural light is equally powerful when you know how to use it. A large north-facing window acts as a giant softbox, producing even, flattering light that beginners often underestimate. The golden hour — the first and last hour of sunlight — adds warmth and dimension that’s hard to replicate artificially.
Posing Psychology: Getting Natural Expressions From Your Subjects
Technical perfection means little if your subject looks stiff or uncomfortable. This is the part of portrait photography that separates photographers with great cameras from photographers with great portfolios.
How to Direct Subjects Naturally
- Start with conversation, not commands — let people relax before you shoot
- Give motivations, not poses (“think about something that made you laugh recently”)
- Use action-based direction: “walk toward me slowly” or “look away and glance back”
- Keep energy light and positive — your mood is contagious on set
- Shoot continuously during transitions — the best expressions happen between poses
The goal isn’t a perfect pose. It’s a genuine moment captured in a controlled environment. When subjects forget the camera exists, that’s when the real magic happens.
Post-Processing Portraits: Editing Without Overdoing It
Modern editing tools give portrait photographers extraordinary power — which also means extraordinary temptation to overprocess. The best-edited portraits look like they needed no editing at all.
A Simple Portrait Editing Workflow
- Set exposure, white balance, and basic tone in Lightroom or Capture One
- Adjust skin tone using HSL sliders — target orange and yellow channels
- Dodge and burn gently to enhance facial dimension
- Apply subtle frequency separation for skin retouching in Photoshop if needed
- Color grade with split-toning or LUTs — keep it cohesive with your overall style
- Export at the correct resolution for the intended use (print, web, social)
Resist the urge to smooth skin until it looks plastic. Clients appreciate natural retouching — they want to look like the best version of themselves, not like a different person.
Pros and Cons of Portrait Photography as a Career
Pros
- High demand across commercial, editorial, and personal sectors
- Deeply rewarding creative work
- Flexible working hours and locations
- Strong income potential with specialization
- Continuous skill development and creative growth
Cons
- Competitive market requires strong differentiation
- High initial gear investment
- Client management can be demanding
- Income can be irregular, especially early on
- Physical demands of long shooting days
Common Portrait Photography Mistakes to Avoid
- Shooting at too wide an aperture — f/1.2 can miss your subject’s eyes entirely; f/2–f/2.8 is usually the sweet spot
- Ignoring the background — distracting elements behind the subject kill an otherwise good shot
- Not building rapport — jumping straight into shooting before the subject is relaxed shows in every frame
- Over-relying on Photoshop — get it right in camera; heavy retouching creates more problems than it solves
- Inconsistent focal length choices — switching lenses mid-session disrupts your visual consistency
- Neglecting catchlights — eyes without catchlights look flat and lifeless; position your light source accordingly
Best Practices for Stunning Portrait Photography
- Always focus on the nearest eye — sharp eyes are non-negotiable in portraits
- Shoot in RAW format for maximum editing flexibility
- Use a tethered shooting setup for client-facing sessions
- Develop a consistent editing style that defines your brand
- Study classic portrait painters — Rembrandt, Vermeer — for lighting inspiration
- Review your work critically; cull ruthlessly and only show your strongest images
- Keep a simple contract and clear communication to set client expectations
Conclusion
Portrait photography is one of the most rewarding disciplines in the visual arts. It demands technical skill, emotional intelligence, and a genuine curiosity about people. Whether you’re shooting a family session in the park or a commercial campaign in a controlled studio, the fundamentals outlined in this guide will serve you at every level.
Start with what you have, learn the light, build real connections with your subjects, and develop an editing style that’s genuinely yours. The rest — the gear upgrades, the client list, the recognition — follows naturally when the work is honest and consistently excellent.
Frequently Asked Questions
1. What camera settings are best for portrait photography?
For most portrait situations, use a wide aperture between f/1.8 and f/2.8 for background blur, a shutter speed of at least 1/125s to avoid motion blur, and auto ISO capped at 3200. In bright conditions, ISO 100–400 will give you the cleanest results.
2. What is the best lens for portrait photography?
The 85mm prime lens is widely considered the gold standard for portrait photography. It offers natural facial compression, beautiful background separation, and flattering rendering. The 50mm is also excellent for environmental portraits where you want more context in the frame.
3. How do I make portrait subjects look natural and relaxed?
Spend the first 10–15 minutes of any session in conversation before picking up your camera. Give action-based direction rather than rigid poses. Play music, keep the mood light, and shoot continuously — the most genuine expressions happen between intentional poses.
4. What lighting setup should I use for indoor portraits?
For indoor portraits without a studio setup, position your subject near a large window with the light coming from the side. This creates natural, directional light. Use a white foam board or reflector on the opposite side to fill in shadows. This approach is free, effective, and looks professional.
5. How do I build a portrait photography portfolio from scratch?
Start by offering free or discounted sessions to friends, family, and local community members. Focus on one or two specific styles to develop a cohesive look. Post consistently on Instagram or your own website. Reach out to local businesses for headshot work — it’s a fast way to build both your portfolio and income simultaneously.
/ You May Also Read /
Photography in the Studio: Essential Tips and Setup Guide for Better Shots
Family Photography: Best Poses, Locations & Expert Tips for Stunning Shots

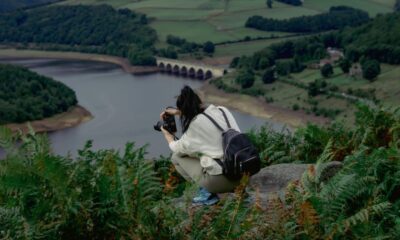
Searching for photography places near me is one of the easiest ways to level up your creative work without spending a fortune on travel. Whether you’re a beginner with a smartphone or a seasoned pro with a full camera bag, your city and surrounding areas are probably packed with hidden gems you haven’t discovered yet. This guide walks you through how to find them, what to look for, and how to make the most of every shoot.
Great photography doesn’t always require exotic destinations. Sometimes the best shots are sitting just a few miles from your front door. You just need to know where to look and how to plan your visit.
Why Local Photography Spots Matter
Shooting close to home has real advantages that traveling photographers often overlook.
First, you save time and money. There’s no need for flights, hotels, or long drives. Second, familiarity breeds better results. When you know a location well, you can predict lighting conditions, crowd patterns, and the best angles. Third, local spots let you shoot more often, which builds skill faster than occasional trips ever could.
Consistent practice, even in familiar surroundings, sharpens your eye for composition and light.
Benefits of Shooting Locally
- Lower cost per shoot
- More flexibility with timing and weather
- Easier to revisit for different seasons or lighting
- Builds a stronger connection to your community
- Reduces creative pressure since you can experiment freely
How to Find Photography Places Near Me
Finding great spots takes a mix of research and exploration. Here’s a step-by-step approach that works for almost any location.
Use Digital Tools First
Start with online resources before heading out the door.
- Google Maps and satellite view to scout parks, waterfronts, and scenic overlooks
- Instagram location tags to see what other photographers have captured nearby
- Local photography Facebook groups or forums for insider recommendations
- Apps that show sunrise, sunset, and golden hour timing for your area
Explore Different Location Types
Not every great shot comes from a postcard-perfect landscape. Mix up your location types to build a diverse portfolio.
| Location Type | Best For | Ideal Time of Day |
|---|---|---|
| Urban streets and alleys | Street photography, texture, architecture | Midday or blue hour |
| Parks and gardens | Portraits, nature, macro shots | Early morning or golden hour |
| Waterfronts and lakes | Reflections, landscapes, sunsets | Sunset or sunrise |
| Historic districts | Architecture, storytelling, texture | Late afternoon |
| Rooftops and viewpoints | Skyline shots, cityscapes | Blue hour or night |
Talk to Local Photographers
Community knowledge often beats any app. Local photography clubs, workshops, or meetups can point you toward spots that don’t show up in a typical search. These photographers already know the quiet corners, the best parking, and the times to avoid crowds.
Planning Your Shoot for Best Results
Once you’ve found a promising location, planning makes the difference between an average photo and a memorable one.
Check Lighting Conditions
Lighting shapes everything in photography. Golden hour, which happens shortly after sunrise and before sunset, gives soft, warm light that flatters almost any subject. Overcast days work well for portraits since clouds act as a natural diffuser.
Scout Before You Shoot
If possible, visit the location once before your actual shoot. This lets you map out compositions, identify obstacles, and note the best vantage points ahead of time.
Prepare Your Gear
Match your equipment to the location and subject.
| Shoot Type | Recommended Gear | Notes |
|---|---|---|
| Portrait sessions | 50mm or 85mm lens, reflector | Great for shallow depth of field |
| Landscape photography | Wide-angle lens, tripod | Stabilizes shots at slower shutter speeds |
| Street photography | Compact camera or smartphone | Easier to move quickly and stay discreet |
| Night photography | Tripod, remote shutter | Reduces camera shake for long exposures |
Pros and Cons of Shooting at Local Photography Spots
Every approach has trade-offs, and local shooting is no exception.
Pros:
- Saves significant time and travel expense
- Allows repeat visits to perfect a shot
- Builds familiarity with lighting and seasonal changes
- Encourages consistent practice
- Supports local businesses and communities when scouting
Cons:
- Locations can feel repetitive over time
- Popular spots may get crowded, especially on weekends
- Limited variety compared to traveling to new regions
- Permits may be required for certain public or private properties
Common Mistakes to Avoid
Many photographers, especially beginners, run into the same avoidable issues when scouting local spots.
- Ignoring lighting timing. Showing up at noon for a sunset-style shot rarely works.
- Skipping permission checks. Some parks, buildings, or private properties require permits or written consent.
- Overcrowding popular locations. Chasing the same viral spot as everyone else often leads to generic shots.
- Not scouting in advance. Arriving without a plan wastes valuable shooting time.
- Relying only on one season. The same location can look completely different in spring versus winter.
Best Practices for Local Photography Success
Following a few consistent habits will help you get more value out of every location you visit.
- Research weather and lighting conditions the night before
- Arrive early to secure the best spot and avoid crowds
- Bring backup batteries and memory cards
- Respect private property and posted signage
- Revisit favorite spots across different seasons
- Build a personal list of go-to locations for various styles
Building a Location Notebook
Keep a simple record of every location you visit. Note the best time of day, parking details, and any permissions needed. Over time, this becomes a valuable personal resource you can return to again and again.
Conclusion
You don’t need to travel far to capture stunning images. With a little research, some planning, and a willingness to explore, photography places near me are often closer than you think. Start with digital tools, connect with local photographers, and build your own list of favorite spots. The more you shoot locally, the more confident and skilled you’ll become, one frame at a time.
Frequently Asked Questions
1. How do I find good photography spots near me?
Use tools like Google Maps, Instagram location tags, and local photography groups to discover nearby locations. Scouting in person before your shoot also helps confirm lighting and access.
2. What is the best time of day for outdoor photography?
Golden hour, shortly after sunrise and before sunset, generally offers the most flattering natural light for most types of photography.
3. Do I need a permit to shoot at public parks?
Most casual photography in public parks doesn’t require a permit, but commercial shoots, tripods, or large groups may need permission. Always check local regulations first.
4. Can I take great photos with just a smartphone?
Yes. Modern smartphones have powerful cameras capable of producing high-quality images, especially in good lighting conditions and with thoughtful composition.
5. How often should I revisit the same photography location?
Revisiting a location across different seasons or times of day can reveal new compositions and lighting opportunities, making it worth returning multiple times a year.
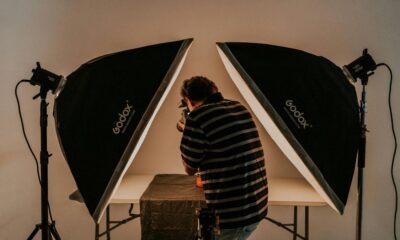
Finding a skilled commercial photographer can make or break how your brand looks to the world. Whether you’re launching a product, refreshing your website, or building an ad campaign, the images you use shape how people perceive your business in seconds.
A commercial photographer specializes in creating visual content for business purposes rather than personal keepsakes. Their work shows up in advertisements, catalogs, websites, packaging, and social media feeds. Unlike a wedding or portrait photographer, their entire focus is helping brands sell products, services, and ideas through compelling imagery.
This guide walks you through everything you need to know before hiring one, what to expect from the process, and how to avoid costly mistakes along the way.
What Does a Commercial Photographer Actually Do?
A commercial photographer creates images used for business and marketing purposes. Their job goes far beyond simply pointing a camera and clicking a shutter.
They plan shoots, manage lighting setups, direct models or products, and often handle post-production editing too. Many also collaborate closely with marketing teams to ensure the final images align with brand guidelines and campaign goals.
Common types of commercial photography include:
- Product photography for e-commerce and catalogs
- Corporate headshots and team photos
- Food and beverage photography
- Architectural and real estate photography
- Advertising and lifestyle campaigns
- Fashion and editorial shoots for brands
Each niche requires a different skill set, which is why many photographers specialize rather than trying to do everything.
Why Hiring a Commercial Photographer Matters for Your Business
Poor-quality images can quietly hurt your conversion rates, even if you don’t notice it right away. Customers judge credibility based on visuals before they even read your copy.
A professional photographer brings technical expertise that’s hard to replicate with a smartphone camera. They understand lighting, composition, color accuracy, and how to direct a shoot so the final images actually serve your marketing goals.
Businesses that invest in professional photography often see stronger engagement on social media, higher click-through rates on ads, and better retention on landing pages. Visuals aren’t just decoration, they’re a functional part of your sales funnel.
The Cost of Skipping Professional Photography
Cutting corners on imagery might save money upfront, but it usually costs more down the road. Blurry product shots, inconsistent lighting, and awkward compositions can make even a great product look unappealing.
Customers associate visual quality with product quality. If your images look amateur, people may assume your product or service is too.
How to Choose the Right Commercial Photographer
Not every photographer fits every project. Choosing the right one depends on your industry, budget, and creative vision.
Start by reviewing portfolios carefully. Look for consistency in style, lighting, and editing across multiple projects rather than just a handful of standout shots. This tells you whether their quality is repeatable.
Next, check their specialization. A photographer known for stunning landscape work may not be the best fit for tight studio product photography, and vice versa.
Here’s a quick breakdown to help you compare candidates:
| Factor to Evaluate | What to Look For | Red Flag |
|---|---|---|
| Portfolio Consistency | Similar quality across many projects | Only 2-3 great photos, rest inconsistent |
| Industry Experience | Prior work in your niche | No relevant samples at all |
| Turnaround Time | Clear delivery timeline upfront | Vague or unwilling to commit |
| Pricing Structure | Transparent rates and packages | Hidden fees or unclear licensing terms |
| Communication Style | Responsive and collaborative | Slow replies, unclear answers |
Questions to Ask Before Hiring
Before signing any contract, ask these key questions:
- How many images will I receive, and in what formats?
- Who owns the usage rights to the final photos?
- What is your typical turnaround time?
- Do you provide retouching and editing as part of the package?
- What happens if I need reshoots?
Getting clear answers upfront prevents misunderstandings later in the project.
Commercial Photography Pricing: What to Expect
Pricing varies widely depending on experience, location, and project scope. A local product photographer might charge a flat rate per image, while an established advertising photographer may charge day rates that run into the thousands.
Generally, pricing depends on a few key factors:
- Photographer’s experience and reputation
- Number of images and revisions required
- Studio rental and equipment costs
- Usage rights and licensing scope
- Post-production and retouching complexity
It’s worth noting that licensing often costs more than the shoot itself for larger campaigns, especially if the images will be used across multiple platforms or countries.
Pros and Cons of Hiring a Commercial Photographer
Like any business decision, working with a professional photographer comes with tradeoffs.
Pros:
- Higher quality, consistent, and polished images
- Professional lighting and composition expertise
- Saves you time compared to DIY photography
- Builds brand credibility and trust
- Access to professional editing and retouching
Cons:
- Can be a significant upfront investment
- Scheduling may require lead time
- Usage rights negotiations can get complex
- Revisions may incur additional costs
Weighing these factors against your budget and goals helps you decide whether hiring a professional makes sense for your current stage of business.
Common Mistakes Businesses Make When Hiring a Photographer
Many businesses rush into hiring decisions without doing enough homework, and it often shows in the final results.
One frequent mistake is choosing based on price alone. The cheapest option isn’t always the best value, especially if it leads to reshoots or unusable images.
Another common issue is unclear briefs. If you don’t communicate your brand style, goals, and must-have shots clearly, the photographer is left guessing, which rarely ends well.
Some businesses also forget to discuss usage rights upfront. Without a clear agreement, you might end up unable to use certain images across all the platforms you need.
Finally, skipping a test shoot or consultation call before a big project can lead to mismatched expectations on both sides.
Best Practices for Working With a Commercial Photographer
A successful shoot usually comes down to preparation and communication. Here are some best practices that consistently lead to better results.
Create a detailed shot list before the shoot day. This keeps everyone aligned and reduces wasted time during the session.
Share brand guidelines, mood boards, or reference images early in the process. Visual references communicate style far better than words alone.
Schedule a pre-shoot consultation to align on goals, timeline, and deliverables. This small step prevents most miscommunications before they happen.
| Best Practice | Why It Matters |
|---|---|
| Detailed shot list | Keeps shoot organized and efficient |
| Mood boards and references | Ensures visual consistency with brand |
| Clear usage rights agreement | Avoids legal or licensing issues later |
| Pre-shoot consultation | Aligns expectations before shoot day |
| Defined revision process | Prevents scope creep and extra costs |
Lastly, always review a sample of edited images before finalizing the entire batch. This gives you a chance to request adjustments before the whole project wraps up.
Conclusion
Hiring a commercial photographer is an investment in how your brand shows up in the world. Quality visuals build trust, boost engagement, and directly support your sales and marketing efforts.
Take the time to review portfolios, ask the right questions, and set clear expectations from the start. When you find the right photographer for your niche and budget, the results speak for themselves through stronger conversions and a more polished brand image.
Frequently Asked Questions
1. What is the difference between a commercial photographer and a regular photographer?
A commercial photographer creates images specifically for business and marketing use, such as advertising, product listings, or corporate branding, rather than personal or event photography.
2. How much does a commercial photographer typically charge?
Rates vary widely based on experience, location, and project scope, ranging from a few hundred dollars for simple product shoots to several thousand for large advertising campaigns.
3. Do commercial photographers handle photo editing too?
Most commercial photographers include basic editing and color correction in their packages, though advanced retouching may cost extra depending on the agreement.
4. What should I include in a photography brief?
Include your brand guidelines, shot list, reference images, deadline, and intended use for the photos to help the photographer understand your vision clearly.
5. Who owns the rights to commercial photography images?
Typically the photographer retains copyright unless otherwise agreed, while the client receives usage rights defined in the contract, so it’s important to clarify this before the shoot.
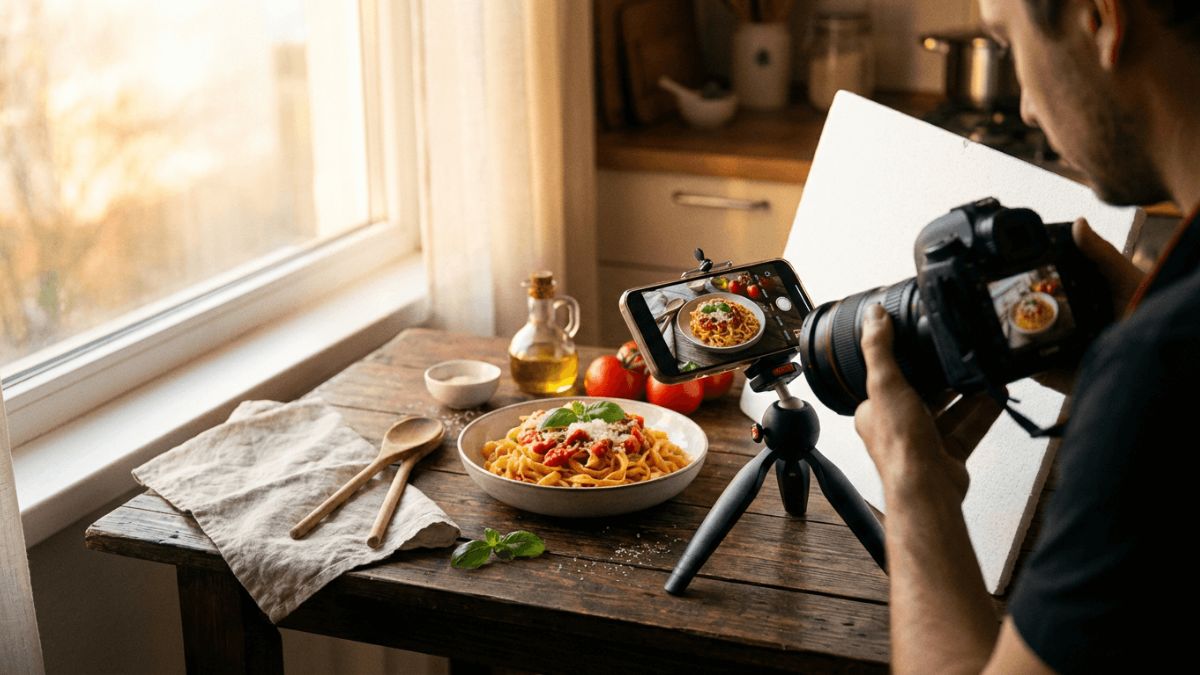
Ever scrolled past a mouthwatering dinner photo and immediately felt hungry, even though you’d just eaten? That’s the power of a good food shot. A great dinner photo doesn’t just document a meal — it tells a story, sets a mood, and makes people want to pull up a chair. Whether you’re sharing a home-cooked meal on social media, running a food blog, or documenting a restaurant experience, learning how to capture your dinner in the best light (literally) can make all the difference.
The good news? You don’t need a professional camera or years of training. With a few simple techniques, anyone can turn an everyday plate into something worth sharing.
Why a Good Dinner Photo Matters
A dinner photo does more than fill space on your feed. It communicates freshness, care, and appetite appeal — three things that influence whether someone stops scrolling or keeps moving. For food bloggers and small restaurants, a strong image can directly impact engagement and even sales.
People eat with their eyes first. That old saying holds true whether you’re serving a five-course meal or a simple weeknight stir-fry.
What Makes a Dinner Photo “Good”
A well-executed dinner photo typically includes:
- Natural, soft lighting that avoids harsh shadows
- A clean, uncluttered background
- Thoughtful composition that draws the eye to the food
- True-to-life color that doesn’t look overly filtered
- A sense of context, like steam, texture, or a hint of the table setting
If your photo checks most of these boxes, you’re already ahead of the curve.
Essential Equipment for Capturing the Perfect Dinner Photo
You don’t need a full studio setup. In fact, most great dinner photos today are taken on smartphones. What matters more is how you use the tools you already have.
Camera or Smartphone
Modern smartphones handle food photography surprisingly well, especially in good lighting. If you’re using a DSLR or mirrorless camera, a simple 50mm lens works beautifully for close-up shots with a soft, blurred background.
Lighting Tools
Natural window light is your best friend. If you’re shooting at night or in a dim restaurant, a small portable LED light or even a reflector (a white piece of paper works fine) can help fill in shadows.
Props and Styling Items
A few napkins, a wooden board, or a simple plate can elevate your shot without overwhelming it. Less is usually more here.
How to Set Up the Perfect Dinner Photo
Getting the setup right before you even lift your camera saves time and produces better results.
Choose the Right Angle
Different dishes call for different angles:
- Overhead (flat lay): Best for dishes with multiple elements, like a full dinner spread or a bowl-based meal
- 45-degree angle: Ideal for most plated dinners, since it mimics how we naturally view food
- Eye-level (straight on): Great for layered dishes like burgers, sandwiches, or stacked desserts
Position Your Light Source
Always shoot with light coming from the side or front, never directly behind you or straight overhead. Side lighting creates gentle shadows that add depth and texture to the food.
Keep the Background Simple
A busy background pulls attention away from the meal. Stick to neutral tones like white, wood, or dark slate to let the dish stand out.
Step-by-Step Guide to Taking a Dinner Photo
- Clean the plate edges before shooting — smudges are distracting
- Position the dish near a window with indirect natural light
- Choose your angle based on the dish type
- Add a small prop, like a napkin or utensil, for context
- Focus manually on the most textured part of the food
- Take multiple shots at slightly different angles
- Adjust brightness and contrast lightly during editing, keeping colors natural
This simple workflow works whether you’re photographing a quiet weeknight dinner or a special occasion spread.
Comparison: Common Dinner Photo Styles and When to Use Them
| Style | Best For | Lighting Needed | Difficulty Level |
|---|---|---|---|
| Overhead Flat Lay | Multi-dish spreads, bowls, brunch tables | Bright, even light | Easy |
| 45-Degree Angle | Standard plated dinners | Soft side light | Moderate |
| Close-Up Macro | Highlighting texture, steam, garnish | Strong directional light | Moderate to Hard |
| Lifestyle/Context Shot | Restaurant scenes, table settings | Ambient or mixed light | Easy |
Pros and Cons of DIY Dinner Photography
Pros:
- No expensive equipment required
- Quick to learn with practice
- Adds visual appeal to blogs, menus, and social posts
- Builds a personal or brand aesthetic over time
Cons:
- Inconsistent lighting can be tricky indoors
- Food cools and changes appearance quickly
- Requires patience to get the right shot before eating
- Editing skills take time to develop
Common Mistakes to Avoid When Taking a Dinner Photo
Even enthusiastic home cooks fall into a few predictable traps.
Using Harsh Overhead Lighting
Ceiling lights often cast unflattering shadows directly onto the plate. Turn them off and rely on window light whenever possible.
Overcrowding the Frame
Cramming too many props, utensils, or dishes into one shot creates visual noise. Focus on one hero dish at a time.
Ignoring the Background
A cluttered countertop or messy tablecloth can ruin an otherwise great photo. Always scan the frame before shooting.
Over-Editing
Heavy filters can make food look artificial or even unappetizing. Aim for natural color correction rather than dramatic effects.
Shooting Too Late
Food loses its fresh appearance fast. Sauces dry out, steam disappears, and garnishes wilt. Shoot as soon as the dish is plated.
Best Practices for Consistently Great Dinner Photos
| Best Practice | Why It Works |
|---|---|
| Shoot near natural light sources | Produces soft, flattering tones without harsh shadows |
| Style with minimal props | Keeps focus on the food itself |
| Use a consistent color palette | Builds a recognizable visual style over time |
| Edit lightly and consistently | Maintains authenticity across multiple photos |
| Capture steam or texture close-up | Adds sensory appeal that static shots lack |
Practical Example: Turning a Simple Weeknight Meal Into a Great Shot
Say you’re making roasted chicken with vegetables on a Tuesday night. Instead of snapping a quick photo under the kitchen light, try this:
- Move the plate near a window before serving
- Wipe any sauce splatters from the plate’s edge
- Add a folded cloth napkin beside the plate
- Shoot from a 45-degree angle to show both the chicken and its texture
- Take three or four shots, adjusting your position slightly each time
This small shift in approach can turn an ordinary meal photo into something that looks intentional and polished.
Editing Tips for a Natural, Appetizing Look
Editing should enhance, not transform, your dinner photo. Focus on:
- Slightly increasing brightness if the shot looks dim
- Boosting contrast just enough to add depth
- Keeping white balance accurate so food doesn’t look too warm or too cool
- Avoiding oversaturation, which can make food look unnatural
A light touch goes a long way toward keeping your dinner photo believable and appealing.
Conclusion
A great dinner photo comes down to a few consistent habits: good lighting, thoughtful composition, and a clean, simple setup. You don’t need professional gear or years of experience — just a willingness to slow down for a minute before digging in. With the tips covered here, you’ll be able to capture meals that look as good as they taste, whether you’re sharing a quick weeknight dinner or a special celebration spread.
Frequently Asked Questions
1. What is the best time of day to take a dinner photo?
Late afternoon or early evening near natural window light usually produces the softest, most flattering results.
2. Do I need a professional camera for dinner photos?
No. Most modern smartphones capture excellent food photos, especially with good lighting and careful composition.
3. What angle works best for most dinner dishes?
A 45-degree angle is the most versatile choice for plated meals, as it closely resembles how we naturally view food.
4. How can I avoid harsh shadows in my dinner photo?
Turn off overhead lighting and position your dish near a window or soft side light source instead.
5. Why does my dinner photo look flat or dull?
This is often due to poor lighting or an overly busy background. Simplify the scene and shoot with natural light for better depth.
/ You May Also Read /
Challenges of Photography: Common Obstacles Every Photographer Faces and How to Overcome Them
Family Photography: Best Poses, Locations & Expert Tips for Stunning Shots
-
 Photography Tips1 month ago
Photography in the Studio: Essential Tips and Setup Guide for Better Shots
-

 Photography Tips1 week ago
Photography Locations Near Me: Best UK Spots to Visit in 2026
-

 Lifestyle2 months ago
Family Photography: Best Poses, Locations & Expert Tips for Stunning Shots
-
 Photography Tips1 week ago
Photography Places Near Me: Top 10 Hidden Gems in the UK You Need to Shoot
-
 Photography Tips1 month ago
Challenges of Photography: Common Obstacles Every Photographer Faces and How to Overcome Them
-
 Photography Tips1 month ago
Drone Photography Near Me: How to Find the Best Aerial Photography Services in Your Area
-

 Photography Tips1 month ago
Beginner Photography Camera Guide: How to Choose the Perfect First Camera
-

 Lifestyle1 month ago
Aura Photography Near Me: Complete Guide to Finding the Best Aura Photography Experience