Lifestyle
Family Photography: Best Poses, Locations & Expert Tips for Stunning Shots
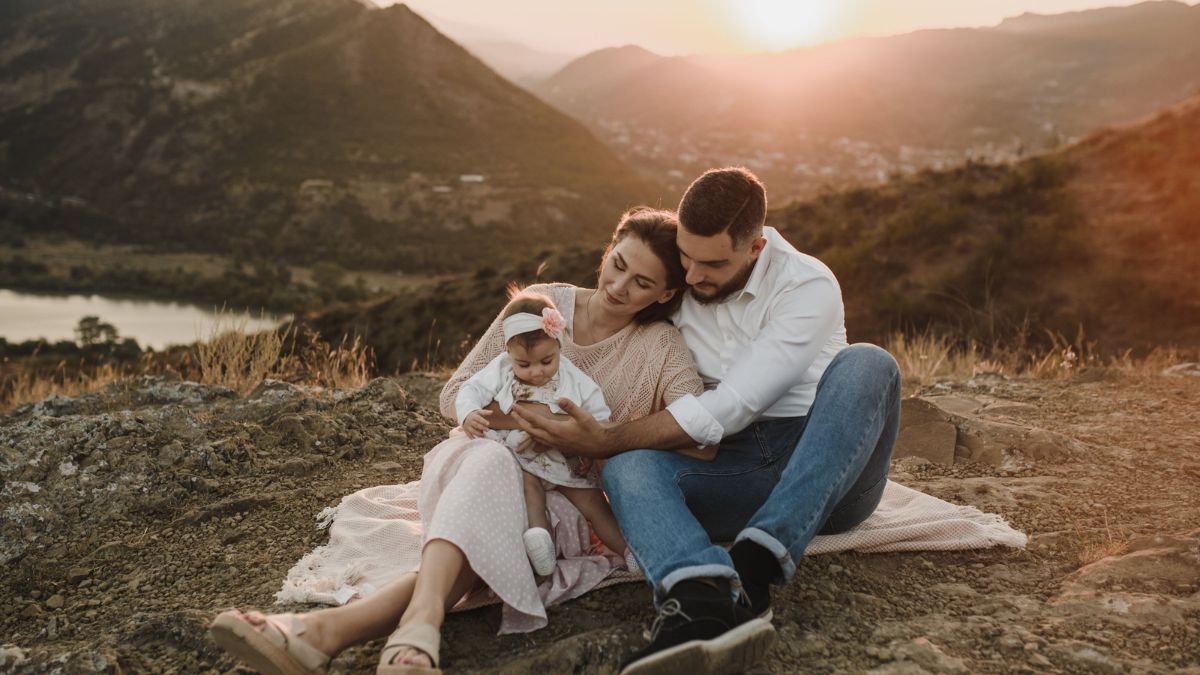
There’s something genuinely irreplaceable about a well-timed family photo. Whether it’s a baby’s first giggle, a grandparent’s warm embrace, or siblings tumbling through autumn leaves — family photography has the power to freeze a fleeting moment and turn it into a lifelong keepsake. But getting that perfect shot? That’s where a little planning, the right location, and some thoughtful posing go a very long way.
This guide walks you through everything you need: from choosing the best locations and picking poses that feel natural, to planning your session like a pro. No matter if you’re the photographer or the family in front of the lens, these tips will help you create images you’ll actually want on your walls.
Why Planning Ahead Makes All the Difference in Family Photography
Spontaneous shots are wonderful — but the best sessions are thoughtfully prepared. When you show up to a shoot without a plan, you spend the first 20 minutes wrangling kids and figuring out where to stand. With a little groundwork, you walk in with confidence and walk out with incredible photos.
Here are a few things worth nailing down before your session:
- Session timing: The golden hour (roughly one hour after sunrise or before sunset) delivers the softest, most flattering natural light.
- Outfit coordination: Pick a cohesive palette — complementary tones rather than identical outfits — so the family looks unified without looking like a matching set.
- Shot list: Jot down must-have combinations — the full group, individual portraits, parent-child pairings, and candid moments.
- Location scouting: Visit your location ahead of time to find the best angles and backdrops.
| Planning Element | Recommended Action | Why It Matters |
| Lighting | Schedule during golden hour | Soft, warm light flatters every skin tone |
| Outfits | Choose 2–3 complementary colors | Cohesion without looking staged |
| Shot list | Plan 8–12 specific shots | Ensures no important combo is missed |
| Location | Scout 1–2 days before | Find the best spots, avoid surprises |
| Session length | 60–90 minutes for most families | Enough time without tiring young children |
The Best Locations for Family Photography Sessions
The location sets the entire mood of a session. A beach at sunset produces something entirely different from a moody forest trail — and both are spectacular. What matters most is choosing a spot that fits your family’s personality and the vibe you want from the images.
Outdoor Natural Settings
Natural environments remain the most popular choice for a reason. They provide gorgeous, varied backdrops with built-in texture and depth — and they’re completely free.
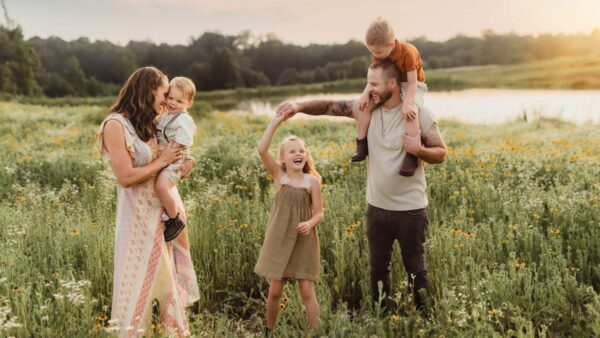
- Parks and meadows: Open fields with tall grass or wildflowers create an airy, romantic feel. Ideal for late afternoon sessions.
- Forests and woodlands: Dappled light filtering through trees adds a magical, editorial quality. Perfect for autumn and spring shoots.
- Beaches and lakesides: The combination of water, sky, and golden light at sunrise or sunset is nearly impossible to get wrong.
- Mountains and hillsides: Dramatic backdrops that work especially well for adventurous, active families.
Urban and Architectural Locations
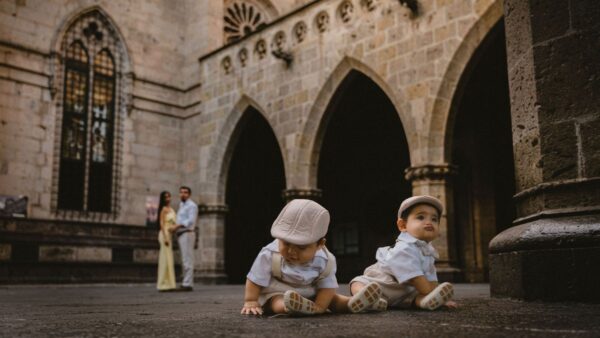
City shoots often get overlooked, but they can produce some of the most striking family portraits. Think brick walls, cobblestone streets, colorful murals, and café-lined alleys.
- Historic districts: Beautiful architecture with minimal distracting backgrounds.
- Rooftops: Skyline views and open skies give an elevated, editorial look.
- Industrial areas: Raw textures like exposed metal, old warehouses, and painted concrete make for edgy, modern portraits.
Home Sessions
In-home sessions are becoming increasingly popular — and it’s easy to see why. Your home is full of personal details, familiar textures, and real emotion. The morning light streaming through bedroom curtains, kids piled on the couch, breakfast at the kitchen table — these shots feel deeply authentic because they’re genuinely lived-in moments.
💡 Pro tip: For in-home sessions, clear out clutter before the photographer arrives, but leave out meaningful items — a favorite book, handmade blanket, or beloved toy — to add personality to the space.
Family Portrait Poses That Actually Look Natural
One of the biggest challenges in family portrait sessions is avoiding the stiff, awkward lineup that makes everyone look uncomfortable. The goal is to create poses that feel effortless — even if they’re carefully choreographed.
Foundational Posing Principles
Good poses in family photography aren’t about contorting people into magazine stances. They’re about encouraging genuine interaction and emotion. Here are the core principles:
- Connection over perfection: Encourage family members to touch — hold hands, lean in, hug. Physical connection creates emotional warmth in an image.
- Avoid standing parallel: Stagger heights and positions slightly so no one is directly behind another person.
- Diagonal lines: Position family members in a slight diagonal rather than a flat row — it creates depth and a more dynamic composition.
- Engage the kids first: Children are the wildcard in every session. Once they’re having fun, adults relax naturally.
Best Poses by Group Size
| Group Size | Recommended Pose | Variation to Try |
| Couple (2 people) | Walking side by side, hands linked | Forehead to forehead, looking down at baby |
| Family of 3 | Parents flanking child, all looking up | One parent kneeling to child’s level, other standing |
| Family of 4 | Seated together on steps or a log | Walking shot from behind, hands linked in a row |
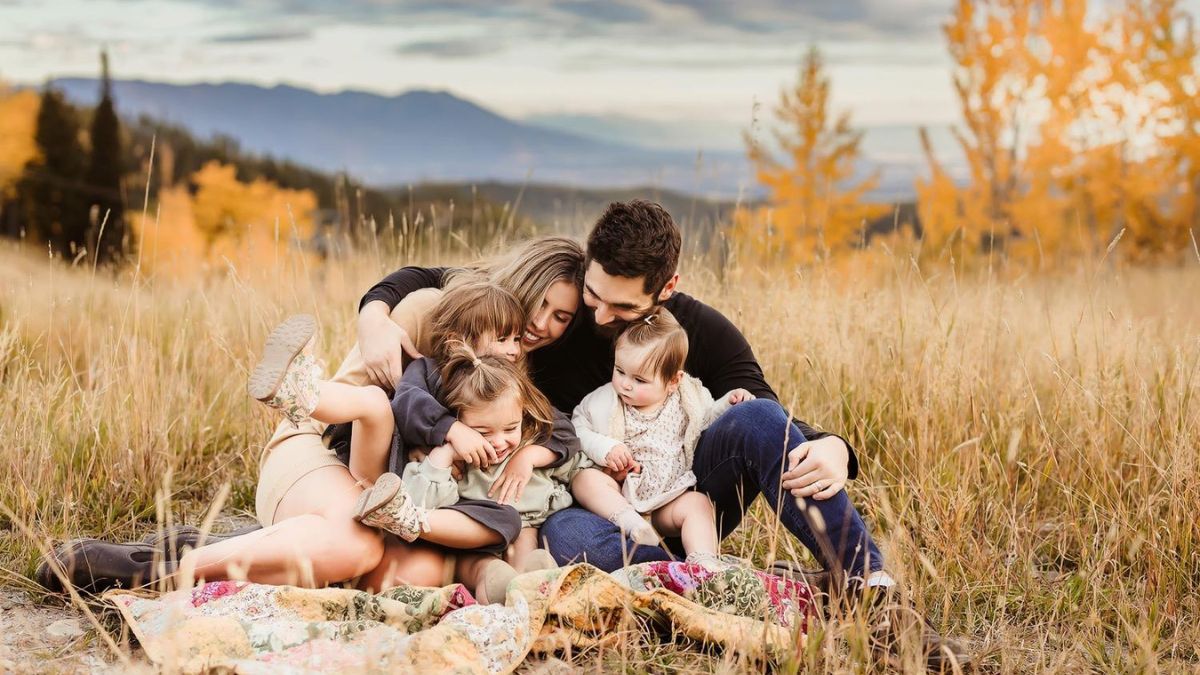
| Extended family (6+) | Layered group on a staircase or hillside | Overhead flat-lay with everyone looking up at camera |
| Multi-generational | Grandparents seated, others standing/kneeling around | Candid moment — grandchild on grandparent’s lap |
Candid and Movement Poses
Some of the most beloved family photos aren’t posed at all — they’re captured mid-action. Ask families to walk toward the camera while talking, tickle each other, share a snack, or simply explore the location together. Movement frees people from self-consciousness and gives the photographer natural, joyful moments to work with.
Pros and Cons of Professional vs. DIY Family Photography
✓ Pros — Professional Session
- Consistent, high-quality results
- Expert posing and directing
- Professional editing and retouching
- Equipment suited for any lighting
- Stress-free for the whole family
✗ Cons — Professional Session
- Higher cost (typically $150–$800+)
- Requires scheduling and coordination
- Less control over spontaneous moments
- May feel formal for some families
✓ Pros — DIY Session
- Cost-effective or completely free
- More relaxed, natural atmosphere
- Shoot whenever, wherever you want
- Captures truly candid everyday moments
✗ Cons — DIY Session
- Harder to achieve sharp, properly exposed shots
- Someone is always missing from the frame
- Limited posing knowledge and directing skills
- Basic equipment may limit quality
Common Mistakes to Avoid in Family Photography
Even with the best intentions, these errors can undermine an otherwise great shoot:
- Shooting in harsh midday sun: Direct overhead light creates unflattering shadows. Always opt for shade or golden-hour light.
- Matching outfits too rigidly: When everyone wears the exact same thing, images look dated quickly. Coordinate, don’t clone.
- Neglecting the background: A beautiful family in front of a cluttered parking lot is still a bad photo. Always check what’s behind your subjects.
- Over-posing everyone: Stiffness kills authenticity. Build in play time, movement, and interaction between poses.
- Ignoring the littlest family members: Babies and toddlers set the pace of a shoot. Schedule sessions around nap times, bring snacks, and keep things short.
- Skipping the edit: Even a basic color correction and slight crop can elevate an average image significantly.
Best Practices for a Successful Family Photo Session
Follow these tried-and-true practices and you’ll consistently walk away with images everyone loves:
- Brief the family: Let everyone know what to expect, what to wear, and roughly how long the session will take. Fewer surprises mean less stress.
- Start with the hardest shots: Young children have limited patience. Capture the full-group formal shots early while energy is high.
- Use a remote shutter or tripod: For DIY photographers, a tripod with a remote or timer function lets everyone join the frame.
- Shoot in RAW format: RAW files give you far more flexibility in post-processing than JPEGs.
- Vary your angles: Don’t just shoot at eye level. Get low, get high, shoot wide, and zoom in. Variety gives you stronger final options.
- Capture the details: Little hands, tiny shoes, a grandparent’s fingers around a grandchild’s — detail shots add enormous emotional depth to a gallery.
- Deliver a story, not just portraits: The best galleries have a narrative arc — arrival, laughter, quiet moments, and a final beautiful image.
Conclusion
A truly great family photo isn’t about having the most expensive camera or finding the most photogenic spot. It’s about capturing genuine connection — the kind that makes you stop mid-scroll and feel something. With thoughtful planning, a location that fits your family’s personality, and poses that invite real interaction rather than stiff performance, you’ll create images that only get more meaningful with time.
Whether you’re booking a professional or picking up your own camera, take these tips with you — and don’t forget to actually be present. Sometimes the best shot happens when nobody is quite ready for it.
Frequently Asked Questions
1. What is the best time of day for family photography?
The golden hour — approximately one hour after sunrise or one hour before sunset — is widely considered the best time for family photography. The light during this window is soft, warm, and flattering for all skin tones, and it creates a natural golden glow that’s difficult to replicate at any other time of day.
2. How long should a family photography session last?
Most family photography sessions run between 60 and 90 minutes. Sessions shorter than an hour can feel rushed, especially when young children need time to warm up. Anything longer than two hours tends to exhaust children and reduce the quality of later shots.
3. What should families wear for a photo session?
Families should wear coordinated outfits rather than perfectly matching ones. Choose two to three complementary colors from a cohesive palette — soft earth tones, muted blues, or neutral creams work beautifully. Avoid large logos, very busy patterns, or bright neon colors that can distract from faces.
4. What are the best outdoor locations for family portrait photography?
The best outdoor family photography locations include open meadows, forested trails, beaches or lakesides, urban parks, and historic districts. The ideal location depends on the family’s personality and the mood they want — natural settings work beautifully for warm, organic images, while urban environments can produce striking, modern portraits.
5. How do I get young children to cooperate during a family photo session?
The most effective approach is to make the session feel like play rather than work. Schedule shoots around nap times, bring familiar snacks and a favorite toy, and build in time for kids to explore the location freely. Photographers who engage children directly — playing games, asking silly questions, or simply ignoring them at first — consistently get the best natural expressions.
/ You May Also Read /
Photography in the Studio: Essential Tips and Setup Guide for Better Shots
Photography Locations Near Me: Best UK Spots to Visit in 2026

Autumn is one of the most beautiful seasons for family portraits. The colorful foliage, cozy clothing, and golden sunlight create a picture-perfect backdrop for unforgettable memories. If you’re searching for fall family photography ideas, you’re in the right place. Whether you’re planning a professional photoshoot or taking pictures with your own camera, the right setting and poses can transform ordinary photos into treasured keepsakes.
This guide covers creative concepts, location ideas, outfit inspiration, and practical tips to help your family capture beautiful seasonal moments.
Why Fall Is Perfect for Family Photography
Fall offers unique visual elements that naturally enhance photographs.
Some of the biggest advantages include:
- Vibrant autumn colors
- Soft natural lighting
- Comfortable outdoor temperatures
- Seasonal props and decorations
- Cozy wardrobe options
Unlike summer’s harsh sunlight or winter’s unpredictable weather, autumn provides balanced conditions that photographers love.
Quick Benefits of Autumn Photo Sessions
| Fall Photography Advantage | Why It Matters |
|---|---|
| Golden foliage | Creates vibrant backgrounds |
| Mild temperatures | Keeps families comfortable |
| Golden hour lighting | Produces soft, flattering portraits |
| Seasonal decorations | Adds visual interest |
| Layered clothing | Creates stylish coordinated looks |
Fall Family Photography Ideas for Every Family
Choosing the right concept helps create photos that feel natural and meaningful.
1. Walk Through a Leaf-Covered Trail
A simple walk through a colorful path often produces the most authentic photos. Encourage family members to interact naturally rather than posing rigidly.
2. Pumpkin Patch Adventure
Pumpkin patches offer built-in seasonal charm. Use pumpkins as props and capture candid moments while exploring.
3. Family Picnic in the Park
Bring:
- Plaid blankets
- Apples
- Hot chocolate mugs
- Small pumpkins
These details create a warm seasonal atmosphere.
4. Leaf Tossing Fun
Children especially enjoy throwing leaves into the air. This activity generates energetic, joyful images.
5. Sitting on a Rustic Wooden Fence
Country-style locations provide timeless fall aesthetics and work beautifully for large family portraits.
6. Apple Orchard Session
Apple orchards combine nature, texture, and seasonal character in a single location.
7. Cozy Blanket Snuggles
Capture family members wrapped in oversized blankets during golden hour.
8. Matching Sweater Portraits
Coordinated sweaters create visual consistency without looking overly formal.
Best Locations for Fall Family Photos
Location selection significantly impacts the final results.
Public Parks
Many local parks feature stunning autumn colors and open spaces.
Forest Trails
Tree-lined paths naturally frame family portraits.
Lakeside Areas
Reflections on calm water add depth and visual interest.
Countryside Farms
Rustic settings complement the cozy feeling of autumn.
Backyard Sessions
Sometimes the best location is your own home, where everyone feels relaxed.
Top Fall Photo Locations Comparison
| Location Type | Best For | Difficulty Level |
|---|---|---|
| Park | Casual family portraits | Easy |
| Forest | Nature-focused photos | Moderate |
| Orchard | Seasonal storytelling | Easy |
| Farm | Rustic aesthetics | Moderate |
| Backyard | Comfortable family sessions | Very Easy |
Outfit Ideas That Look Great in Fall Photos
Clothing plays a major role in creating cohesive images.
Recommended Fall Color Palette
Choose colors that complement autumn scenery:
- Burgundy
- Rust orange
- Cream
- Mustard yellow
- Olive green
- Navy blue
- Brown
Avoid These Outfit Mistakes
Try not to wear:
- Neon colors
- Large logos
- Busy patterns
- Completely matching outfits
Instead, coordinate colors while allowing each person’s style to show.
Layering Creates Visual Interest
Popular layering options include:
- Cardigans
- Denim jackets
- Scarves
- Vests
- Flannel shirts
These pieces add texture and depth to photos.
Creative Family Poses for Natural Photos
Many families worry about posing. Fortunately, the best portraits often happen during movement and interaction.
Walking Together
Walk slowly while talking and laughing naturally.
Group Hug
Gather everyone close for a warm, emotional image.
Looking at Each Other
Instead of staring directly at the camera, family members can look at one another.
Sitting on a Blanket
Arrange everyone comfortably on a seasonal blanket for a relaxed composition.
Parent and Child Moments
Capture individual interactions such as:
- Holding hands
- Reading together
- Piggyback rides
- Gentle hugs
These images often become family favorites.
Seasonal Props That Enhance Fall Photography
Props can add personality without overwhelming the image.
Great Fall Photo Props
| Prop | Best Use |
|---|---|
| Pumpkins | Seasonal portraits |
| Blankets | Cozy family scenes |
| Baskets | Orchard sessions |
| Hot cocoa mugs | Lifestyle photos |
| Hay bales | Farm settings |
| Fall wreaths | Decorative backgrounds |
Keep Props Simple
The family should remain the main focus. Use props as supporting elements rather than centerpieces.
Best Time of Day for Fall Family Photos
Lighting can make or break a photoshoot.
Golden Hour
Golden hour occurs shortly after sunrise and before sunset.
Benefits include:
- Soft shadows
- Warm skin tones
- Beautiful background glow
- Reduced squinting
Overcast Days
Cloudy weather can also produce excellent portraits because clouds diffuse sunlight evenly.
Common Mistakes to Avoid
Even beautiful locations cannot compensate for avoidable errors.
Arriving Late
Fall sunsets happen earlier than many people expect.
Overmatching Outfits
Coordinating is good. Identical outfits often appear outdated.
Ignoring Background Clutter
Check for:
- Trash cans
- Cars
- Utility poles
- Distracting signs
Forcing Poses
Natural interaction usually produces stronger images than stiff posing.
Skipping Preparation
Bring:
- Water
- Snacks
- Extra clothing
- Wet wipes
- Hairbrush
Preparation helps sessions run smoothly, especially with young children.
Pros and Cons of Fall Family Photography
Pros
- Beautiful natural colors
- Comfortable weather
- Endless location options
- Cozy seasonal atmosphere
- Great wardrobe flexibility
Cons
- Unpredictable weather changes
- Earlier sunsets
- Popular locations can be crowded
- Leaves may peak for a short period
Best Practices for Stunning Fall Photos
Following a few proven strategies can dramatically improve results.
Plan Around Peak Foliage
Research when local leaves reach their peak color.
Focus on Interaction
Encourage activities instead of constant posing.
Examples include:
- Walking together
- Playing games
- Telling jokes
- Sharing stories
Use Natural Light
Avoid harsh midday sunlight whenever possible.
Prioritize Comfort
Happy family members create better photographs.
Capture Candid Moments
Some of the most memorable images happen between poses.
Fall Family Photography Ideas for Large Families
Large family sessions require extra planning.
Create Smaller Groupings
Photograph:
- Grandparents with grandchildren
- Parents with children
- Siblings together
- Entire family group
Use Elevated Locations
Gentle hills and staircases help arrange larger groups effectively.
Coordinate Colors
Choose a complementary color palette rather than identical clothing.
Fall Family Photography Ideas with Young Children
Children bring energy and spontaneity to photos.
Let Kids Explore
Instead of asking children to sit still, allow movement and play.
Incorporate Seasonal Activities
Popular options include:
- Collecting leaves
- Picking apples
- Carrying mini pumpkins
- Running through fields
Keep Sessions Short
Young children typically cooperate best during shorter shoots.
Creating a Story Through Your Photos
The strongest family galleries often tell a story.
Consider capturing:
- Arriving at the location
- Walking together
- Playing activities
- Individual portraits
- Group portraits
- Candid interactions
This approach creates a complete visual narrative rather than a collection of unrelated images.
Conclusion
The best fall family photography ideas combine beautiful locations, comfortable clothing, natural interactions, and seasonal charm. Whether you choose a pumpkin patch, apple orchard, forest trail, or your own backyard, the goal is to capture authentic moments that reflect your family’s personality.
Focus on connection rather than perfection. With thoughtful planning, good lighting, and a relaxed atmosphere, your autumn photos can become cherished memories for years to come.
Frequently Asked Questions
1. What should families wear for fall photos?
Earth tones such as burgundy, mustard, cream, olive green, and navy work exceptionally well with autumn backgrounds.
2. What is the best month for fall family photography?
October is often ideal because foliage colors are usually at their peak in many regions.
3. What time of day is best for family portraits?
Golden hour, shortly after sunrise or before sunset, provides the most flattering natural light.
4. Are pumpkin patches good for family photos?
Yes. Pumpkin patches offer seasonal charm, colorful props, and a naturally festive atmosphere.
5. How can I make family photos look more natural?
Encourage conversation, movement, and interaction instead of relying on stiff poses.
/ You May Also Read /
Aura Photography Near Me: Complete Guide to Finding the Best Aura Photography Experience
Family Photography: Best Poses, Locations & Expert Tips for Stunning Shots
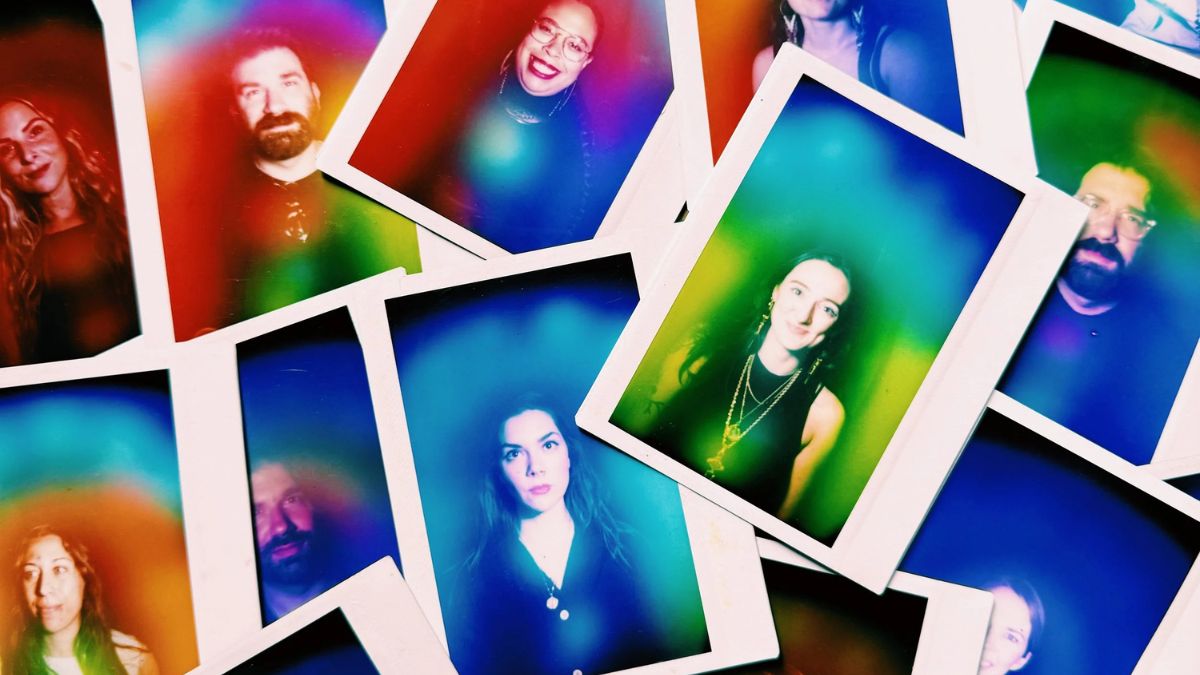
Aura photography near me is one of the most searched terms among people interested in spiritual wellness, self-discovery, and unique photography experiences. Whether you’re curious about energy fields, looking for a memorable activity, or exploring holistic practices, aura photography offers an intriguing way to visualize your personal energy through colorful portraits.
In recent years, aura photography has gained popularity at wellness centers, spiritual events, holistic expos, and specialty photography studios. Many people seek aura photography sessions to gain insights into their emotional state, personal growth, and overall energy balance.
This guide explains what aura photography is, how it works, where to find services nearby, what to expect during a session, and how to choose the right studio for your needs.
What Is Aura Photography?
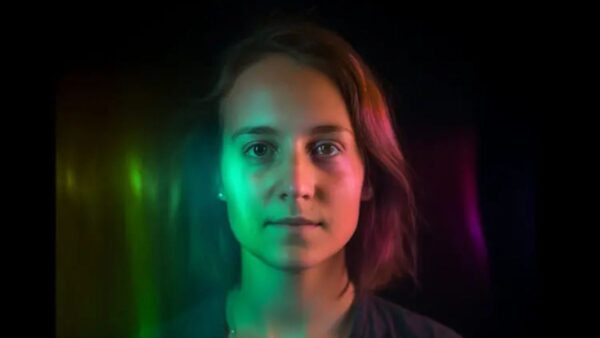
Aura photography is a specialized form of portrait photography that combines biometric sensors with imaging technology to create a visual representation of a person’s energy field.
The resulting image typically shows colorful light patterns surrounding the subject. Practitioners interpret these colors as representations of emotions, personality traits, or energetic conditions.
How Aura Photography Works
Although methods vary between studios, the process generally involves:
- Placing hands on biometric sensors
- Measuring factors such as skin conductivity
- Processing sensor data through specialized software
- Generating a colorful aura image around the portrait
- Providing a color interpretation report
Why People Get Aura Photos
People seek aura photography for various reasons:
- Personal reflection
- Spiritual exploration
- Wellness tracking
- Entertainment and curiosity
- Unique gifts and experiences
- Social media content
- Special events and celebrations
How to Find Aura Photography Near You
Finding quality aura photography services requires more than simply searching online.
Search Local Wellness Centers
Many wellness businesses offer aura photography services, including:
- Holistic wellness centers
- Spiritual shops
- Meditation studios
- Metaphysical stores
- Alternative healing clinics
Check Local Events
Aura photography often appears at:
- Wellness expos
- Mind-body-spirit festivals
- Holistic fairs
- Community wellness events
- Spiritual retreats
Use Online Reviews
Reviews can help identify reputable practitioners. Look for feedback regarding:
- Professionalism
- Session quality
- Interpretation accuracy
- Studio environment
- Overall customer satisfaction
Quick Location Search Checklist
| What to Check Before Booking | Why It Matters |
|---|---|
| Customer reviews | Reveals client experiences |
| Studio experience | Indicates expertise |
| Aura interpretation included | Adds educational value |
| Session length | Determines overall experience |
| Digital photo delivery | Convenient sharing and storage |
| Pricing transparency | Prevents surprises |
What Happens During an Aura Photography Session?
Most first-time clients wonder what to expect.
Fortunately, aura photography sessions are usually simple, comfortable, and non-invasive.
Typical Session Process
| Session Stage | Description | Average Time |
|---|---|---|
| Check-in | Introduction and consultation | 5–10 minutes |
| Sensor setup | Hand placement and preparation | 2–5 minutes |
| Photo capture | Aura image generation | 5 minutes |
| Interpretation | Review of colors and meanings | 10–20 minutes |
| Final delivery | Printed or digital images | 5 minutes |
Preparing for Your Appointment
Many practitioners recommend:
- Getting adequate rest
- Staying hydrated
- Arriving relaxed
- Avoiding unnecessary stress
- Keeping an open mind
These steps may help create a more enjoyable experience and meaningful discussion during your session.
Understanding Aura Colors
One of the most exciting aspects of aura photography is learning about color interpretations.
While meanings vary between practitioners, some common associations exist.
Common Aura Color Meanings
| Aura Color | Common Interpretation |
|---|---|
| Red | Passion, energy, determination |
| Orange | Creativity, enthusiasm, social connection |
| Yellow | Optimism, confidence, intellectual activity |
| Green | Growth, healing, balance |
| Blue | Communication, calmness, trust |
| Purple | Intuition, spirituality, wisdom |
| White | Clarity, purity, heightened awareness |
| Pink | Compassion, love, kindness |
Important Note About Interpretations
Aura photography interpretations should be viewed as personal insights rather than scientific diagnoses. Many people find the experience valuable for self-reflection, regardless of their beliefs about energy fields.
Benefits of Aura Photography
Aura photography offers several unique advantages.
Encourages Self-Reflection
The colorful images often inspire individuals to think more deeply about their emotions, goals, and personal development.
Creates a Memorable Experience
Unlike traditional portraits, aura photography combines photography with personal exploration.
Provides a Unique Keepsake
Many people frame their aura portraits as meaningful reminders of a particular moment in their lives.
Supports Wellness Journeys
Some clients schedule recurring sessions to document changes in their emotional and spiritual development over time.
Choosing the Best Aura Photography Studio
Not all providers offer the same experience.
Questions to Ask Before Booking
Consider asking:
- How long have you been offering aura photography?
- Is interpretation included?
- Will I receive digital files?
- What equipment is used?
- How long does the session last?
- Are group sessions available?
Signs of a Quality Studio
Look for studios that provide:
- Clear explanations
- Professional communication
- Positive reviews
- Transparent pricing
- Clean facilities
- Detailed interpretations
Aura Photography for Special Events
Aura photography has become increasingly popular at private events.
Popular Event Uses
- Birthday parties
- Corporate wellness events
- Bridal showers
- Festivals
- Retreats
- Family gatherings
Adding aura photography can create an engaging activity that guests remember long after the event ends.
Pros and Cons of Aura Photography
Pros
- Fun and unique experience
- Encourages personal reflection
- Creates memorable photographs
- Suitable for individuals and groups
- Available at many wellness events
- Makes a thoughtful gift
Cons
- Interpretations can vary between practitioners
- Availability may be limited in some areas
- Costs differ significantly between providers
- Results may be subjective
- Appointment scheduling may be required
Common Mistakes People Make
When booking aura photography, many people make avoidable mistakes.
Choosing Based Only on Price
The cheapest option isn’t always the best. Experience and interpretation quality often matter more than a small price difference.
Ignoring Reviews
Customer feedback can reveal important details about professionalism and service quality.
Expecting Scientific Measurements
Aura photography is generally viewed as a wellness and self-exploration experience rather than a scientific assessment.
Not Asking What’s Included
Always verify whether you receive:
- Printed images
- Digital copies
- Aura interpretation
- Follow-up consultation
Best Practices for Getting the Most From Your Session
Arrive With an Open Mind
Approach the experience with curiosity rather than rigid expectations.
Ask Questions
Engage with the practitioner to better understand your results.
Save Your Images
Keep both digital and printed copies for future comparison.
Take Notes
Many clients find value in documenting thoughts and feelings after their session.
Consider Repeat Sessions
Periodic sessions may provide an interesting record of personal growth over time.
Are Aura Photography Results Accurate?
This is one of the most common questions people ask.
Aura photography combines photography technology with interpretive frameworks used in wellness and spiritual communities. While scientific opinions vary regarding energy field visualization, many participants enjoy the experience as a tool for reflection, mindfulness, and conversation.
For most people, the value comes from the personal insights, unique imagery, and memorable experience rather than objective measurement.
How Much Does Aura Photography Usually Cost?
Pricing depends on location, studio reputation, and included services.
Typical pricing ranges include:
- Mini sessions: $20–$50
- Standard sessions: $50–$150
- Premium sessions: $150–$300+
- Event experiences: Variable pricing
Costs may increase when detailed consultations, printed products, or extended interpretations are included.
Conclusion
Searching for aura photography near me can lead to a fascinating experience that combines photography, wellness, and self-discovery. Whether you’re interested in colorful portraits, spiritual exploration, or simply trying something different, aura photography offers a memorable and visually stunning experience.
By choosing a reputable studio, understanding what to expect, and approaching the session with curiosity, you can enjoy an engaging experience and leave with a unique keepsake. As aura photography continues to grow in popularity, finding quality local providers is becoming easier than ever.
Frequently Asked Questions
1. What is aura photography used for?
Aura photography is commonly used for self-reflection, spiritual exploration, wellness experiences, and creating unique portraits.
2. How long does an aura photography session take?
Most sessions take between 20 and 40 minutes, depending on the studio and level of interpretation provided.
3. Can aura photography be done for groups?
Yes. Many studios offer sessions for couples, families, friends, and event attendees.
4. How much does aura photography cost?
Prices typically range from $20 to $300 or more depending on the provider and package.
5. Do aura colors change over time?
Many practitioners believe aura colors can change based on emotional states, experiences, and personal development.
/ You May Also Read /
Portraits and Photography: Your Complete Guide to Capturing Stunning Images in 2026
Family Photography: Best Poses, Locations & Expert Tips for Stunning Shots
-
 Photography Tips1 week ago
Portraits and Photography: Your Complete Guide to Capturing Stunning Images in 2026
-

 Photography Tips1 month ago
Photography in the Studio: Essential Tips and Setup Guide for Better Shots
-

 Photography Tips1 week ago
Photography Locations Near Me: Best UK Spots to Visit in 2026
-
 Photography Tips1 week ago
Photography Places Near Me: Top 10 Hidden Gems in the UK You Need to Shoot
-
 Photography Tips1 month ago
Challenges of Photography: Common Obstacles Every Photographer Faces and How to Overcome Them
-

 Photography Tips1 month ago
Drone Photography Near Me: How to Find the Best Aerial Photography Services in Your Area
-

 Photography Tips1 month ago
Beginner Photography Camera Guide: How to Choose the Perfect First Camera
-

 Lifestyle1 month ago
Aura Photography Near Me: Complete Guide to Finding the Best Aura Photography Experience