
Photography Tips
How to Take a Stunning Dinner Photo: Tips, Tricks, and Common Mistakes to Avoid

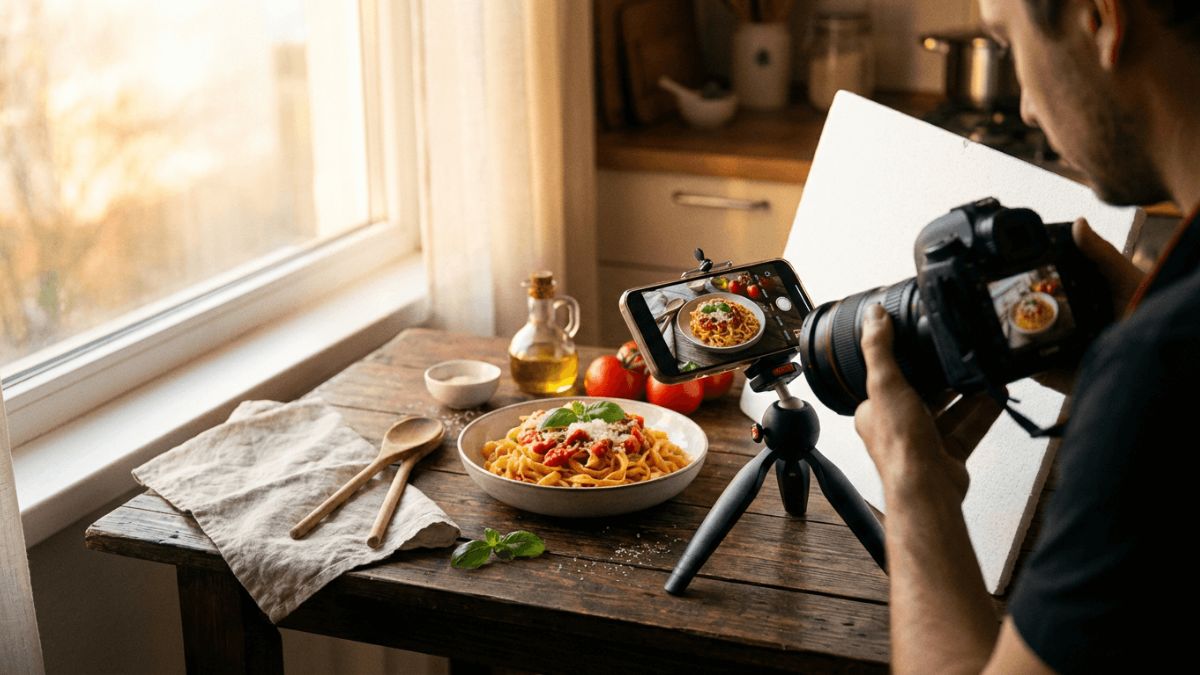
Ever scrolled past a mouthwatering dinner photo and immediately felt hungry, even though you’d just eaten? That’s the power of a good food shot. A great dinner photo doesn’t just document a meal — it tells a story, sets a mood, and makes people want to pull up a chair. Whether you’re sharing a home-cooked meal on social media, running a food blog, or documenting a restaurant experience, learning how to capture your dinner in the best light (literally) can make all the difference.
The good news? You don’t need a professional camera or years of training. With a few simple techniques, anyone can turn an everyday plate into something worth sharing.
Why a Good Dinner Photo Matters
A dinner photo does more than fill space on your feed. It communicates freshness, care, and appetite appeal — three things that influence whether someone stops scrolling or keeps moving. For food bloggers and small restaurants, a strong image can directly impact engagement and even sales.
People eat with their eyes first. That old saying holds true whether you’re serving a five-course meal or a simple weeknight stir-fry.
What Makes a Dinner Photo “Good”
A well-executed dinner photo typically includes:
- Natural, soft lighting that avoids harsh shadows
- A clean, uncluttered background
- Thoughtful composition that draws the eye to the food
- True-to-life color that doesn’t look overly filtered
- A sense of context, like steam, texture, or a hint of the table setting
If your photo checks most of these boxes, you’re already ahead of the curve.
Essential Equipment for Capturing the Perfect Dinner Photo
You don’t need a full studio setup. In fact, most great dinner photos today are taken on smartphones. What matters more is how you use the tools you already have.
Camera or Smartphone
Modern smartphones handle food photography surprisingly well, especially in good lighting. If you’re using a DSLR or mirrorless camera, a simple 50mm lens works beautifully for close-up shots with a soft, blurred background.
Lighting Tools
Natural window light is your best friend. If you’re shooting at night or in a dim restaurant, a small portable LED light or even a reflector (a white piece of paper works fine) can help fill in shadows.
Props and Styling Items
A few napkins, a wooden board, or a simple plate can elevate your shot without overwhelming it. Less is usually more here.
How to Set Up the Perfect Dinner Photo
Getting the setup right before you even lift your camera saves time and produces better results.
Choose the Right Angle
Different dishes call for different angles:
- Overhead (flat lay): Best for dishes with multiple elements, like a full dinner spread or a bowl-based meal
- 45-degree angle: Ideal for most plated dinners, since it mimics how we naturally view food
- Eye-level (straight on): Great for layered dishes like burgers, sandwiches, or stacked desserts
Position Your Light Source
Always shoot with light coming from the side or front, never directly behind you or straight overhead. Side lighting creates gentle shadows that add depth and texture to the food.
Keep the Background Simple
A busy background pulls attention away from the meal. Stick to neutral tones like white, wood, or dark slate to let the dish stand out.
Step-by-Step Guide to Taking a Dinner Photo
- Clean the plate edges before shooting — smudges are distracting
- Position the dish near a window with indirect natural light
- Choose your angle based on the dish type
- Add a small prop, like a napkin or utensil, for context
- Focus manually on the most textured part of the food
- Take multiple shots at slightly different angles
- Adjust brightness and contrast lightly during editing, keeping colors natural
This simple workflow works whether you’re photographing a quiet weeknight dinner or a special occasion spread.
Comparison: Common Dinner Photo Styles and When to Use Them
| Style | Best For | Lighting Needed | Difficulty Level |
|---|---|---|---|
| Overhead Flat Lay | Multi-dish spreads, bowls, brunch tables | Bright, even light | Easy |
| 45-Degree Angle | Standard plated dinners | Soft side light | Moderate |
| Close-Up Macro | Highlighting texture, steam, garnish | Strong directional light | Moderate to Hard |
| Lifestyle/Context Shot | Restaurant scenes, table settings | Ambient or mixed light | Easy |
Pros and Cons of DIY Dinner Photography
Pros:
- No expensive equipment required
- Quick to learn with practice
- Adds visual appeal to blogs, menus, and social posts
- Builds a personal or brand aesthetic over time
Cons:
- Inconsistent lighting can be tricky indoors
- Food cools and changes appearance quickly
- Requires patience to get the right shot before eating
- Editing skills take time to develop
Common Mistakes to Avoid When Taking a Dinner Photo
Even enthusiastic home cooks fall into a few predictable traps.
Using Harsh Overhead Lighting
Ceiling lights often cast unflattering shadows directly onto the plate. Turn them off and rely on window light whenever possible.
Overcrowding the Frame
Cramming too many props, utensils, or dishes into one shot creates visual noise. Focus on one hero dish at a time.
Ignoring the Background
A cluttered countertop or messy tablecloth can ruin an otherwise great photo. Always scan the frame before shooting.
Over-Editing
Heavy filters can make food look artificial or even unappetizing. Aim for natural color correction rather than dramatic effects.
Shooting Too Late
Food loses its fresh appearance fast. Sauces dry out, steam disappears, and garnishes wilt. Shoot as soon as the dish is plated.
Best Practices for Consistently Great Dinner Photos
| Best Practice | Why It Works |
|---|---|
| Shoot near natural light sources | Produces soft, flattering tones without harsh shadows |
| Style with minimal props | Keeps focus on the food itself |
| Use a consistent color palette | Builds a recognizable visual style over time |
| Edit lightly and consistently | Maintains authenticity across multiple photos |
| Capture steam or texture close-up | Adds sensory appeal that static shots lack |
Practical Example: Turning a Simple Weeknight Meal Into a Great Shot
Say you’re making roasted chicken with vegetables on a Tuesday night. Instead of snapping a quick photo under the kitchen light, try this:
- Move the plate near a window before serving
- Wipe any sauce splatters from the plate’s edge
- Add a folded cloth napkin beside the plate
- Shoot from a 45-degree angle to show both the chicken and its texture
- Take three or four shots, adjusting your position slightly each time
This small shift in approach can turn an ordinary meal photo into something that looks intentional and polished.
Editing Tips for a Natural, Appetizing Look
Editing should enhance, not transform, your dinner photo. Focus on:
- Slightly increasing brightness if the shot looks dim
- Boosting contrast just enough to add depth
- Keeping white balance accurate so food doesn’t look too warm or too cool
- Avoiding oversaturation, which can make food look unnatural
A light touch goes a long way toward keeping your dinner photo believable and appealing.
Conclusion
A great dinner photo comes down to a few consistent habits: good lighting, thoughtful composition, and a clean, simple setup. You don’t need professional gear or years of experience — just a willingness to slow down for a minute before digging in. With the tips covered here, you’ll be able to capture meals that look as good as they taste, whether you’re sharing a quick weeknight dinner or a special celebration spread.
Frequently Asked Questions
1. What is the best time of day to take a dinner photo?
Late afternoon or early evening near natural window light usually produces the softest, most flattering results.
2. Do I need a professional camera for dinner photos?
No. Most modern smartphones capture excellent food photos, especially with good lighting and careful composition.
3. What angle works best for most dinner dishes?
A 45-degree angle is the most versatile choice for plated meals, as it closely resembles how we naturally view food.
4. How can I avoid harsh shadows in my dinner photo?
Turn off overhead lighting and position your dish near a window or soft side light source instead.
5. Why does my dinner photo look flat or dull?
This is often due to poor lighting or an overly busy background. Simplify the scene and shoot with natural light for better depth.
/ You May Also Read /
Challenges of Photography: Common Obstacles Every Photographer Faces and How to Overcome Them
Family Photography: Best Poses, Locations & Expert Tips for Stunning Shots
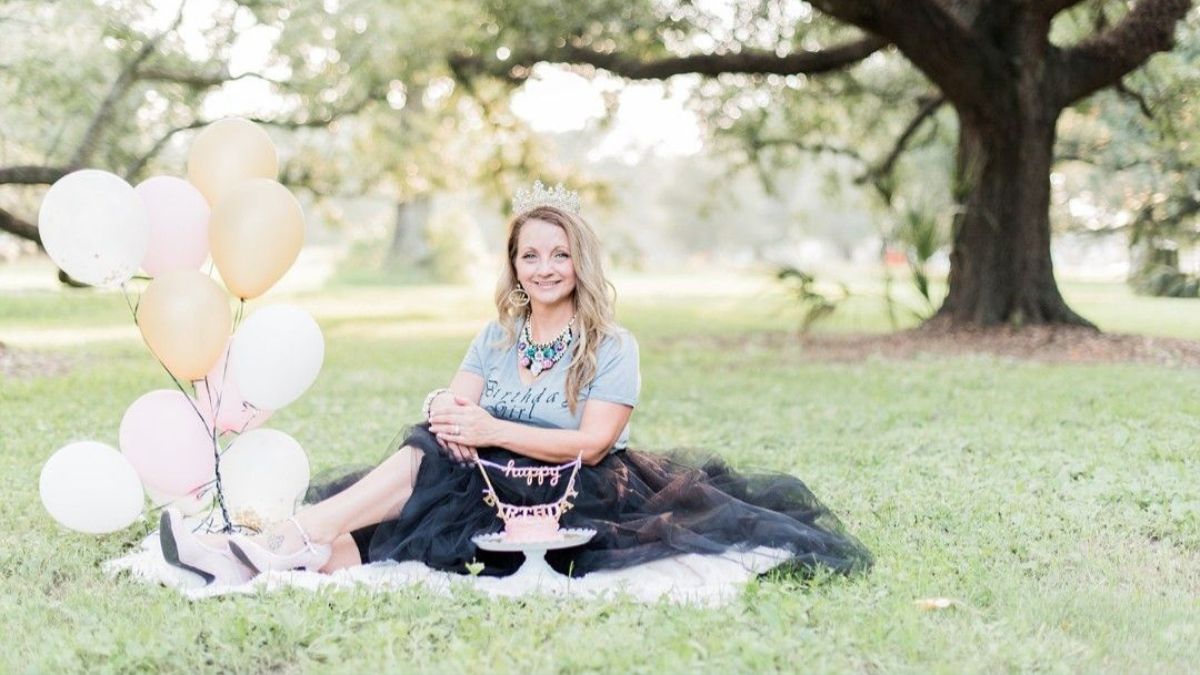
Looking for fresh photoshoot ideas that actually stand out? You are not alone. Thousands of people search for new ways to capture memories every single day.
Whether you are a beginner with a phone camera or a professional with a full studio, the right photoshoot ideas can turn an ordinary photo into something unforgettable. In fact, the best photos often come from simple concepts done with care.
This guide walks you through everything. You will find ideas for portraits, couples, families, fashion, and business shoots. So, let’s get started.
Quick Facts: Photoshoot Ideas at a Glance
| Category | Best For | Difficulty Level | Popularity in 2026 |
|---|---|---|---|
| Portrait | Individuals, headshots | Easy | Very High |
| Outdoor/Nature | Couples, families | Medium | High |
| Studio | Fashion, product | Medium | High |
| Themed/Creative | Social media content | Hard | Rising Fast |
| Candid/Lifestyle | Influencers, blogs | Easy | Very High |
What Are Photoshoot Ideas?
Photoshoot ideas are creative concepts, themes, or setups used to plan a photography session with a clear purpose. They guide the location, outfit, lighting, and pose choices. As a result, the photos feel intentional instead of random.
Why Photoshoot Ideas Matter
A photoshoot without a plan often feels flat. However, a clear idea gives every photo direction and meaning.
Think about it. A themed shoot tells a story. A random shoot just captures a moment. Therefore, planning ahead always improves the final result.
Understanding Your Style and Purpose
Before picking an idea, ask yourself a simple question. What is this photoshoot for?
Is it for social media, a portfolio, a special occasion, or just for fun? Because the purpose changes everything, from location to outfit choices. Additionally, your personal style should guide your final decision.
Best Photoshoot Ideas By Category
Here is a breakdown of popular photoshoot ideas, grouped by category and purpose.
| Idea | Category | Setting |
|---|---|---|
| Golden hour portraits | Portrait | Outdoor |
| Mirror reflection shots | Creative | Indoor |
| Silhouette against sunset | Nature | Outdoor |
| Flat lay product shots | Business | Studio/Home |
| Candid street walking | Lifestyle | Urban |
| Pastel backdrop studio | Fashion | Studio |
| Rainy window portraits | Moody/Artistic | Indoor |
| Family picnic scenes | Family | Outdoor |
| Couple laughing candids | Couple | Anywhere |
| Rooftop city skyline | Urban | Outdoor |
Portrait Photoshoot Ideas
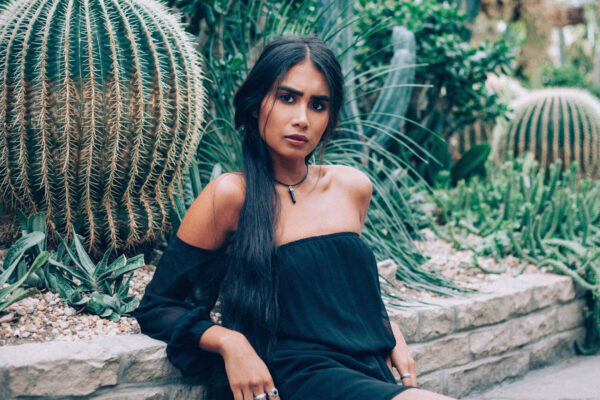
Portraits remain one of the most searched photoshoot ideas online. A close-up shot with natural light often works best. For example, standing near a window during morning hours creates soft, flattering light.
Outdoor and Nature Photoshoot Ideas
Nature offers free, ever-changing backdrops. Beaches, forests, and open fields all add depth to a photo. Meanwhile, golden hour, the hour before sunset, gives skin a warm and natural glow.
Studio and Fashion Photoshoot Ideas
Studios give full control over lighting and background. Because of this, they are perfect for fashion, product, and branding shoots. A plain backdrop also helps the subject stand out clearly.
Themed and Creative Photoshoot Ideas
Creative themes make photos memorable. Think retro outfits, colorful smoke bombs, or double exposure effects. Instead of a plain shoot, these ideas turn photography into storytelling.
Couple and Family Photoshoot Ideas
Couple and family shoots focus on emotion. Genuine laughter, small gestures, and candid moments always beat stiff, posed shots. So, encourage natural interaction instead of forced smiles.
Step-by-Step: How to Plan a Photoshoot
Planning matters as much as the idea itself. Here is a simple timeline to follow.
| Stage | Action | Details |
|---|---|---|
| One Week Before | Choose theme and location | Research lighting and permits |
| Two Days Before | Plan outfits and props | Match colors to the setting |
| Shoot Day | Arrive early | Test lighting before starting |
| After Shoot | Edit and select photos | Pick top 10-15 final shots |
Before the Shoot
Scout your location in advance, if possible. Additionally, check the weather forecast and lighting conditions. This small step saves a lot of stress later.
During the Shoot
Take more photos than you think you need. However, focus on quality over quantity in each set. Direct your subject gently, but let natural moments happen too.
After the Shoot
Editing shapes the final mood of your photos. Basic adjustments, like brightness and contrast, often make a big difference. Yet, avoid over-editing, since natural results usually perform better online.
Budget Breakdown for a Photoshoot
Costs vary widely depending on your setup and goals.
| Expense | Estimated Cost | Notes |
|---|---|---|
| Camera or phone gear | $0 – $2,000 | Many phones now work well |
| Location rental | $0 – $500 | Free with outdoor spots |
| Outfits and props | $20 – $300 | Depends on the theme |
| Professional photographer | $100 – $1,500 | Varies by experience level |
| Editing software | $0 – $50/month | Free apps are also available |
Where the Money Goes
Most beginners spend on props and outfits first. Professionals, however, often invest more in lighting equipment. Because lighting affects every single photo, this investment usually pays off.
Personal Style and Choosing What Works for You
Not every idea suits every person. Therefore, choose concepts that match your comfort level and personality.
Matching Ideas to Your Personality
Bold personalities often enjoy bright colors and dramatic poses. Meanwhile, calmer personalities may prefer soft tones and quiet, candid shots. There is no wrong choice here. Instead, the best photoshoot idea is the one that feels true to you.
What Makes These Photoshoot Ideas Unique
Interestingly, the best photoshoot ideas are rarely complicated. What makes them unique is emotional honesty, not expensive gear. A simple candid laugh often outperforms a highly staged, perfect pose.
Moreover, trends now favor authenticity over perfection. As a result, natural lighting and real expressions are more popular than ever in 2026.
Common Mistakes and Challenges People Face
Many people rush their planning stage. However, this often leads to disappointing results.
- Ignoring lighting conditions
- Overplanning poses instead of allowing natural movement
- Choosing outfits that clash with the background
- Skipping a test shot before the real session
- Editing photos too heavily
Avoiding these mistakes can instantly improve your photoshoot results.
Trends and Influence in 2026
In 2026, candid and lifestyle-style photography continues to dominate social media. Additionally, film-style filters and grainy textures have made a strong comeback. Furthermore, AI-assisted editing tools are now common, though many photographers still prefer manual edits for a personal touch.
Interesting and Lesser-Known Tips
Here are a few tips that most beginners overlook.
- Shooting during overcast days gives soft, shadow-free light
- Puddle reflections after rain create unique mirror effects
- A white bedsheet can work as a budget backdrop
- Slightly underexposing a photo often looks more cinematic
Similar Concepts and Comparisons
Photoshoot ideas often overlap with related concepts like styled photography, editorial shoots, and influencer content creation. However, each one has a slightly different goal. Editorial shoots focus on storytelling for magazines, while influencer content prioritizes engagement and relatability.
Photoshoot Ideas – 2026 Update
Public interest in photoshoot ideas keeps rising every year. In fact, short-form video platforms have pushed even more people toward creative, shareable photo concepts. Therefore, expect this trend to keep growing through 2026 and beyond.
FAQs
1. What are the best photoshoot ideas for beginners?
Simple portrait shoots using natural window light work best for beginners. They require minimal equipment and are easy to edit later.
2. How do I plan a photoshoot on a low budget?
Use natural outdoor locations and everyday outfits. Additionally, free editing apps can replace expensive software.
3. What time of day is best for outdoor photoshoots?
Golden hour, right before sunset, offers the most flattering natural light. Early morning light also works well for soft, calm tones.
4. How many photos should I take during a photoshoot?
Aim for 50 to 100 shots per concept. This gives you enough variety to select the best final images.
5. Do I need a professional camera for good photoshoot ideas?
No, modern phone cameras can capture high-quality photos. However, good lighting matters far more than the camera itself.
Conclusion
At the end of the day, photoshoot ideas are not about perfect gear or expensive locations. They are about capturing real moments that mean something to you.
So, pick an idea that feels true to your story. Because the most memorable photos always come from authentic, unforgettable moments.
/ You May Also Read /
Wildlife Photography for Beginners: Tips, Gear, and Techniques That Work
Aura Photography Near Me: Complete Guide to Finding the Best Aura Photography Experience
Introduction
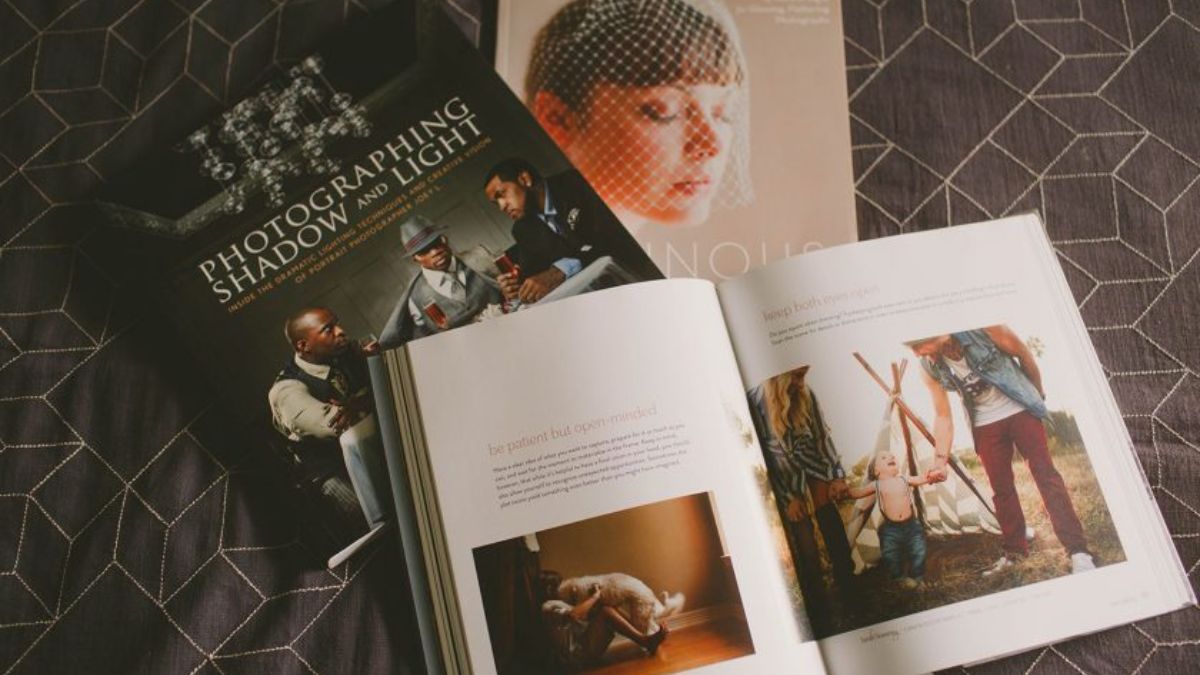
Have you ever flipped through a magazine and stopped on one image? That pause is the power of editorial photography.
Editorial photography is not just a pretty picture. It is a visual story built to support an article, a fashion feature, or a brand narrative. Because of this, it sits somewhere between journalism and art.
In this guide, you will learn what editorial photography really means. You will also see how it started, how photographers build a career in it, and where the industry stands in 2026.
Quick Facts
| Category | Details |
|---|---|
| What It Is | A photography style used to visually narrate a story for magazines, newspapers, or digital publications |
| Also Known As | Magazine photography, editorial photojournalism style |
| Primary Use | Fashion magazines, news outlets, digital editorials, brand storytelling |
| Key Purpose | To support and enhance a written story through images |
| Typical Subjects | People, fashion, lifestyle moments, portraits, real-life scenes |
| Common Equipment | Mirrorless or DSLR cameras, prime lenses, studio and natural lighting |
| Career Field | Photography, visual journalism, fashion media |
| Income Style | Freelance, staff, and hybrid publication-based work |
| 2026 Demand | Rising, driven by a shift toward authentic, story-first visuals |
Who Uses Editorial Photography?
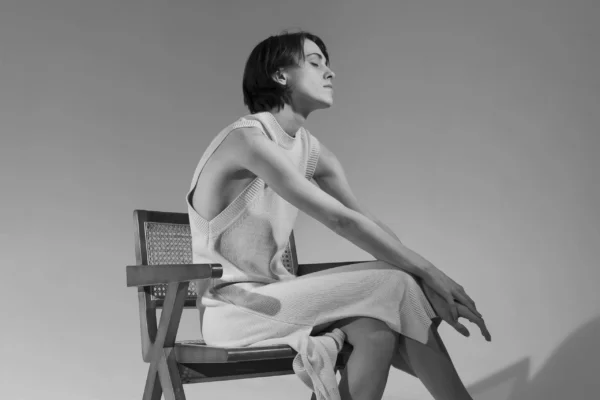
Editorial photography is the style used by magazines, newspapers, and online publications to tell a visual story alongside written content. Unlike advertising photography, its goal is to inform or move the reader emotionally, not sell a product directly.
You will find it in fashion spreads, celebrity profiles, lifestyle features, and even hard news coverage. Because of this, the style constantly borrows from both art and journalism.
Early History and Background
Editorial photography did not appear overnight. It grew out of early photojournalism in the 1920s and 1930s, when magazines first realized that images could carry a story on their own.
Publications like Life magazine changed how readers consumed news. Instead of only reading about an event, people could now see it. As a result, photographers became storytellers, not just documenters.
Cultural and Creative Influences
Fashion houses and design magazines pushed this idea even further. Editorial fashion photography, in particular, blended art direction, styling, and photography into one creative package.
Meanwhile, photojournalists working for newspapers focused on capturing real, unscripted moments. Both paths shaped what we now call editorial photography today.
How Photographers Build an Editorial Career
Most editorial photographers do not start with a magazine cover. Instead, they build a body of work slowly, one project at a time. Below is a general timeline of how the field has evolved.
| Era | Milestone | Details |
|---|---|---|
| 1920s–1930s | Birth of photojournalism | Magazines began using photos to tell news stories visually |
| 1960s–1980s | Golden age of magazine editorials | Fashion publications defined the modern editorial look |
| 1990s–2000s | Digital transition | Digital cameras replaced film, speeding up editorial workflows |
| 2010s | Social media influence | Instagram blurred lines between editorial and lifestyle photography |
| 2020s | Authenticity movement | Brands pushed back on heavy editing in favor of raw, real imagery |
| 2026 | Hybrid era | AI tools assist editing, but human storytelling remains central |
Career Beginnings
Most photographers start by assisting an established professional. This is where they learn lighting, pacing, and how to work with a creative team under pressure.
However, some build a portfolio independently. They shoot personal projects and pitch them directly to small publications or online magazines.
Rise Within the Industry
Once a photographer builds a strong portfolio, editors start reaching out. Therefore, consistency and a clear personal style matter more than raw talent alone.
In fact, many well-known editorial photographers built their reputation through one signature look. That signature became their calling card across multiple publications.
Recognized Achievements in the Field
Success in editorial photography is often measured through published covers, awards, and long-term collaborations with major publications. Additionally, some photographers cross over into commercial and advertising work once they gain recognition.
Editorial Photography Income Breakdown
Public information about exact industry-wide earnings is limited, since rates vary by publication, region, and experience. Still, most income in this field comes from a mix of sources.
| Income Source | Estimated Earnings | Notes |
|---|---|---|
| Magazine assignments | Varies by publication size and photographer experience | Larger publications generally pay more than niche outlets |
| Freelance commissioned shoots | Project-based, ranges widely | Depends on client budget and usage rights |
| Licensing and editorial stock images | Ongoing, smaller amounts per use | Income builds over time through repeated licensing |
| Brand and fashion campaigns | Often higher than pure editorial work | Common path once a photographer gains recognition |
| Workshops and teaching | Supplementary income | Many photographers diversify once established |
How Photographers Actually Make Money
Most editorial photographers combine several income streams instead of relying on one. For example, a photographer might shoot for a magazine while also licensing older work and teaching workshops.
This mix protects them from slow seasons. As a result, diversified income has become the norm, not the exception, in this field.
The Lifestyle Behind the Lens
Editorial photography is not a nine-to-five job. Shoots can happen early morning or late at night, depending on light, location, and the creative team’s schedule.
Travel is common too. Many editorial photographers move between cities for fashion weeks, press events, or on-location shoots tied to a story.
Working Relationships That Matter
A single editorial shoot involves more than just the photographer. Stylists, makeup artists, art directors, and editors all shape the final image together.
Because of this, strong communication skills matter just as much as technical camera skills. A photographer who collaborates well often gets called back for future projects.
What Makes Editorial Photography Unique
Unlike commercial photography, editorial work is led by a story first, not a sales goal. This gives the photographer more creative freedom to experiment with mood, composition, and emotion.
Interestingly, this freedom is also what draws so many photographers to the field. Instead of shooting a product to look flawless, they get to shoot a moment that feels true.
Think about it this way: a commercial photo sells you something, but an editorial photo makes you feel something first.
Key Turning Points in the Industry
The shift from print to digital changed everything for editorial photography. Magazines that once relied only on print sales had to build strong online editorial content too.
Furthermore, social media created a new distribution channel. A single striking editorial image can now reach millions of people within hours, something print alone could never do.
Challenges Facing Editorial Photographers Today
The photography industry has faced real pressure in recent years. Magazine budgets have shrunk, and many publications now pay less for editorial work than they did a decade ago.
Additionally, the rise of AI-generated imagery has raised new questions. Some worry it could replace certain types of editorial shoots. However, current industry commentary suggests brands are actually moving toward more human, less “perfect” imagery as a response.
So, instead of replacing photographers, this shift has pushed many toward more authentic, story-driven work. That trend has become one of the strongest movements in the field heading into 2026.
Public Image and Influence of Editorial Photography
Editorial photography shapes how the public sees fashion, culture, and even news events. A powerful editorial image can define how an entire generation remembers a moment.
Moreover, this style has influenced advertising, social media content, and even film. Many brands now request an “editorial look” specifically because it feels more credible than a polished ad.
Interesting and Lesser-Known Facts
- Editorial photography often does not pay as well as commercial work, yet many top photographers still prioritize it for creative freedom.
- Some of the most iconic magazine covers in history were shot on very limited budgets.
- Editorial photographers frequently shoot personal projects with no pay just to build a stronger portfolio.
- A single editorial spread can take a full day to shoot but only seconds for a reader to view.
- Many fashion trends were first introduced to the public through editorial spreads, not runway shows.
Editorial vs Other Photography Styles
Editorial photography is often confused with fashion, commercial, or documentary photography. However, each serves a different purpose.
- Editorial photography supports a story or article with strong visual narrative.
- Commercial photography exists to sell a product or service directly.
- Fashion photography can overlap with editorial work but often focuses purely on clothing and styling.
- Documentary photography captures real events with minimal creative direction, unlike the styled approach of editorial work.
Editorial Photography in 2026
Based on current industry commentary, 2026 has brought a strong shift toward authenticity in editorial work. Candid, unposed photography is gaining popularity fast, as creators lean into grain, blur, and real, imperfect expressions instead of polished perfection.
At the same time, AI has entered the workflow, but mostly behind the scenes. AI now handles tasks like sorting through frames, smart selection, and batch exposure fixes, while photographers still bring their physical presence, emotional read of a scene, and storytelling instinct.
Cinematic, film-inspired visuals have also become popular in editorial work this year. This style is shaping fashion campaigns, social storytelling, and editorial portraits with a narrative feel pulled straight from film. As a result, 2026 feels like a year where technology and human storytelling are working together, not against each other.
Frequently Asked Questions
What is editorial photography in simple terms?
Editorial photography is a style of photography used to support a story, article, or feature, usually in a magazine or online publication. It focuses on storytelling over selling a product.
How is editorial photography different from commercial photography?
Editorial photography supports a narrative, while commercial photography is created to promote or sell a product. Editorial work generally allows more creative freedom.
Do editorial photographers need a formal degree?
No formal degree is required, though many photographers study photography or visual arts. Building a strong portfolio matters more than formal education in this field.
How much do editorial photographers earn?
Public information about exact average earnings is limited, since pay varies by publication, location, and experience. Income often comes from a mix of assignments, licensing, and brand work.
Is editorial photography still relevant in 2026?
Yes, editorial photography remains highly relevant. In fact, the current shift toward authentic, story-driven imagery has made this style more valued than ever.
Conclusion
Editorial photography has never really been about a perfect shot. It has always been about a true one.
From early photojournalism to today’s blend of raw authenticity and smart AI tools, this craft keeps adapting without losing its soul. So, the next time you pause on a magazine image, remember someone built that moment to make you feel something.
That is the quiet power of editorial photography, and it is not going anywhere.
/ You May Also Read /
Portraits and Photography: Your Complete Guide to Capturing Stunning Images in 2026
Challenges of Photography: Common Obstacles Every Photographer Faces and How to Overcome Them
Introduction
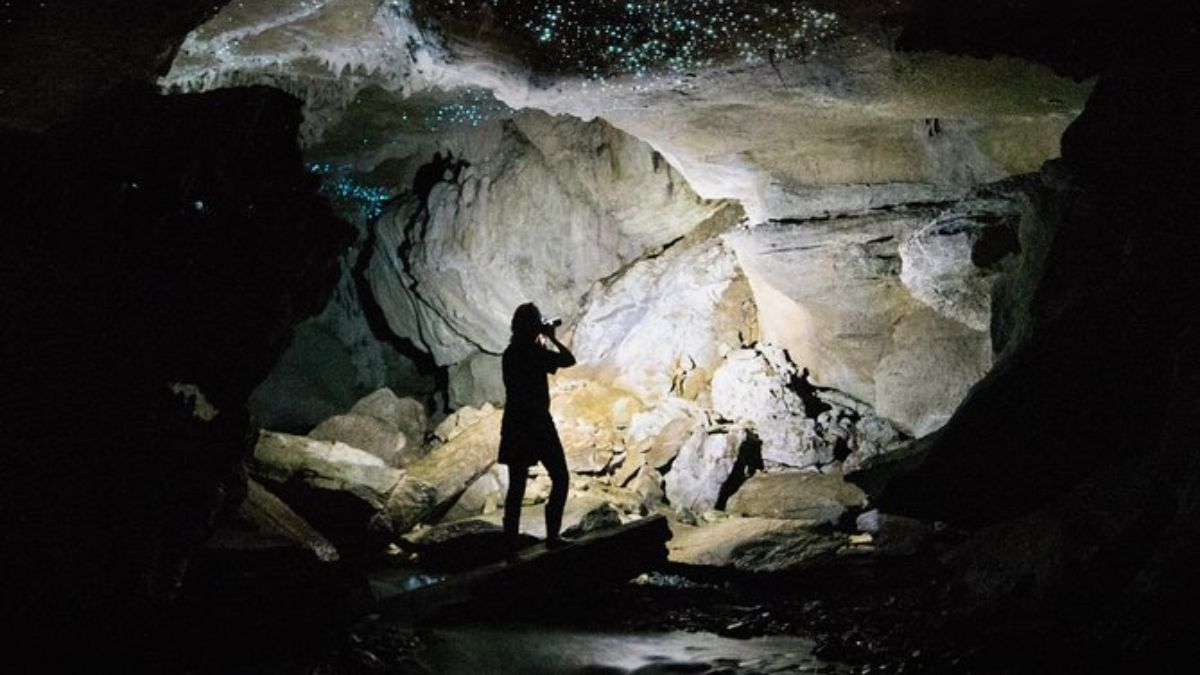
Caves are pitch black, damp, and completely unforgiving to a camera. So how do photographers capture those glowing, magical shots you see online?
The secret lies in mastering cave photography tips for lighting and exposure. Get these two things right, and even a phone-lit tunnel can look like another planet.
This guide breaks down exactly how to light a cave, set your exposure, and avoid the mistakes that ruin most underground shots.
Quick Facts
<div class=”wp-table-wrapper”>
| Detail | Information |
|---|---|
| Skill Level Needed | Intermediate to Advanced |
| Best Camera Mode | Manual (M) |
| Recommended ISO Range | 400–3200 |
| Typical Aperture | f/8–f/16 |
| Shutter Speed Range | 1 second–30 seconds (tripod required) |
| Essential Gear | Tripod, headlamp, off-camera flash |
| Best Light Source | Continuous LED or light painting torch |
| Common Technique | Light painting combined with long exposure |
</div>
What Is Cave Photography Lighting and Exposure?
Cave photography lighting and exposure is the technique of controlling artificial light and camera settings to capture detail in a space with zero natural light. Because caves have no ambient light, photographers rely on long shutter speeds, wide apertures, and manual light sources. This combination reveals textures, colors, and depth that the human eye can barely see in the dark.
Why Lighting Matters in Caves
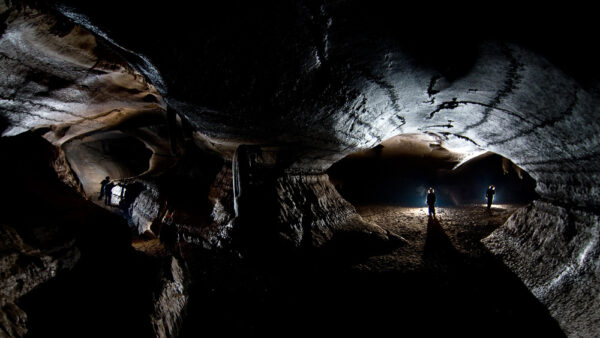
A cave is not like a dim room. It is total darkness, broken only by whatever light you bring in.
Because of this, your light source becomes your biggest creative tool. Where you place it changes everything about the final image.
For example, light from directly behind the camera flattens the scene. But light from the side reveals texture in the rock.
Family and Early Influences of the Technique
Cave photography grew from early spelunking documentation and mining photography in the 1900s. Photographers used magnesium flash powder long before modern strobes existed.
Today, LED torches and wireless flashes have replaced those risky old methods. However, the core idea stays the same: bring your own light, and control it carefully.
Mastering Exposure Settings (Step-by-Step Process)
Getting a clean cave shot is not random. It follows a clear process every time.
<div class=”wp-table-wrapper”>
| Stage | Action | Details |
|---|---|---|
| 1. Scout | Visit or research the cave first | Note hazards, angles, and formations |
| 2. Setup | Mount the camera on a tripod | Use a remote shutter or timer |
| 3. Meter | Take a test shot | Check the histogram, not just the screen |
| 4. Light | Add your light source | Use light painting or off-camera flash |
| 5. Expose | Set a long shutter speed | Typically 5–30 seconds |
| 6. Review | Check sharpness and exposure | Reshoot if the image is too dark or blown out |
</div>
Getting Started With Cave Exposure
Beginners should start in manual mode. Auto settings almost always guess wrong in near-total darkness.
Set your ISO around 800 first. Then open your aperture to f/8 and test a 10-second exposure.
Check the histogram, not the LCD screen. Cave scenes often look brighter on screen than they actually are.
Advanced Lighting Techniques
Once you understand the basics, try light painting. This means moving a torch across the scene during a long exposure.
Moreover, off-camera flash gives you more control than a torch. You can trigger it wirelessly and freeze motion in specific areas.
For example, one flash pointed at a rock wall and another lighting the foreground creates depth. This layered lighting is what separates flat shots from stunning ones.
Techniques That Produce Award-Level Shots
Bracketing exposures is one trick used for competition-level cave photos. Shoot the same frame at three or more exposure levels.
Then, blend them later using exposure blending or HDR software. As a result, you capture both the bright light source and the dark shadows in one final image.
Essential Gear and Cost Breakdown
You do not need every tool on this list. But having the right gear makes cave shooting far easier.
<div class=”wp-table-wrapper”>
| Item | Estimated Cost | Purpose |
|---|---|---|
| Sturdy Tripod | $80–$250 | Stability for long exposures |
| Headlamp or Torch | $20–$100 | Hands-free lighting and light painting |
| Off-Camera Flash | $150–$500 | Directional fill light |
| Wide-Angle Lens | $300–$1,200 | Capturing the full scale of a cave |
| Remote Shutter Release | $15–$40 | Prevents camera shake during long exposures |
</div>
How Photographers Actually Use This Gear
Most cave photographers combine a wide lens with a tripod as their base setup. Then, they add one or two lights depending on the scene.
Instead of buying everything at once, start with a tripod and a single strong torch. You can add flashes later as your skills grow.
Safety and Preparation
Caves are physically demanding and sometimes dangerous. So, safety planning matters just as much as camera settings.
Always tell someone where you are going. Additionally, carry a backup light source in case your main one fails.
Wear proper footwear because cave floors are often wet, uneven, or slippery. Because visibility is low, a fall here is riskier than in a normal setting.
What Makes Cave Photography Lighting Unique
Unlike landscape or portrait photography, you fully control every light source in the frame. There is no sun, no bounce light, and no ambient glow to rely on.
Interestingly, this gives photographers total creative freedom. You decide exactly where shadows fall and where highlights appear.
Think about it like painting with a camera. Every beam of light is a deliberate brushstroke, not a happy accident.
Common Challenges and Mistakes to Avoid
Even experienced photographers struggle with a few recurring issues underground. Public information about exact failure rates is limited, but these mistakes come up constantly in photography communities.
- Underexposing the scene — Caves trick your eyes into thinking there is more light than there is.
- Camera shake — Long exposures amplify even small movements, so always use a tripod.
- Flat lighting — Placing light directly behind the camera removes texture and depth.
- Condensation on the lens — Cave humidity fogs glass quickly, so allow your gear to adjust to temperature first.
- Overusing one light source — A single flat light rarely creates a compelling image.
However, each of these problems has a simple fix once you know what to look for.
Impact and Influence on Modern Photography
Cave photography has influenced broader lighting techniques used in studio and product photography. The idea of “light painting” started underground before spreading into mainstream creative photography.
Furthermore, social media has pushed more photographers to explore caves as unique, unexplored content. As a result, this niche has grown steadily in popularity since 2020.
Interesting and Lesser-Known Tips
- Bring a white balance reference card. Cave walls have color casts that confuse auto white balance.
- Shoot in RAW format. This gives you far more flexibility to fix exposure later.
- Use a small aperture like f/16 near light sources to create a starburst effect.
- Bracket every important shot. You cannot easily go back and reshoot in a remote cave.
Similar Genres and Comparisons
Cave photography shares techniques with astrophotography and urban exploration photography. All three rely on long exposures and manual light control.
However, cave photography is unique because you control 100% of the light. Astrophotographers work with starlight, and urbex photographers often use existing structure lighting.
Meanwhile, underwater photography shares the equipment challenges of harsh, unpredictable environments. But water adds refraction issues that caves do not have.
Cave Photography Trends in 2026
By 2026, more photographers are pairing multiple wireless flashes with smartphone control apps. This makes complex lighting setups faster to adjust in the field.
Additionally, compact LED panels have replaced bulky flash rigs for many hobbyists. They are lighter, easier to carry through tight cave passages, and simpler to control.
Drone photography inside larger cave systems is also becoming more common, though access restrictions still limit this in many locations.
FAQs
What ISO should I use for cave photography? Start around ISO 800 and adjust based on your light source. Lower ISO reduces noise but needs a longer exposure or stronger light.
Can I shoot cave photos without a tripod? It is very difficult. Long exposures require a stable base, so a tripod is essentially required for sharp results.
What is the best light source for cave photography? A combination of a continuous LED torch for light painting and an off-camera flash for fill light works best for most scenes.
Why do my cave photos look too dark? Your shutter speed or ISO is likely too low for the available light. Increase exposure time or add more light before increasing ISO too much.
Is flash or continuous light better in caves? Both work well together. Flash freezes detail sharply, while continuous light gives more control over light painting effects.
Conclusion
Cave photography is not just about owning good gear. It is about understanding how light behaves when there is none to begin with.
Once you master lighting and exposure, a plain rock wall can turn into something breathtaking. So, grab your tripod, bring extra batteries, and start experimenting underground.
Every great cave shot starts the same way: total darkness, and a photographer willing to bring the light.
You May Also Read /
Portraits and Photography: Your Complete Guide to Capturing Stunning Images in 2026
Wedding Photography Packages: Complete Guide to Pricing, Coverage, and Value
-
 Photography Tips4 weeks ago
50+ Creative Photoshoot Ideas to Try in 2026
-
 Lifestyle3 months ago
Family Photography: Best Poses, Locations & Expert Tips for Stunning Shots
-

 Blog2 months ago
How to Turn On Profile Picture Guard: A Complete Step-by-Step Guide
-
 Blog2 months ago
Profile Picture Guide: How to Choose a Photo That Gets Noticed
-
 Photography Tips3 months ago
Photography in the Studio: Essential Tips and Setup Guide for Better Shots
-
 Photography Tips3 months ago
Challenges of Photography: Common Obstacles Every Photographer Faces and How to Overcome Them
-
 Studio Photography4 weeks ago
Types of Lighting in Photography: A Complete Beginner-to-Pro Guide
-
 Photography Tips2 months ago
Portraits and Photography: Your Complete Guide to Capturing Stunning Images in 2026