
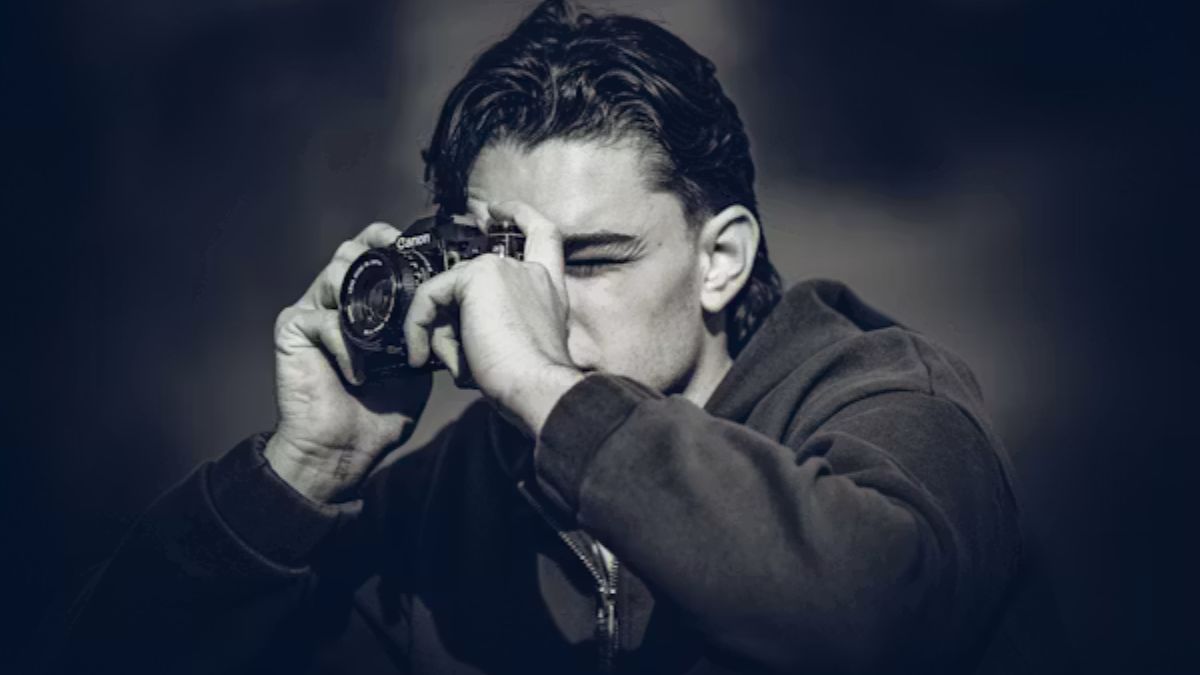
Photography Tips
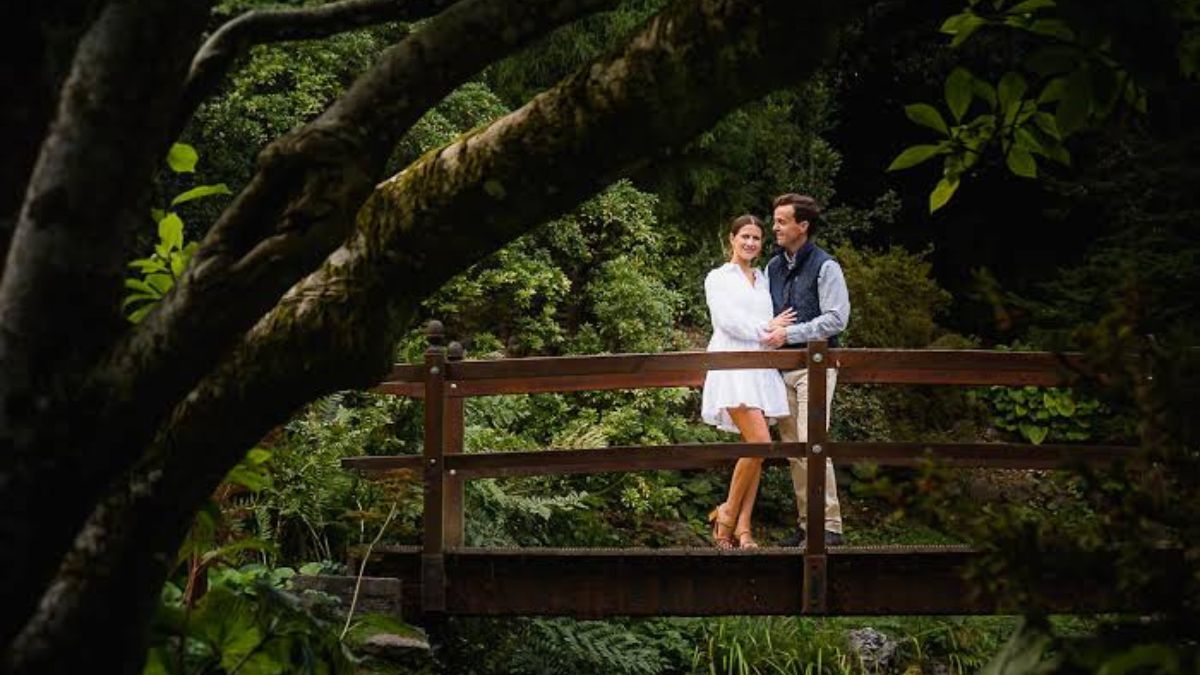
Engagement Photos: The Complete Guide to Stunning and Meaningful Couple Portraits
Introduction
Engagement photos are more than just beautiful pictures. They celebrate a major milestone, capture genuine emotions, and help couples preserve memories before their wedding day.
Whether you’re newly engaged or planning your wedding timeline, an engagement session offers a chance to document your relationship in a relaxed and meaningful way. These images often appear on wedding websites, invitations, save-the-date cards, guest books, and social media announcements.
The best engagement photography combines authentic emotions, thoughtful locations, flattering lighting, and natural interactions. With the right preparation, couples can create timeless images they will treasure for years.
In this guide, you’ll learn how to plan, prepare for, and maximize your engagement photo session while avoiding common mistakes.
What Are Engagement Photos?
Engagement photos are professional portraits taken after a couple becomes engaged and before their wedding day.
Their primary purpose is to celebrate the engagement period while creating memorable images that showcase the couple’s personality, relationship, and story.
Why Couples Choose Engagement Sessions
Many couples schedule engagement sessions because they:
- Become comfortable in front of the camera
- Build trust with their photographer
- Create photos for wedding stationery
- Capture a unique chapter in their relationship
- Preserve memories before wedding planning becomes overwhelming
Key Benefits at a Glance
| Benefit | Why It Matters |
|---|---|
| Camera Confidence | Helps reduce wedding day photo anxiety |
| Photographer Connection | Builds rapport before the wedding |
| Save-the-Date Images | Provides personalized wedding materials |
| Lasting Memories | Documents the engagement journey |
| Creative Freedom | Allows unique locations and styling |
How to Plan the Perfect Engagement Photos Session
Successful sessions begin with thoughtful planning.
Choose a Meaningful Location
The location sets the tone for your images and can make the session feel more personal.
Popular choices include:
- Beaches
- Parks and gardens
- Urban downtown areas
- Coffee shops
- Historic districts
- Mountains and hiking trails
- Places where you first met
Consider the Best Time of Day
Lighting dramatically impacts photo quality.
Photographers often recommend:
Golden Hour
The hour after sunrise or before sunset provides:
- Soft light
- Warm colors
- Flattering skin tones
- Romantic atmosphere
Blue Hour
Shortly after sunset, blue hour creates:
- Dreamy backgrounds
- City light effects
- Dramatic mood
Coordinate Your Outfits
Outfits should complement each other rather than match exactly.
A good approach includes:
- Neutral colors
- Layered clothing
- Timeless styles
- Comfortable footwear
- Minimal distracting logos
Best Outfit Ideas for Engagement Photos

Choosing the right wardrobe can elevate your entire session.
Casual and Relaxed Look
Perfect for:
- Parks
- Beaches
- Lifestyle sessions
Examples:
- Jeans and sweaters
- Flowy dresses
- Casual jackets
- Simple accessories
Elegant and Formal Look
Ideal for:
- City sessions
- Historic venues
- Luxury locations
Examples:
- Cocktail dresses
- Tailored suits
- Sophisticated footwear
Seasonal Outfit Guide
| Season | Recommended Colors | Popular Clothing Choices |
|---|---|---|
| Spring | Pastels, soft greens | Dresses, lightweight layers |
| Summer | Whites, blues, neutrals | Linen clothing, airy fabrics |
| Fall | Rust, burgundy, mustard | Sweaters, boots, scarves |
| Winter | Deep jewel tones | Coats, knitwear, elegant layers |
Creative Engagement Photo Ideas
Unique concepts can make your images stand out while reflecting your personality.
Include Shared Hobbies
Consider activities you enjoy together:
- Cycling
- Hiking
- Cooking
- Reading
- Traveling
- Dancing
These activities create authentic moments and genuine expressions.
Bring Your Pet
Pets often feel like part of the family.
Including them can:
- Add personality
- Create candid moments
- Reduce nervousness
- Tell a fuller story
Revisit a Special Place
Locations with emotional significance often produce the most meaningful photographs.
Examples include:
- First date locations
- Proposal spots
- Favorite weekend destinations
- College campuses
Posing Tips for Natural-Looking Images
Many couples worry about looking awkward.
Fortunately, great engagement portraits rarely rely on stiff poses.
Focus on Interaction
Instead of staring directly at the camera constantly:
- Walk together
- Hold hands
- Talk naturally
- Share a joke
- Look at each other
Keep Moving
Movement creates authentic moments.
Popular prompts include:
- Walking side by side
- Slow dancing
- Spinning
- Running playfully
- Embracing while moving
Trust Your Photographer
Professional photographers guide couples through poses and prompts that feel comfortable and natural.
Common Mistakes to Avoid
Even well-planned sessions can suffer from avoidable issues.
Waiting Too Long to Schedule
Popular photographers often book months in advance.
Plan early to secure:
- Preferred dates
- Desired seasons
- Ideal locations
Wearing Distracting Clothing
Avoid:
- Large logos
- Neon colors
- Busy patterns
- Wrinkled garments
Ignoring Weather Conditions
Always prepare backup options for:
- Rain
- Wind
- Extreme temperatures
Overcomplicating the Session
Too many outfit changes or locations can create stress and reduce shooting time.
Engagement Photos Location Comparison
Different locations create different visual styles and moods.
| Location Type | Style | Best For | Photography Mood |
|---|---|---|---|
| Beach | Romantic | Sunset sessions | Soft and dreamy |
| Forest | Natural | Outdoor lovers | Organic and intimate |
| City Streets | Modern | Fashion-forward couples | Energetic and stylish |
| Mountains | Adventurous | Nature enthusiasts | Epic and cinematic |
| Coffee Shop | Lifestyle | Casual couples | Cozy and authentic |
| Historic Venue | Elegant | Formal sessions | Timeless and classic |
Best Practices for Exceptional Engagement Photos
Following proven strategies can dramatically improve your results.
Communicate Expectations
Discuss with your photographer:
- Vision
- Style preferences
- Must-have shots
- Location ideas
Practice Self-Care Before the Session
The day before:
- Get enough sleep
- Stay hydrated
- Prepare outfits
- Confirm logistics
Arrive Early
Early arrival allows time for:
- Adjustments
- Relaxation
- Location scouting
Focus on Each Other
The strongest images happen when couples focus on their connection rather than the camera.
Pros and Cons of Engagement Photos
Pros
- Builds confidence before wedding photography
- Creates lasting memories
- Provides images for wedding materials
- Strengthens photographer relationship
- Allows creative freedom
Cons
- Additional expense
- Requires planning and scheduling
- Weather can impact outdoor sessions
- Some couples initially feel camera shy
For most couples, the benefits significantly outweigh the drawbacks.
Sample Engagement Session Timeline
Two Months Before
- Book photographer
- Select location
- Discuss creative ideas
One Month Before
- Finalize outfits
- Plan transportation
- Review inspiration photos
One Week Before
- Check weather forecast
- Confirm details
- Prepare accessories
Day of Session
- Arrive early
- Relax
- Trust the process
- Enjoy the experience
How to Use Your Engagement Photos
Once your gallery is delivered, you can use the images in multiple ways.
Popular options include:
- Save-the-date cards
- Wedding invitations
- Wedding websites
- Guest books
- Social media announcements
- Framed wall art
- Thank-you cards
These uses help extend the value of your investment far beyond the session itself.
Conclusion
Engagement photos offer a wonderful opportunity to celebrate your relationship while creating meaningful memories before your wedding day. With thoughtful planning, the right location, coordinated outfits, and a skilled photographer, your session can produce timeless images that reflect your personality and connection.
The most memorable engagement portraits are not about perfect poses. They are about genuine emotions, shared experiences, and authentic moments. By focusing on your relationship and enjoying the process, you’ll create photographs that remain special long after the wedding day has passed.
Frequently Asked Questions
1. When should engagement photos be taken?
Most couples schedule engagement sessions between six and twelve months before their wedding.
2. How long does an engagement session last?
Most sessions last between one and two hours, depending on locations and outfit changes.
3. What should we wear for engagement photos?
Choose coordinated outfits with complementary colors, timeless styles, and comfortable clothing that reflects your personality.
4. Are engagement photos necessary?
They are not required, but they provide valuable practice, beautiful memories, and useful images for wedding-related materials.
5. How many engagement photos do photographers typically deliver?
The number varies, but many photographers deliver between 40 and 100 edited images depending on session length and package.
/ You May Also Read /
Wedding Photography Packages: Complete Guide to Pricing, Coverage, and Value
Why the Quality of Wedding Photography Declines: Causes, Warning Signs, and Solutions
Photography Tips
Tripod for Long Exposure Photography: How to Choose the Right Support for Sharp, Stunning Images
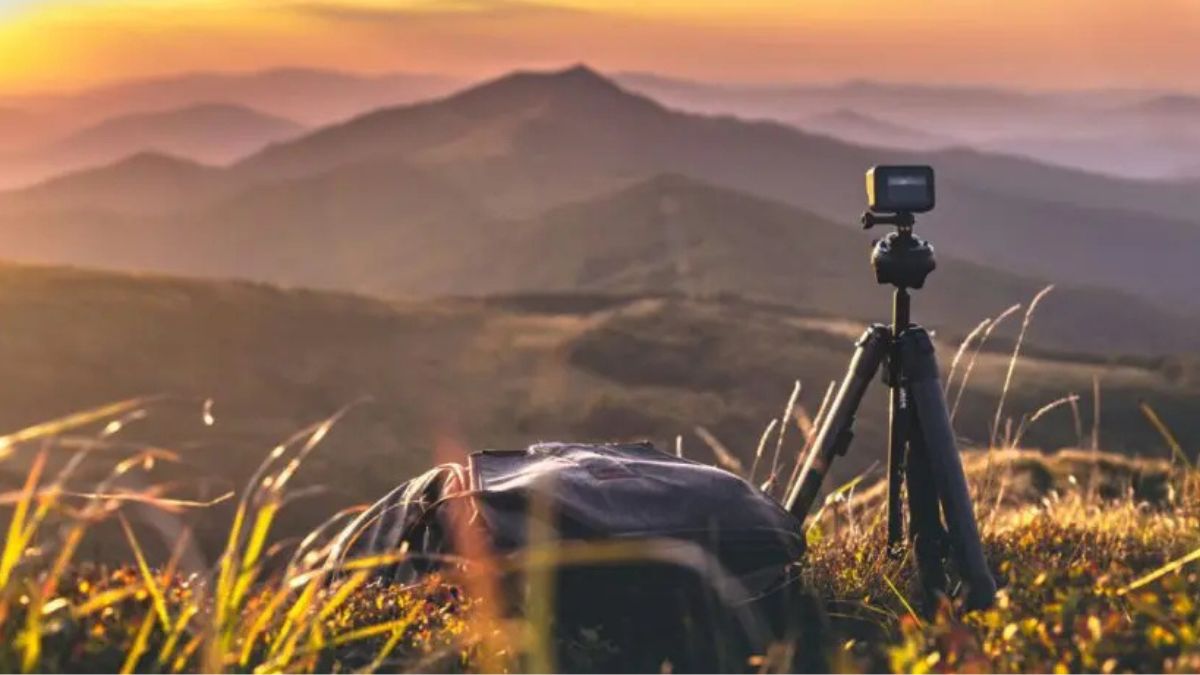
Long exposure photography allows photographers to capture movement in a unique and artistic way. From silky waterfalls and smooth ocean waves to glowing city light trails and dramatic night skies, the technique creates images that stand out from ordinary photographs.
However, even the best camera settings cannot compensate for camera shake. That’s why choosing the right tripod for long exposure photography is one of the most important decisions a photographer can make.
A stable tripod keeps the camera perfectly still while the shutter remains open for several seconds or even minutes. Without proper support, long exposure images often appear blurry, soft, and unusable.
This guide explains everything you need to know about selecting, using, and maintaining a tripod for long exposure work.
Why a Tripod Is Essential for Long Exposure Photography
Long exposure photography involves keeping the camera sensor exposed to light for an extended period. During this time, even the smallest movement can reduce image sharpness.
A quality tripod provides:
- Maximum camera stability
- Consistent framing
- Reduced motion blur
- Better composition control
- Easier low-light shooting
- Improved image quality
What Happens Without a Stable Tripod?
When photographing at shutter speeds slower than 1/30 second, handheld shooting becomes increasingly difficult. At exposures lasting several seconds, even slight hand movement creates visible blur.
This is especially problematic when photographing:
- Waterfalls
- Rivers
- Ocean landscapes
- Night cityscapes
- Light trails
- Star photography
- Architecture in low light
What Makes a Good Tripod for Long Exposure Photography?
Not all tripods perform equally well. Some are designed for portability, while others prioritize stability.
Key Features to Look For
| Feature | Why It Matters | Recommended Choice |
|---|---|---|
| Material | Affects weight and vibration control | Carbon fiber or aluminum |
| Load Capacity | Supports camera and lens safely | At least 2x gear weight |
| Leg Locks | Determines setup speed and stability | Twist locks or quality lever locks |
| Height | Improves shooting comfort | Eye-level height preferred |
| Center Column | Can reduce stability when extended | Minimal use recommended |
| Weight | Balances portability and stability | Moderate to heavy for long exposures |
A tripod should feel solid and secure even in windy conditions.
Carbon Fiber vs Aluminum Tripods
One of the biggest purchasing decisions involves tripod material.
| Feature | Carbon Fiber | Aluminum |
|---|---|---|
| Weight | Lighter | Heavier |
| Vibration Absorption | Excellent | Good |
| Durability | Excellent | Very Good |
| Travel Friendly | Excellent | Moderate |
| Cost | Higher | More Affordable |
Carbon fiber models are popular among landscape photographers because they reduce vibration and remain lightweight during long hikes.
Aluminum tripods offer excellent value and can still produce outstanding long exposure results.
Choosing the Right Tripod Size
Tripod size directly affects stability and convenience.
Travel Tripods
Travel tripods are compact and lightweight.
Benefits include:
- Easy transportation
- Fits carry-on luggage
- Great for hiking
- Fast setup
The trade-off is reduced stability compared to larger models.
Standard Landscape Tripods
Landscape photographers often prefer medium-to-large tripods.
Advantages include:
- Better wind resistance
- Higher load capacity
- Greater durability
- Improved stability
For serious long exposure photography, these models usually provide the best balance between portability and performance.
Heavy-Duty Tripods
Heavy-duty tripods excel in extreme conditions.
They are ideal for:
- Coastal photography
- Mountain photography
- Large telephoto lenses
- Strong winds
- Commercial work
Their additional weight helps minimize vibration during long exposures.
Best Tripod Head Types for Long Exposure Photography
The tripod legs provide support, but the tripod head controls positioning.
Ball Heads
Ball heads are the most versatile option.
Benefits:
- Quick adjustments
- Lightweight design
- Compact size
- Flexible positioning
Many landscape photographers rely on ball heads for everyday shooting.
Pan-and-Tilt Heads
These heads allow precise control over each axis independently.
They work well for:
- Architecture
- Product photography
- Detailed compositions
Gimbal Heads
Gimbal heads are mainly used with large telephoto lenses.
Although less common for long exposure landscapes, they can be valuable for wildlife photography at slower shutter speeds.
How to Set Up a Tripod for Maximum Stability
Even an expensive tripod can perform poorly if used incorrectly.
Extend the Thickest Leg Sections First
The upper leg sections are generally thicker and more stable.
For best results:
- Extend upper sections first.
- Avoid extending the smallest sections unless necessary.
- Lock each section securely.
Avoid Raising the Center Column
The center column acts like a monopod attached to the tripod.
When fully extended:
- Stability decreases
- Vibration increases
- Wind resistance worsens
Keep the center column lowered whenever possible.
Add Weight in Windy Conditions
Many tripods include a center hook beneath the platform.
Useful items to hang include:
- Camera bag
- Sandbag
- Backpack
Additional weight can significantly improve stability during long exposures.
Best Camera Settings for Long Exposure Photography
A tripod alone does not guarantee great results.
The following settings often work well:
| Setting | Recommended Starting Point |
|---|---|
| ISO | 100 |
| Aperture | f/8 to f/16 |
| Shutter Speed | 1 second to several minutes |
| Focus Mode | Manual focus |
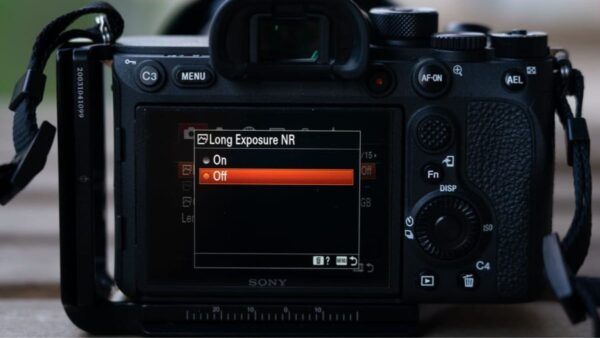
| Image Stabilization | Off when on tripod |
| File Format | RAW |
These settings provide a solid starting point for most scenes.
Use a Remote Shutter Release
Pressing the shutter button can introduce vibration.
Instead, use:
- Remote trigger
- Wireless release
- Smartphone app
- Self-timer mode
This simple step often improves image sharpness dramatically.
Common Long Exposure Photography Scenarios
Waterfalls
A tripod helps create smooth, flowing water while keeping surrounding rocks and foliage sharp.
Typical shutter speeds:
- 0.5 to 5 seconds
Ocean Photography
Long exposures transform crashing waves into a soft, dreamy appearance.
Typical shutter speeds:
- 2 to 30 seconds
City Light Trails
Traffic creates colorful streaks of light during long exposures.
Typical shutter speeds:
- 5 to 30 seconds
Night Sky Photography
Astrophotography demands exceptional tripod stability.
Typical shutter speeds:
- 10 to 30 seconds
Pros and Cons of Using a Tripod
Pros
- Sharper images
- Better low-light performance
- Improved composition
- Reduced camera shake
- Essential for long exposures
- Enables creative techniques
Cons
- Extra weight to carry
- Slower setup time
- Takes up storage space
- Quality models can be expensive
Despite these drawbacks, the advantages greatly outweigh the disadvantages for long exposure work.
Common Mistakes When Using a Tripod
Many photographers unknowingly reduce tripod performance.
Extending All Leg Sections
Using every leg section reduces rigidity and increases vibration.
Ignoring Wind
Strong wind can introduce movement even when using a quality tripod.
Leaving Image Stabilization On
Many lenses and cameras perform better with stabilization disabled when mounted on a tripod.
Using Lightweight Tripods in Harsh Conditions
Ultralight models may struggle near waterfalls, coastlines, and mountain viewpoints.
Poor Leg Placement
Uneven leg positioning creates instability and increases the chance of accidental tipping.
Best Practices for Long Exposure Success
Scout Locations Early
Arrive before the ideal shooting time.
This allows you to:
- Find compositions
- Test tripod placement
- Evaluate lighting conditions
Use Neutral Density Filters
ND filters reduce incoming light.
This enables longer shutter speeds during daylight hours.
Check Stability Frequently
Before every exposure:
- Verify leg locks
- Tighten head controls
- Secure camera mounting plate
Shoot Multiple Frames
Conditions change rapidly outdoors.
Capturing several exposures improves the chances of obtaining a perfect image.
Protect Your Equipment
Water, sand, and dirt can affect tripod performance.
After each shoot:
- Clean leg locks
- Remove debris
- Dry equipment thoroughly
How to Maintain a Tripod
A tripod can last many years with proper care.
Maintenance tips include:
- Rinse after beach use
- Remove sand from joints
- Inspect locking mechanisms regularly
- Tighten loose screws
- Store in a dry environment
Routine maintenance preserves stability and extends the lifespan of the equipment.
Conclusion
A reliable tripod is the foundation of successful long exposure photography. Whether you’re photographing waterfalls, ocean waves, city lights, or star-filled skies, stability directly influences image quality.
The ideal tripod balances strength, portability, durability, and ease of use. Carbon fiber models offer premium performance, while aluminum tripods provide excellent value. Regardless of the material you choose, proper setup techniques and good shooting habits will help you capture sharper and more creative long exposure images.
Investing in the right tripod not only improves technical image quality but also opens the door to new photographic possibilities that simply aren’t achievable handheld.
Frequently Asked Questions
1. What is the best tripod material for long exposure photography?
Carbon fiber is generally considered the best option because it absorbs vibration effectively while remaining lightweight and durable.
2. Can I do long exposure photography without a tripod?
It is possible for very short exposures using stable surfaces, but a tripod is essential for consistent results and maximum image sharpness.
3. Should image stabilization be turned off on a tripod?
In most cases, yes. Many camera systems perform better with stabilization disabled when mounted securely on a tripod.
4. How much weight should a tripod support?
A tripod should ideally support at least twice the total weight of your camera and lens combination.
5. Are travel tripods good for long exposure photography?
Yes, but larger tripods generally provide better stability in windy conditions and when using heavier camera equipment.
/ You May Also Read /
Beginner Photography Camera Guide: How to Choose the Perfect First Camera

The holiday season brings countless opportunities to create lasting memories, and santa pet photography has become one of the most popular ways for pet owners to celebrate with their furry companions. Whether you’re a professional photographer, a pet parent planning a holiday photoshoot, or a business organizing seasonal pet events, capturing pets with Santa creates heartwarming images that families cherish for years.
From selecting the perfect setup to keeping pets comfortable during the session, successful holiday pet portraits require preparation, patience, and creativity. This guide covers everything you need to know to create memorable Christmas pet photos that stand out.
What Is Santa Pet Photography?
Santa pet photography is a holiday-themed photography session where pets pose with a person dressed as Santa Claus or within a Santa-inspired Christmas setting. These sessions are commonly offered by photography studios, pet stores, animal shelters, shopping centers, and independent photographers during the holiday season.
Why Is It So Popular?
Several factors contribute to the growing popularity of holiday pet portraits:
- Families increasingly consider pets as family members.
- Seasonal photos become cherished keepsakes.
- Images are perfect for holiday cards and social media.
- Pet-friendly holiday events attract communities.
- Many sessions support local animal charities.
Featured Snippet: Benefits of Santa Pet Photography
| Benefit | Why It Matters |
|---|---|
| Family Memories | Creates lasting holiday keepsakes |
| Holiday Cards | Provides personalized seasonal greetings |
| Social Sharing | Generates engaging festive content |
| Pet Celebration | Includes pets in family traditions |
| Charity Support | Often raises funds for animal welfare |
Planning the Perfect Santa Pet Photography Session
Preparation plays a major role in achieving beautiful holiday portraits.
Choose the Right Location
The location should be comfortable, safe, and visually appealing.
Popular options include:
- Professional photography studios
- Christmas-themed pop-up events
- Shopping mall Santa displays
- Local pet boutiques
- Home-based holiday setups
A controlled indoor environment often produces the best results because lighting and distractions can be managed more effectively.
Select a Pet-Friendly Santa
Not every Santa performer is comfortable around animals. The ideal Santa should:
- Remain calm around pets
- Understand animal behavior
- Be patient during sessions
- Allow pets to approach naturally
- Avoid sudden movements
When pets feel relaxed, expressions appear more natural and authentic in photographs.
Prepare Pets Before the Shoot
A little preparation can dramatically improve the outcome.
Before the session:
- Exercise energetic dogs.
- Bring favorite treats.
- Pack familiar toys.
- Ensure grooming is completed.
- Carry water and cleanup supplies.
A relaxed pet is far easier to photograph than one with excess energy.
Essential Props for Holiday Pet Portraits
The right props can elevate your Christmas pet photography from ordinary to unforgettable.
Popular Christmas-Themed Props
Some of the most effective props include:
- Santa hats
- Holiday scarves
- Decorative gift boxes
- Christmas trees
- Faux snow
- Holiday blankets
- Reindeer antlers
- Festive wreaths
However, avoid overwhelming the scene with too many accessories.
Prop Selection Guide
| Prop Type | Best For | Difficulty Level |
|---|---|---|
| Santa Hat | Dogs and calm cats | Easy |
| Holiday Scarf | Most pets | Very Easy |
| Gift Boxes | All pets | Easy |
| Reindeer Antlers | Patient pets | Moderate |
| Christmas Tree Setup | Family portraits | Moderate |
| Faux Snow Scene | Creative holiday images | Advanced |
Safety Considerations
Always prioritize animal comfort over aesthetics.
Avoid:
- Tight costumes
- Small choking hazards
- Heavy accessories
- Bright flashing decorations
- Toxic holiday plants
Comfortable pets create better photos than heavily dressed pets.
How to Capture Better Santa Pet Photography
Technical execution makes a significant difference in image quality.
Use Fast Camera Settings
Pets rarely sit perfectly still.
Recommended settings include:
- Fast shutter speed
- Continuous autofocus
- Burst shooting mode
- Wide aperture for background blur
These settings help capture sharp expressions and spontaneous moments.
Focus on the Eyes
The eyes tell the story in pet portraits.
Sharp, expressive eyes instantly create emotional connections and draw viewers into the image.
Capture Natural Interactions
Instead of forcing poses, encourage genuine moments.
Examples include:
- Santa offering treats
- Pet looking toward the owner
- Curious interactions with gifts
- Playful reactions to decorations
Natural behavior often creates the most memorable photographs.
Creating Different Styles of Santa Pet Photography

Not every holiday portrait needs the same approach.
Traditional Santa Portraits
This classic style features:
- Santa seated prominently
- Pet sitting beside or on Santa’s lap
- Clean holiday backdrop
- Formal composition
These images work exceptionally well for holiday cards.
Lifestyle Holiday Sessions
Lifestyle sessions focus on storytelling.
Examples include:
- Pets opening gifts
- Santa reading near a fireplace
- Family and pets together
- Cozy Christmas morning scenes
These photographs feel authentic and emotionally engaging.
Creative Studio Concepts
Creative themes may include:
- Winter wonderland settings
- North Pole workshops
- Candy cane backdrops
- Vintage Christmas scenes
Unique concepts help photographers differentiate their services.
Santa Pet Photography Setup Comparison
Different setups offer different advantages.
| Setup Style | Advantages | Challenges | Best Use |
|---|---|---|---|
| Studio Setup | Controlled lighting | Higher costs | Professional portraits |
| Home Setup | Comfortable pets | Limited space | Casual sessions |
| Mall Santa Event | High traffic | Distractions | Quick portraits |
| Outdoor Holiday Scene | Natural light | Weather concerns | Creative photography |
| Charity Event Booth | Community engagement | Limited session time | Fundraising campaigns |
Common Challenges and Solutions
Holiday pet photography presents unique obstacles.
Nervous Pets
Some animals feel anxious around strangers and costumes.
Solutions:
- Allow adjustment time
- Use positive reinforcement
- Keep sessions short
- Let owners stay nearby
Distracted Pets
Holiday decorations often attract attention.
To maintain focus:
- Use squeaky toys
- Offer treats strategically
- Minimize background distractions
- Employ assistants when possible
Multiple Pet Sessions
Photographing multiple pets can be challenging.
Success strategies include:
- Photograph individually first
- Combine pets gradually
- Use coordinated handlers
- Reward cooperation frequently
Patience often produces the best group portraits.
Pros and Cons of Santa Pet Photography
Pros
- Creates memorable holiday keepsakes
- Generates personalized greeting cards
- Strengthens family traditions
- Supports pet-friendly community events
- Provides unique social media content
Cons
- Some pets dislike costumes
- Sessions can be stressful for anxious animals
- Seasonal demand may increase costs
- Requires careful planning
- Limited holiday availability
Common Mistakes to Avoid
Many holiday pet sessions fail because of avoidable errors.
Overdressing Pets
Too many accessories can create discomfort and frustration.
Rushing the Session
Pets often need time to become familiar with the environment.
Ignoring Pet Personality
Every animal has unique behaviors and comfort levels.
Using Excessive Props
A cluttered scene distracts from the pet and Santa.
Skipping Trial Photos
Test shots help identify lighting, posing, and composition issues before the session begins.
Best Practices for Outstanding Results
Following proven techniques increases the likelihood of successful holiday portraits.
Keep Sessions Short
Most pets perform best during brief photography sessions.
Reward Frequently
Positive reinforcement helps maintain engagement.
Maintain Comfortable Temperatures
Heavy costumes and studio lights can make pets uncomfortable.
Prioritize Safety
Never force a pose or interaction.
Embrace Imperfect Moments
Some of the most beloved pet photographs happen unexpectedly.
A curious head tilt, playful expression, or spontaneous interaction often becomes the favorite image from the session.
Future Trends in Santa Pet Photography
Holiday pet photography continues evolving.
Emerging trends include:
- Luxury holiday portrait experiences
- Personalized Christmas story themes
- Pet-and-family holiday packages
- Charity fundraising photography events
- Social media-ready vertical portrait formats
As pets become increasingly integrated into family traditions, demand for festive pet portraits is likely to continue growing.
Conclusion
Santa pet photography combines holiday spirit, family traditions, and beloved pets into unforgettable images. Whether you’re planning a professional holiday session or organizing a festive community event, success comes from preparation, patience, and a pet-first approach.
By choosing the right setup, keeping animals comfortable, using thoughtful props, and focusing on genuine interactions, you can create holiday portraits that families treasure for years. The best Christmas pet photos aren’t always perfectly posed—they capture the unique personality and joy that pets bring to the holiday season.
Frequently Asked Questions
1. What is santa pet photography?
Santa pet photography is a holiday-themed portrait session where pets are photographed with Santa Claus or within a festive Christmas setting.
2. How should I prepare my pet for a Santa photo session?
Exercise your pet beforehand, bring treats and toys, ensure grooming is completed, and allow time for adjustment upon arrival.
3. Are Santa pet photography sessions safe for cats?
Yes. As long as the environment is calm and handlers prioritize the cat’s comfort, these sessions can be safe and successful.
4. What should pets wear for holiday portraits?
Simple accessories such as holiday scarves, Santa hats, or festive collars usually work best without causing discomfort.
5. When should I book a holiday pet photography session?
Booking at least four to six weeks before Christmas is recommended since holiday sessions often fill quickly.
/ You May Also Read /
Photography Locations Near Me: Best UK Spots to Visit in 2026
Silk Road Photography: Capturing History, Culture, and Landscapes Along the Ancient Trade Route
Photography Tips
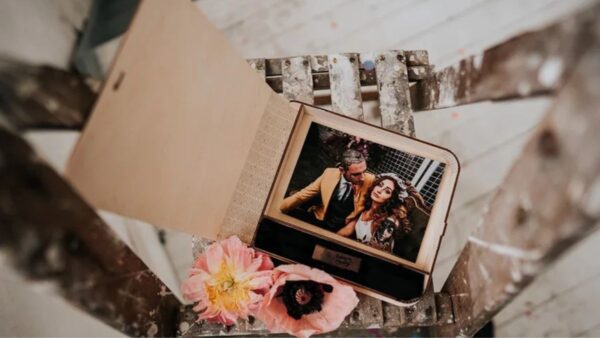
Wedding Photography Packaging: Complete Guide to Creating Memorable Client Experiences

Wedding photography packaging is much more than placing photos inside a box. It is the final touchpoint that clients experience after their wedding day, making it one of the most powerful opportunities to leave a lasting impression.
In today’s competitive photography market, thoughtful wedding photography packaging helps photographers elevate their brand, increase referrals, strengthen client relationships, and create a premium experience. Whether you are an established wedding photographer or just starting your business, investing in professional packaging can significantly enhance perceived value.
This guide explores everything you need to know about creating memorable wedding photography packaging that delights clients and supports long-term business growth.
What Is Wedding Photography Packaging?
Wedding photography packaging refers to the presentation and delivery materials used when providing wedding photographs to clients.
These materials may include:
- Wedding albums
- Custom USB drives
- Print boxes
- Framed photographs
- Thank-you cards
- Branded wrapping
- Keepsake boxes
- Photo books
- Digital delivery products
The goal is simple: transform photo delivery into an unforgettable experience.
Why Packaging Matters
Clients often remember how they received their wedding memories almost as much as the photographs themselves.
Effective packaging can:
- Increase perceived value
- Encourage social media sharing
- Strengthen brand recognition
- Generate referrals
- Improve client satisfaction
- Differentiate your photography business
Benefits of Premium Wedding Photography Packaging
A carefully designed delivery package creates emotional connections and enhances professionalism.
Creates a Luxury Client Experience
Weddings are emotional events. When clients receive beautifully packaged memories, they feel that their investment was worthwhile.
Luxury presentation adds excitement and anticipation before viewing the final images.
Improves Brand Recognition
Custom packaging helps reinforce your visual identity.
Elements such as:
- Logos
- Brand colors
- Custom inserts
- Personalized messages
all contribute to stronger brand recall.
Encourages Word-of-Mouth Marketing
Many couples share their delivery experience online.
An attractive package often appears in:
- Instagram stories
- Facebook posts
- Wedding blogs
- Referral conversations
This creates organic marketing opportunities.
Types of Wedding Photography Packaging
Different photographers offer different levels of packaging based on pricing and client expectations.
| Packaging Type | Best For | Value Added |
|---|---|---|
| Digital Delivery | Budget packages | Fast and convenient |
| USB Presentation Box | Mid-range packages | Professional appearance |
| Luxury Wedding Album | Premium packages | Long-term keepsake |
| Fine Art Print Box | High-end clients | Display-ready photos |
| Complete Keepsake Collection | Luxury weddings | Exceptional experience |
Digital Delivery Packages
Digital galleries remain popular because they provide quick access to photographs.
However, combining digital delivery with physical presentation often creates greater perceived value.
USB Presentation Boxes
Custom USB boxes remain a favorite among wedding photographers.
Features may include:
- Wooden boxes
- Acrylic boxes
- Leather cases
- Engraved designs
- Custom branding
Wedding Albums
Albums remain one of the most profitable photography products.
A professionally designed wedding album:
- Preserves memories
- Adds tangible value
- Creates heirloom products
- Enhances package pricing
Fine Art Print Collections
Fine art prints appeal to couples who want wall art or framed memories.
Popular options include:
- Matted prints
- Canvas prints
- Framed enlargements
- Gallery wall collections
Essential Elements of Great Wedding Photography Packaging
Successful packaging combines aesthetics, functionality, and emotional appeal.
Presentation Quality
Every component should reflect your brand standards.
Consider:
- Premium materials
- Durable construction
- Elegant finishing
- Consistent design
Personalization
Personalized details create stronger emotional connections.
Examples include:
- Couple’s names
- Wedding date
- Custom messages
- Personalized album covers
Protection and Durability
Photography products are valuable and often irreplaceable.
Packaging should protect:
- Prints
- Albums
- USB drives
- Framed artwork
Unboxing Experience
Modern consumers appreciate memorable unboxing experiences.
Small details matter:
- Tissue wrapping
- Satin ribbons
- Handwritten notes
- Custom inserts
Wedding Photography Packaging Materials Comparison
Choosing the right materials directly impacts quality and budget.
| Material | Appearance | Durability | Cost Level |
|---|---|---|---|
| Cardboard Boxes | Good | Moderate | Low |
| Kraft Packaging | Rustic | Moderate | Low |
| Wooden Boxes | Premium | High | Medium |
| Acrylic Cases | Luxury | High | High |
| Leather Covers | Elegant | High | Premium |
Wooden Packaging
Wooden presentation boxes offer a timeless and elegant look.
Advantages:
- Durable
- Customizable
- Environmentally friendly
- Premium appearance
Acrylic Packaging
Acrylic products provide a modern luxury feel.
They work particularly well for:
- Contemporary weddings
- High-end brands
- Luxury photo products
How to Design Packaging That Matches Your Brand
Consistency is essential for professional branding.
Define Your Brand Style
Ask yourself:
- Is your brand luxury?
- Is it rustic?
- Is it modern?
- Is it minimalist?
Your packaging should reflect the same visual identity as your website and portfolio.
Use Consistent Brand Elements
Include:
- Logo placement
- Brand typography
- Color palette
- Signature messaging
Focus on Client Emotions
Clients are not simply purchasing photographs.
They are investing in memories.
Your packaging should communicate:
- Celebration
- Nostalgia
- Appreciation
- Exclusivity
Packaging Ideas for Different Wedding Photography Packages
Different service levels require different presentation strategies.
| Package Tier | Recommended Packaging | Client Perception |
|---|---|---|
| Basic | Digital gallery + thank-you card | Professional |
| Standard | USB box + prints | Premium |
| Premium | Album + print box | Luxury |
| Signature | Complete keepsake collection | Exclusive |
Basic Package Ideas
Affordable yet professional options include:
- Branded envelopes
- Printed thank-you cards
- Online galleries
- Small print sets
Premium Package Ideas
High-value presentation options include:
- Custom wooden boxes
- Fine art albums
- Personalized engraving
- Premium wrapping materials
Luxury Collection Ideas
Luxury clients often expect:
- Handcrafted albums
- Archival prints
- Custom storage cases
- Exclusive presentation boxes
Common Wedding Photography Packaging Mistakes
Even talented photographers sometimes overlook packaging details.
Using Generic Materials
Generic packaging can reduce perceived value.
Avoid:
- Plain shipping boxes
- Unbranded materials
- Low-quality presentation products
Ignoring Brand Consistency
Mismatched packaging creates confusion.
Ensure every item supports your overall brand identity.
Overcomplicating the Design
Luxury often comes from simplicity.
Avoid excessive:
- Decorations
- Inserts
- Colors
- Packaging layers
Neglecting Protection
Beautiful packaging is ineffective if products arrive damaged.
Always prioritize safe delivery.
Best Practices for Wedding Photography Packaging
Follow these proven practices to maximize client satisfaction.
Invest in Quality Materials
Quality materials immediately improve perceived value.
Include Personal Touches
Handwritten notes remain one of the most memorable additions.
Keep Branding Subtle
Clients should feel celebrated rather than marketed to.
Create a Consistent Workflow
Develop a standardized packaging process to maintain quality.
Test the Unboxing Experience
Experience your packaging as a client would.
Look for opportunities to improve:
- Presentation
- Organization
- Emotional impact
Pros and Cons of Premium Wedding Photography Packaging
Pros
- Higher perceived value
- Better client satisfaction
- Increased referrals
- Stronger branding
- Upselling opportunities
- Enhanced professionalism
Cons
- Higher costs
- Additional preparation time
- Storage requirements
- Shipping challenges
- Inventory management
Practical Example: Building a Memorable Client Package
Imagine a premium wedding collection that includes:
- Personalized wooden keepsake box
- Custom USB drive
- 20 fine art prints
- Handwritten thank-you card
- Luxury wedding album
- Branded wrapping materials
The client receives a complete experience rather than just digital files.
This approach often increases client satisfaction and referral rates because it feels special and memorable.
Conclusion
Wedding photography packaging plays a vital role in how clients perceive your work and your brand. While exceptional photography remains the foundation of success, presentation can significantly influence client satisfaction and long-term business growth.
The best packaging solutions balance aesthetics, functionality, and emotional impact. Whether you offer simple digital galleries or luxury heirloom collections, thoughtful presentation transforms photo delivery into an experience that clients remember and share.
By investing in quality materials, maintaining consistent branding, and focusing on memorable client experiences, photographers can create packaging that strengthens relationships and enhances business value.
Frequently Asked Questions
1. What is wedding photography packaging?
Wedding photography packaging refers to the materials and presentation methods used to deliver wedding photos, albums, prints, and digital files to clients.
2. Why is wedding photography packaging important?
It increases perceived value, enhances client satisfaction, supports branding, and encourages referrals.
3. What should be included in a wedding photography package?
Common items include albums, prints, USB drives, online galleries, thank-you cards, and keepsake boxes.
4. What is the best material for wedding photo packaging?
Wooden boxes, premium cardboard, leather products, and acrylic presentation cases are among the most popular options.
5. How can photographers make packaging more memorable?
Personalization, premium materials, branded presentation, and thoughtful unboxing experiences help create lasting impressions.
/ You May Also Read /
Why the Quality of Wedding Photography Declines: Causes, Warning Signs, and Solutions
Engagement Photos: The Complete Guide to Stunning and Meaningful Couple Portraits
-

 Photography Tips3 days ago
Photography in the Studio: Essential Tips and Setup Guide for Better Shots
-
 Photography Tips3 days ago
Portraits and Photography: Your Complete Guide to Capturing Stunning Images in 2026
-

 Photography Tips3 days ago
Photography Locations Near Me: Best UK Spots to Visit in 2026
-

 Photography Tips3 days ago
Photography Places Near Me: Top 10 Hidden Gems in the UK You Need to Shoot
-

 Lifestyle2 weeks ago
Family Photography: Best Poses, Locations & Expert Tips for Stunning Shots
-

 Photography Tips3 days ago
Beginner Photography Camera Guide: How to Choose the Perfect First Camera
-

 Photography Tips3 days ago
Challenges of Photography: Common Obstacles Every Photographer Faces and How to Overcome Them
-

 Photography Tips3 days ago
Drone Photography Near Me: How to Find the Best Aerial Photography Services in Your Area