
Studio Photography
Types of Lighting in Photography: A Complete Beginner-to-Pro Guide

Photography Tips
Maternity Photography Couples: Creative Ideas, Poses, and Planning Tips for Stunning Pregnancy Photos
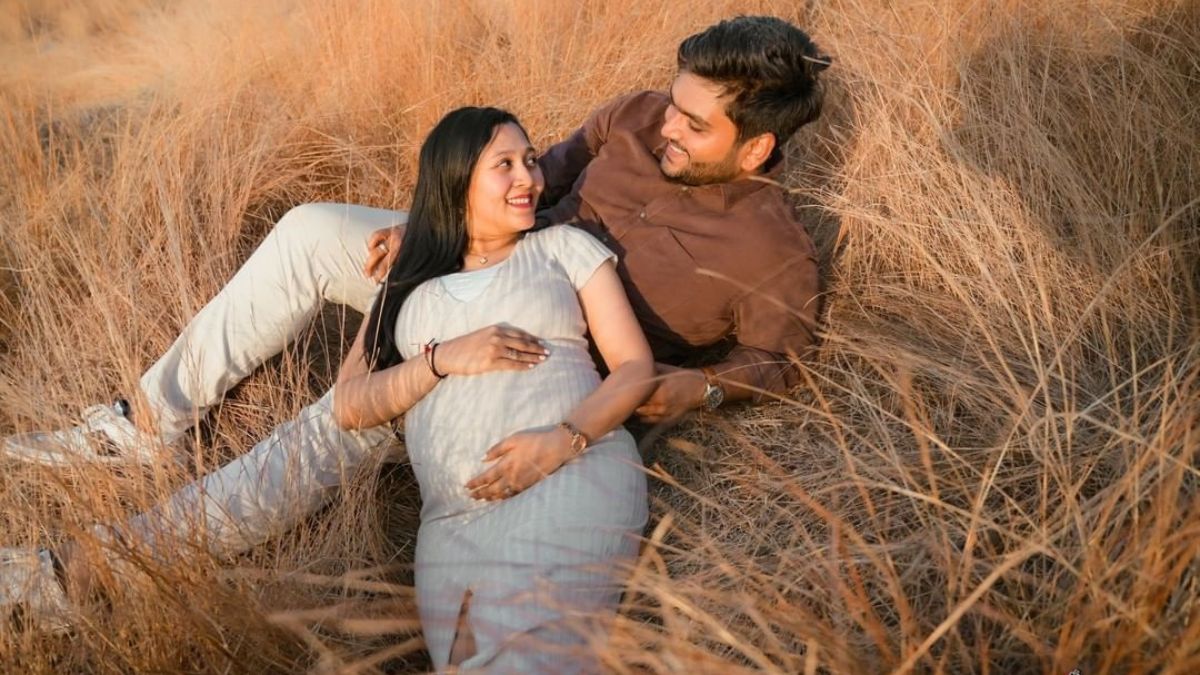
Pregnancy is one of life’s most meaningful milestones, and maternity photography couples sessions provide a wonderful way to preserve those memories forever. While maternity portraits often focus on the mother-to-be, including both partners creates a deeper emotional story that captures love, anticipation, and the journey into parenthood.
Whether you’re planning your first maternity session or looking for fresh inspiration, understanding how to prepare, pose, and choose the right setting can help you create timeless images you’ll treasure for years.
In this guide, you’ll discover creative maternity photo ideas, planning tips, pose suggestions, common mistakes to avoid, and professional best practices for achieving stunning results.
What Is Maternity Couple Photography?
Maternity couple photography is a professional photo session that documents the pregnancy journey while highlighting the bond between expecting parents.
The goal is to capture:
- Emotional connection
- Excitement about the baby
- Natural interactions
- Family anticipation
- Beautiful pregnancy milestones
These sessions can take place outdoors, indoors, in a studio, or at meaningful locations that tell the couple’s unique story.
Why Couples Should Participate in Maternity Photos
Including both partners creates more dynamic and emotional photographs. It also helps tell a complete story of the family’s transition into parenthood.
Benefits include:
- Stronger emotional storytelling
- More posing variety
- Shared memories
- Meaningful keepsakes for the child
- Enhanced family photo collections
Best Time for Maternity Photography Couples Sessions
Timing plays a major role in achieving beautiful maternity portraits.
Most photographers recommend scheduling sessions between 28 and 34 weeks of pregnancy.
At this stage:
- The baby bump is clearly visible.
- Most mothers still feel comfortable moving around.
- Swelling and fatigue are often more manageable.
- There is flexibility if the baby arrives early.
Maternity Session Timing Guide
| Pregnancy Stage | Benefits | Considerations |
|---|---|---|
| 20–27 Weeks | Early planning and smaller bump | Less dramatic maternity look |
| 28–34 Weeks | Ideal balance of comfort and visibility | Most recommended timeframe |
| 35–38 Weeks | Full bump appearance | Mobility may become challenging |
| 39+ Weeks | Last-minute memories | Risk of early labor |
Creative Maternity Photography Couples Ideas
Choosing a concept helps create more meaningful photographs.
Outdoor Nature Sessions
Natural environments provide stunning backdrops and beautiful lighting.
Popular locations include:
- Beaches
- Parks
- Forest trails
- Mountain overlooks
- Flower fields
Outdoor sessions often feel relaxed and authentic while offering plenty of visual variety.
In-Home Lifestyle Photography
Lifestyle sessions focus on genuine moments in a comfortable environment.
Ideas include:
- Decorating the nursery
- Reading baby books together
- Preparing baby clothes
- Relaxing on the couch
- Sharing morning routines
These photos often feel intimate and personal.
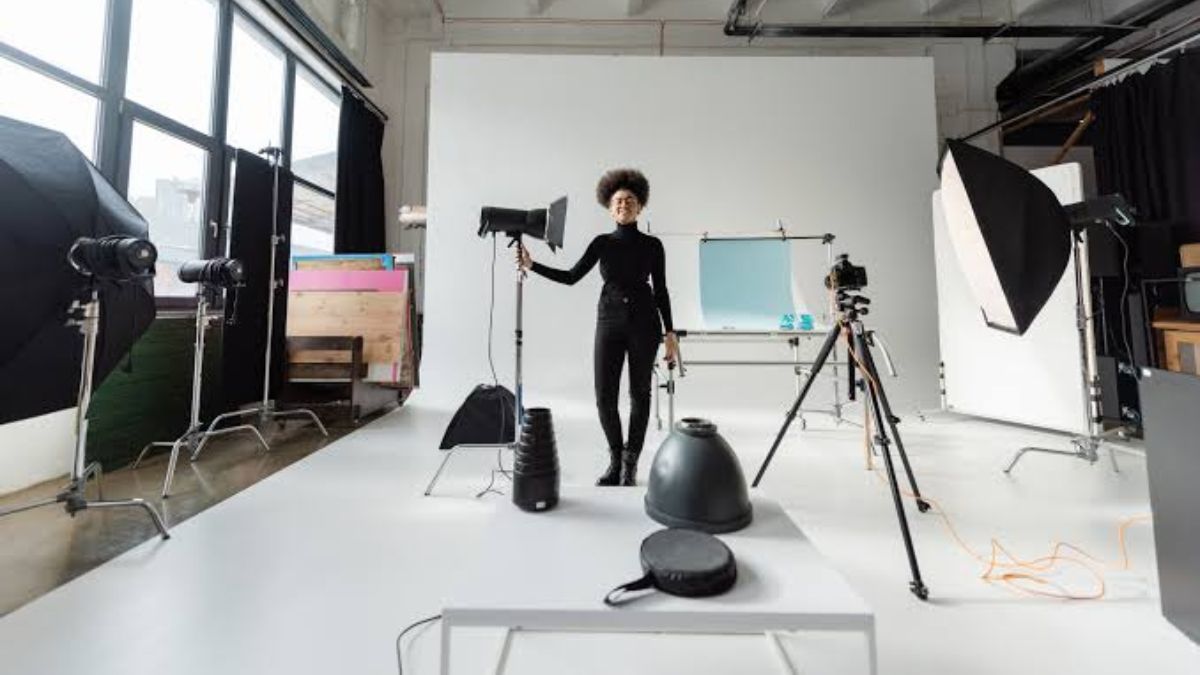
Studio Maternity Portraits
Studio photography emphasizes:
- Clean backgrounds
- Controlled lighting
- Elegant wardrobe styling
- Artistic compositions
This option is perfect for couples seeking timeless and sophisticated portraits.
Seasonal Maternity Sessions
Seasonal themes can add visual interest.
Examples include:
| Season | Photography Ideas | Visual Style |
|---|---|---|
| Spring | Flower gardens, blossoms | Fresh and colorful |
| Summer | Beach sunsets, open fields | Bright and warm |
| Autumn | Falling leaves, rustic settings | Cozy and romantic |
| Winter | Snow scenes, indoor fireplaces | Elegant and dramatic |
Essential Poses for Maternity Photography Couples
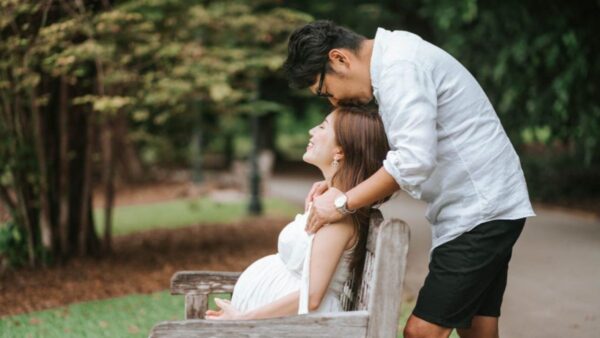
Posing naturally is often the biggest concern for expecting parents.
Fortunately, simple interactions usually create the best photographs.
Belly Embrace Pose
One partner gently wraps their arms around the pregnant belly while standing close together.
This pose highlights:
- Connection
- Anticipation
- Physical closeness
Forehead-to-Forehead Pose
The couple stands face-to-face with foreheads touching.
This creates:
- Intimacy
- Emotional expression
- Romantic imagery
Walking Together
Rather than standing still, couples walk naturally while talking and laughing.
Benefits include:
- Relaxed expressions
- Authentic interactions
- Dynamic movement
Looking at the Baby Bump
Both partners focus their attention on the belly.
This simple pose creates a powerful storytelling moment and symbolizes excitement for the baby’s arrival.
Nursery Preparation Pose
Capturing parents in the baby’s future room creates meaningful images filled with anticipation.
How to Choose the Perfect Outfits
Wardrobe choices significantly influence the final results.
The best maternity outfits complement the location and photography style.
Outfit Tips for Expecting Mothers
Consider:
- Flowing dresses
- Neutral colors
- Soft fabrics
- Fitted gowns that highlight the bump
- Elegant accessories
Outfit Tips for Partners
Partners should coordinate rather than match exactly.
Good choices include:
- Solid colors
- Neutral tones
- Simple button-down shirts
- Well-fitted casual clothing
- Minimal patterns
Outfit Planning Framework
| Element | Recommended Choice | Avoid |
|---|---|---|
| Colors | Neutral, earth tones, pastels | Neon colors |
| Patterns | Simple textures | Busy prints |
| Fit | Comfortable and tailored | Oversized clothing |
| Accessories | Minimal and elegant | Distracting accessories |
| Footwear | Location-appropriate shoes | Worn-out shoes |
How to Prepare for a Successful Maternity Session
Preparation reduces stress and improves the overall experience.
Schedule Around Lighting
Photographers often prefer:
- Sunrise sessions
- Golden hour before sunset
These times provide softer and more flattering light.
Prioritize Comfort
Bring:
- Water
- Comfortable shoes
- Touch-up makeup items
- Extra outfit options
Discuss Expectations
Before the session, communicate with the photographer about:
- Preferred style
- Must-have poses
- Location ideas
- Editing preferences
Create a Mood Board
Gather inspiration images to help communicate your vision clearly.
Pros and Cons of Maternity Couple Photography
Pros
- Preserves meaningful memories
- Celebrates the parenting journey
- Strengthens emotional storytelling
- Creates lasting family keepsakes
- Offers creative photo opportunities
Cons
- Requires scheduling and planning
- Weather can affect outdoor shoots
- Professional photography may increase costs
- Some couples may initially feel camera shy
Despite these challenges, most parents consider maternity portraits a worthwhile investment.
Common Mistakes to Avoid
Many couples unintentionally reduce the quality of their maternity photographs by overlooking small details.
Waiting Too Long
Scheduling too close to the due date may lead to discomfort or missed opportunities.
Choosing Distracting Clothing
Busy patterns and bright colors often draw attention away from the subjects.
Overposing
Forced poses can appear unnatural.
Instead:
- Focus on interaction
- Laugh naturally
- Talk during the session
- Move comfortably
Ignoring Location Planning
The right location contributes significantly to the final aesthetic.
Scout locations in advance whenever possible.
Forgetting Personal Details
Meaningful props can add emotional depth.
Examples include:
- Baby shoes
- Ultrasound photos
- Name signs
- Special gifts
Best Practices for Stunning Maternity Couple Photos
Following professional recommendations can elevate the final results.
Focus on Genuine Emotion
Authentic interactions usually outperform perfectly posed photographs.
Keep the Session Relaxed
The best images often happen between poses when couples are simply enjoying the experience.
Use Natural Light Whenever Possible
Soft natural lighting enhances skin tones and creates a timeless appearance.
Tell a Story
Instead of treating each image as a separate portrait, think about creating a visual narrative.
Work With an Experienced Photographer
Photographers specializing in maternity sessions understand:
- Flattering angles
- Comfortable posing
- Lighting techniques
- Pregnancy-safe session planning
Capturing Meaningful Moments Beyond the Baby Bump
The most memorable maternity photographs are rarely just about the pregnancy itself.
They capture:
- Excitement
- Hope
- Partnership
- Love
- Future dreams
Whether you’re standing in a flower field at sunset or preparing the nursery together, these moments become treasured reminders of a remarkable chapter in your family’s story.
Conclusion
Maternity photography couples sessions offer far more than beautiful pictures. They preserve the emotions, connection, and anticipation that make pregnancy such a unique life experience. By choosing the right timing, location, wardrobe, and poses, expecting parents can create timeless images that celebrate their journey into parenthood.
The key is to focus on authentic moments rather than perfection. When genuine emotion takes center stage, the resulting photographs become lasting memories that families cherish for generations.
Frequently Asked Questions
1. When should couples schedule a maternity photoshoot?
Most photographers recommend scheduling between 28 and 34 weeks of pregnancy when the baby bump is clearly visible and the mother remains relatively comfortable.
2. What should couples wear for maternity photos?
Neutral colors, coordinated outfits, comfortable fabrics, and timeless styles generally produce the best results.
3. Are outdoor maternity photos better than studio sessions?
Neither is inherently better. Outdoor sessions provide natural scenery, while studio sessions offer controlled lighting and a more polished appearance.
4. How long does a maternity couple photography session last?
Most sessions last between 60 and 120 minutes depending on locations, outfit changes, and photography style.
5. Can older children join maternity couple photos?
Yes. Including siblings can create meaningful family portraits and document the transition to a growing family.
/ You May Also Read /
Family Photography: Best Poses, Locations & Expert Tips for Stunning Shots
Wedding Photography Packages: Complete Guide to Pricing, Coverage, and Value
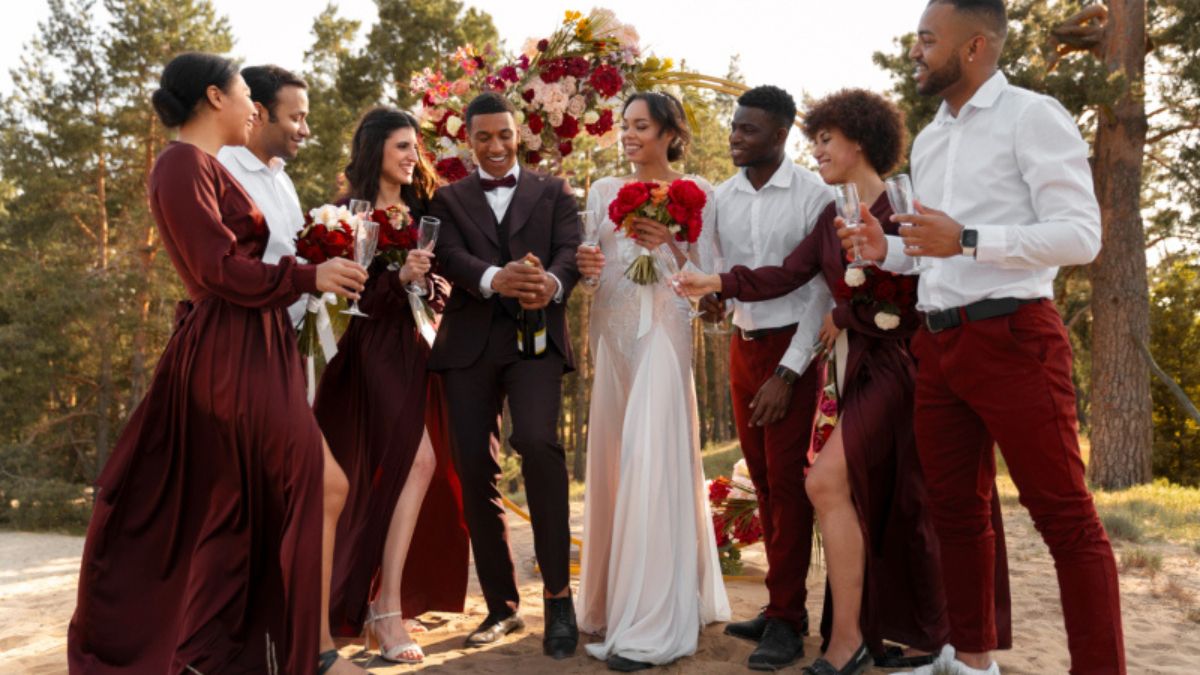
Choosing the right wedding photography packages is one of the most important decisions you’ll make during wedding planning. While flowers fade and the cake disappears, your wedding photos remain for a lifetime. That’s why selecting the right photography coverage deserves careful consideration.
However, many couples feel overwhelmed when comparing package options, pricing structures, and included services. Some photographers offer simple collections, while others provide comprehensive experiences that include engagement sessions, albums, and multiple photographers.
This guide explains everything you need to know about wedding photography pricing, package options, and how to find the best value for your investment.
What Are Wedding Photography Packages?
Wedding photography packages are pre-designed service bundles that photographers offer to simplify booking and pricing. Instead of purchasing every service separately, couples choose a package that fits their wedding size, timeline, and budget.
Most photography collections include a combination of:
- Hours of coverage
- Edited digital images
- Online galleries
- Print rights
- Engagement sessions
- Wedding albums
- Second photographers
- Sneak peek photos
Why Photographers Offer Packages
Packages help photographers streamline their services while helping couples compare options more easily.
Benefits include:
- Transparent pricing
- Easier planning
- Better overall value
- Customized coverage options
- Simplified booking process
Typical Wedding Photography Package Tiers
Most photographers offer three package levels: basic, standard, and premium.
| Package Level | Coverage Hours | Common Inclusions | Best For |
|---|---|---|---|
| Basic | 4–6 Hours | Digital gallery, edited photos | Small weddings |
| Standard | 8–10 Hours | Full-day coverage, engagement session | Most couples |
| Premium | 10–12+ Hours | Albums, second shooter, extended coverage | Large weddings |
The standard package is often the most popular because it balances coverage and value.
Basic Photography Collections
Basic packages typically cover:
- Ceremony
- Family portraits
- Couple portraits
- Limited reception coverage
These options work well for:
- Courthouse weddings
- Elopements
- Small intimate ceremonies
- Destination micro weddings
Standard Photography Collections
Standard packages usually include:
- Bridal preparation
- Ceremony
- Portrait sessions
- Reception highlights
- Hundreds of edited images
This level provides enough coverage for most traditional weddings.
Premium Photography Collections
Premium packages often deliver a complete wedding experience.
Additional services may include:
- Second photographer
- Luxury album
- Engagement session
- Extended coverage
- Rehearsal dinner photography
- Faster photo delivery
Understanding Wedding Photography Pricing
Pricing varies significantly based on experience, location, demand, and included services.
Factors That Influence Cost
Several elements affect package pricing.
Experience Level
Highly experienced photographers often charge more because they offer:
- Consistent results
- Advanced editing skills
- Reliable backup systems
- Professional workflow
Coverage Duration
More coverage hours generally increase the total investment.
Number of Photographers
Adding a second shooter allows more moments to be captured simultaneously.
Examples include:
- Bride and groom preparations
- Multiple ceremony angles
- Larger family groups
- Reception candid moments
Albums and Prints
Physical products increase package costs but often provide excellent long-term value.
What’s Usually Included in Wedding Photography Packages?
Understanding inclusions helps couples compare photographers fairly.
| Feature | Usually Included | Optional Add-On |
|---|---|---|
| Edited Digital Images | Yes | Rarely |
| Online Gallery | Yes | No |
| Print Release | Often | Sometimes |
| Engagement Session | Mid-Level & Premium | Yes |
| Wedding Album | Premium | Yes |
| Second Photographer | Premium | Yes |
| Drone Photography | Sometimes | Often |
When comparing photographers, focus on overall value rather than image quantity alone.
Digital Image Delivery
Most photographers provide:
- High-resolution images
- Professionally edited photos
- Downloadable galleries
- Online sharing options
Engagement Sessions
Engagement sessions offer several advantages:
- Comfort in front of the camera
- Stronger photographer relationship
- Save-the-date photos
- Additional memories before the wedding
How to Choose the Right Wedding Photography Packages
Selecting the right package requires balancing budget, timeline, and priorities.
Consider Your Wedding Timeline
A realistic timeline helps determine required coverage.
| Wedding Type | Recommended Coverage |
|---|---|
| Elopement | 2–4 Hours |
| Small Wedding | 4–6 Hours |
| Traditional Wedding | 8–10 Hours |
| Luxury Wedding | 10–12+ Hours |
If you want preparation photos, reception coverage, and an exit celebration, a longer package is usually necessary.
Prioritize Important Moments
Ask yourself:
- Do you want getting-ready photos?
- Is a first look important?
- Will there be special cultural traditions?
- Do you want reception dancing documented?
Your answers help determine the ideal coverage length.
Evaluate Portfolio Quality
A photographer’s portfolio reveals:
- Editing consistency
- Lighting expertise
- Creativity
- Storytelling ability
Look beyond highlight photos and request full wedding galleries whenever possible.
Questions to Ask Before Booking
Before signing a contract, ask these important questions.
How Many Weddings Have You Photographed?
Experience often improves confidence and problem-solving abilities during unpredictable wedding situations.
What Happens If an Emergency Occurs?
Professional photographers should have:
- Backup equipment
- Emergency plans
- Associate photographers
- Data protection systems
How Long Is the Delivery Time?
Typical delivery timelines range from:
- Sneak peeks: 24–72 hours
- Full galleries: 4–12 weeks
Delivery schedules vary by photographer and season.
Are Travel Fees Included?
Always clarify:
- Travel charges
- Accommodation requirements
- Parking fees
- Destination wedding expenses
Pros and Cons of Larger Photography Packages
Pros
- More complete wedding story
- Additional photographer coverage
- More images and variety
- Greater flexibility
- Premium products included
Cons
- Higher investment
- May include services you don’t need
- Larger image galleries require more review time
For many couples, the ideal choice falls in the middle rather than selecting the most expensive option.
Common Mistakes Couples Make
Avoiding these mistakes can save money and prevent disappointment.
Choosing Based Only on Price
Lower pricing doesn’t always provide better value.
Instead, consider:
- Experience
- Portfolio quality
- Reviews
- Included services
Booking Too Little Coverage
Many couples underestimate how quickly wedding days pass.
Running out of photography coverage before major reception events can be frustrating.
Ignoring Contract Details
Always review:
- Cancellation policies
- Delivery timelines
- Payment schedules
- Usage rights
Focusing Only on Image Quantity
A gallery of 500 exceptional photos often provides more value than 2,000 average images.
Best Practices for Maximizing Photography Value
Create a Detailed Timeline
Work with your photographer to develop an efficient schedule.
Benefits include:
- Better lighting opportunities
- Reduced stress
- More portrait time
- Smoother transitions
Schedule Enough Portrait Time
Rushing portraits often leads to missed opportunities.
Aim for:
- Couple portraits: 30–60 minutes
- Family photos: 20–30 minutes
- Wedding party photos: 20–40 minutes
Communicate Expectations Clearly
Share:
- Must-have photo lists
- Family dynamics
- Cultural traditions
- Venue details
Good communication improves results significantly.
Trust Your Photographer
After hiring a professional, allow them creative freedom.
Natural moments often create the most memorable photographs.
Wedding Photography Package Red Flags
Watch for warning signs when evaluating photographers.
Potential concerns include:
- Extremely low pricing compared to competitors
- No backup equipment
- Limited portfolio examples
- Missing contracts
- Poor communication
- Unclear editing timelines
Professionalism matters just as much as photography skills.
Are Wedding Photography Packages Worth It?
For most couples, bundled packages offer better value than purchasing services individually.
Packages simplify planning while ensuring important wedding moments are captured professionally.
The best package isn’t necessarily the largest or most expensive. Instead, it’s the one that aligns with your wedding schedule, priorities, and budget.
By understanding package structures, comparing inclusions carefully, and asking the right questions, you can confidently invest in photography coverage that preserves your memories for decades to come.
Conclusion
Wedding photography is one of the few wedding investments that continues delivering value long after the celebration ends. Choosing among different wedding photography packages becomes much easier when you understand coverage options, pricing factors, and included services.
Focus on quality, experience, and the overall experience rather than simply searching for the lowest price. A thoughtfully selected photography package will help preserve every meaningful moment, from the excitement of getting ready to the final dance of the evening.
Frequently Asked Questions
1. How much do wedding photography packages usually cost?
Pricing varies by location and experience, but most couples invest between $1,500 and $5,000 for professional wedding photography coverage.
2. How many hours of wedding photography coverage do I need?
Most traditional weddings require 8–10 hours to fully document preparations, ceremony, portraits, and reception events.
3. Are engagement sessions included in wedding photography packages?
Many mid-tier and premium packages include engagement sessions, while others offer them as optional add-ons.
4. Is a second photographer worth it?
A second photographer provides additional angles, better coverage of large weddings, and more candid moments throughout the day.
5. What should I look for when comparing wedding photographers?
Compare portfolio quality, experience, package inclusions, reviews, communication, delivery timelines, and contract terms rather than focusing solely on price.
/ You May Also Read /
Family Photography: Best Poses, Locations & Expert Tips for Stunning Shots
Portraits and Photography: Your Complete Guide to Capturing Stunning Images in 2026
Introduction
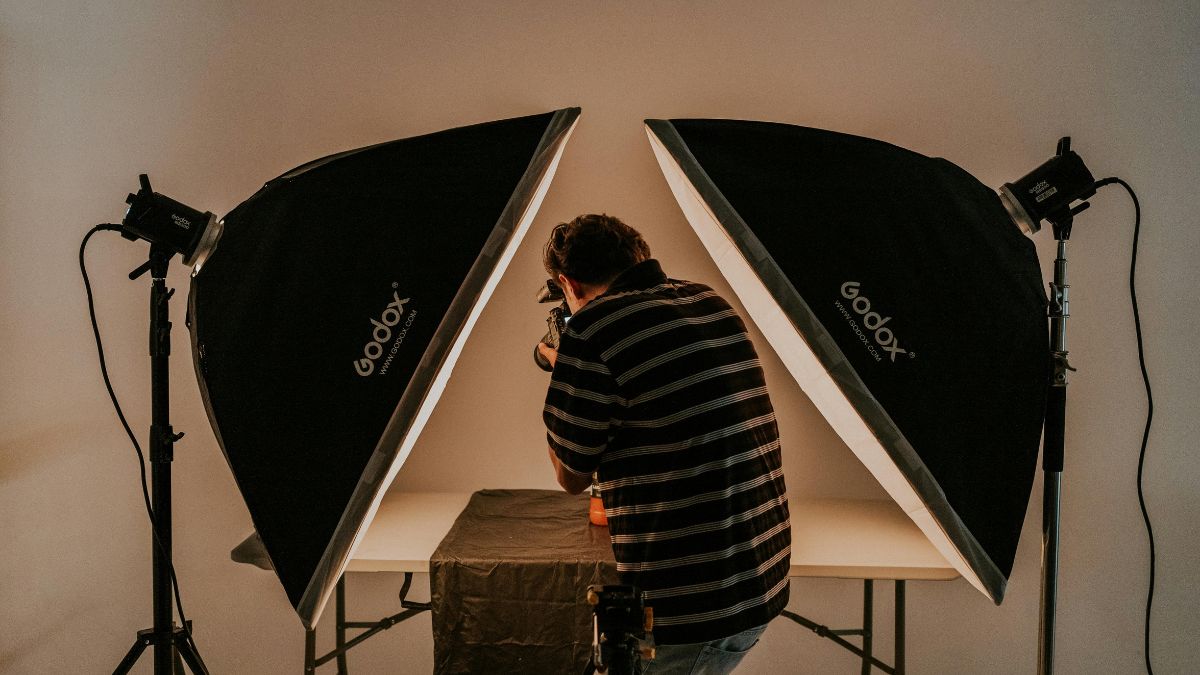
If you have ever wanted total control over how your images look, photography in the studio is where that journey truly begins. Unlike outdoor shooting, a studio gives you the power to shape every single element — the light, the background, the mood — exactly the way you envision it.
That level of creative control is exciting. But it also comes with a learning curve. You need to understand how artificial light behaves, how to position your subject, and which camera settings to reach for. Get those fundamentals right, and your images will look polished, professional, and purposeful.
This guide walks you through everything — from building your first studio setup to nailing your exposure every time. Whether you are a beginner starting from scratch or an enthusiast ready to level up, there is something here for you.
What Is Photography in the Studio?
Studio photography refers to any image captured in a controlled indoor environment, specifically designed for photographic work. It removes all the unpredictability of outdoor shooting — no harsh noon sun, no sudden wind, no strangers wandering into the frame.
At its core, a studio setup relies on three things: a light source (or multiple), a background, and enough space to work freely. Everything else — props, reflectors, backdrops — builds on top of that foundation.
Types of studio photography
Studio shooting covers a surprisingly wide range of subjects. Knowing which type you are working in helps you make smarter equipment and lighting choices.
- Portrait photography — headshots, editorial, and lifestyle portraits
- Product photography — e-commerce, commercial, and still-life
- Fashion photography — editorial, lookbooks, and advertising campaigns
- Food photography — menu shoots and brand content
- Fine art photography — conceptual and creative personal projects
Setting Up Your Studio Space: A Photography in the Studio Starter Guide
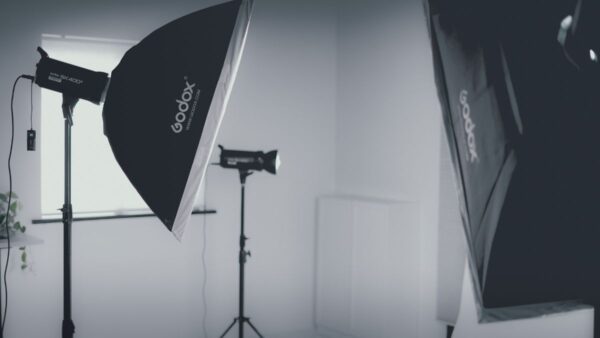
Before you fire a single flash, the physical space needs to be right. A cramped, cluttered room will limit your creativity and cause technical problems. You do not need a massive space — but you do need a functional one.
Minimum space requirements
For portrait work, aim for at least 10×12 feet of usable floor space. Product photography can be done in a much smaller area — even a tabletop setup on a kitchen counter can work beautifully with the right lighting.
| Photography type | Recommended studio size | Key requirement |
| Headshots / portraits | 10×12 ft minimum | Space for subject + background separation |
| Full-body fashion | 15×20 ft or larger | Room to back up for wide framing |
| Product / still life | Tabletop (4×4 ft surface) | Controlled light table or sweep |
| Food photography | 6×8 ft minimum | Overhead shooting angle access |
| Pet photography | 12×15 ft recommended | Non-slip flooring, safety space |
Essential studio gear to start with
You do not need the most expensive kit. Start with the essentials, learn them deeply, and then expand. Here is a solid starter list for most studio photographers.
- A strobe or continuous light source (speedlight, monolight, or LED panel)
- A softbox or umbrella modifier for diffused light
- A seamless paper backdrop (white, grey, and black cover most needs)
- A sturdy backdrop stand system
- At least one reflector or fill card
- A light meter (optional but highly recommended)
- Gaffer tape and sandbags for safety
Lighting Techniques That Actually Work
Lighting is the single most important skill in studio photography. Unlike natural light, which you chase and adapt to, studio light is something you build. That means getting it wrong is entirely avoidable — once you understand the basics.
Classic portrait lighting setups
| Lighting pattern | Light position | Effect / best for |
| Rembrandt lighting | 45° above, to the side | Dramatic triangle shadow — moody portraits |
| Loop lighting | Slightly above, 30–45° off-axis | Flattering, natural look — most commercial work |
| Butterfly lighting | Directly above the subject | Glamour look, emphasizes cheekbones |
| Split lighting | 90° directly to the side | Bold, graphic — editorial and artistic shoots |
| Broad lighting | Light on the near side of face | Wider face appearance — softens features |
Using modifiers effectively
A bare flash is harsh and unflattering for most subjects. Light modifiers change the quality of that light — making it softer, more diffused, and far more pleasing.
- Octaboxes produce beautiful, even, wrap-around light ideal for close-up portraits
- Strip boxes create narrow, directional light perfect for rim lighting or product edges
- Umbrellas are affordable and spread light broadly — great for larger group shots
- Beauty dishes give a punchy, slightly contrasty light popular in fashion and beauty work
- Gels add color — use them to change background hues or add creative color tones to skin
Camera Settings for Studio Work
Many photographers get the lighting right but struggle with camera settings when moving indoors. The good news is that studio shooting actually simplifies your exposure decisions considerably.
Recommended starting settings for flash photography
Studio flash is a frozen moment of light. That means your shutter speed does not affect exposure in the traditional sense — the flash duration does. Here is where to start.
- Shutter speed: Set to your camera’s sync speed (typically 1/160s to 1/250s)
- Aperture: Begin at f/8 for portraits, adjust flash power to match
- ISO: Keep it at your base ISO — usually 100 or 200 — for the cleanest files
- White balance: Set manually to match your flash (around 5500K for most strobes)
- Shoot in RAW format for maximum editing flexibility
Pros and Cons of Studio Photography
Pros
- Full control over lighting, background, and environment
- Weather-independent — shoot any day, any season
- Consistent, repeatable results for commercial clients
- Distraction-free environment focuses attention on the subject
- Easier post-processing with clean, predictable exposures
- Ideal for building a professional portfolio
Cons
- High upfront cost for lights, stands, and modifiers
- Can feel artificial or stiff without good direction
- Limited space restricts certain creative concepts
- Requires technical knowledge to set up correctly
- No natural environmental context for documentary work
- Power requirements and heat from continuous lights
Common Mistakes to Avoid
- Forgetting background separation. Placing your subject too close to the backdrop causes unwanted shadows to fall on it. Keep at least 4–6 feet between subject and background.
- Ignoring ambient light. Even in a studio, windows and overhead room lights can affect your exposure and color temperature. Always control or eliminate ambient light sources.
- Shooting wide open every time. A shallow depth of field is useful in some contexts, but studio work often benefits from stopping down to f/8–f/11 for sharp detail across the subject.
- Using only one light and no fill. A single bare light source creates harsh shadows. Add a reflector or a second, weaker fill light to balance things out.
- Not tethering your camera. Shooting tethered to a laptop lets you review images on a large screen instantly, catching focus issues and lighting problems before your subject leaves.
Best Practices for Studio Photography
- Test your lighting before your subject arrives. Fire a few test shots on a stand-in and refine your ratios, so you spend shoot time capturing great images — not troubleshooting.
- Use a grey card or colour checker to set a custom white balance. This makes colour grading in post dramatically faster and more consistent across a full shoot.
- Label your lighting setups. After a shoot, write down what worked — modifier type, distance from subject, power setting, and camera position. This becomes an invaluable personal reference library.
- Communicate clearly with your subjects. A relaxed, well-directed person always looks better on camera. Spend the first few minutes of every shoot building rapport before picking up the camera.
- Master one lighting setup completely before adding complexity. Loop lighting with a single softbox and a reflector can produce stunning results. You do not need five lights to make great studio photos.
Conclusion
Photography in the studio opens up a world of creative possibilities that outdoor shooting simply cannot match. Once you understand the relationship between light, subject, and camera, you will find that a studio is not a limiting place — it is a liberating one.
Start small. Get one light, one modifier, and one backdrop. Shoot often, review critically, and adjust. The technical knowledge will come naturally with practice, and so will your personal style.
Your studio does not need to be perfect from day one. It just needs to be a space where you can experiment, learn, and grow. That is where great photography always begins.
Frequently Asked Questions
1. What equipment do I need to start photography in the studio?
At a minimum, you need a light source (a single monolight or speedlight), a softbox or umbrella modifier, a backdrop, and a backdrop stand. A DSLR or mirrorless camera with a standard lens completes the basic kit. You do not need expensive gear to start producing professional-quality images.
2. What is the best camera setting for studio photography?
For studio flash photography, start with ISO 100, aperture f/8, and shutter speed at your camera’s sync speed (usually 1/160s–1/250s). Set white balance manually to match your flash (around 5500K). Shoot in RAW. Adjust aperture or flash power to control exposure rather than changing the shutter speed.
3. How much space do I need for a home photography studio?
For basic portrait work, a room of at least 10×12 feet provides enough space for a subject, a seamless backdrop, and a light positioned at the correct distance. Product photographers can work in much smaller spaces. The key is ensuring enough room between your subject and backdrop to avoid shadow spill.
4. Is continuous lighting or flash better for studio photography?
Flash (strobe) lighting is generally preferred for portraits because it is more powerful, produces less heat, and freezes subject motion. Continuous LED lighting is easier to learn because “what you see is what you get” — great for beginners, product photography, and video. Many photographers use both depending on the project.
5. How do I avoid harsh shadows in studio portraits?
The most effective ways to soften shadows are: use a large softbox or umbrella modifier instead of bare flash; move the light closer to the subject (larger light source = softer shadows); add a fill light or a white reflector on the shadow side; and ensure adequate distance between the subject and the background so shadows don’t land on it.
/ You May Also Read /
Portraits and Photography: Your Complete Guide to Capturing Stunning Images in 2026
Family Photography: Best Poses, Locations & Expert Tips for Stunning Shots
-
 Lifestyle4 months ago
Family Photography: Best Poses, Locations & Expert Tips for Stunning Shots
-
 Photography Tips2 months ago
50+ Creative Photoshoot Ideas to Try in 2026
-
 Photography Tips3 months ago
Challenges of Photography: Common Obstacles Every Photographer Faces and How to Overcome Them
-

 Blog3 months ago
How to Turn On Profile Picture Guard: A Complete Step-by-Step Guide
-
 Photography Tips2 months ago
15 Best Places to Take Pictures Near Me for Stunning Photos in 2025
-
 Photography Tips3 months ago
Photography in the Studio: Essential Tips and Setup Guide for Better Shots
-
 Photography Tips3 months ago
Portraits and Photography: Your Complete Guide to Capturing Stunning Images in 2026
-
 Blog3 months ago
Profile Picture Guide: How to Choose a Photo That Gets Noticed