
Blog
100+ Cute Profile Pictures Ideas to Make Your Social Media Pop in 2025


Your profile picture says a lot before you say a word. It’s the first thing people notice on Instagram, WhatsApp, Discord, or LinkedIn. That’s why picking the right cute profile pictures matters more than most people realize.
A great avatar isn’t just about looking nice. It reflects your personality, sets the tone for your online presence, and helps you stand out in a sea of generic selfies. Whether you want something playful, aesthetic, or downright adorable, this guide covers everything you need to know.
Let’s dive into how to choose, create, and use cute profile pictures that actually match your vibe.
What Makes a c “Cute”?
A cute profile picture typically combines soft colors, warm expressions, and a sense of charm. It doesn’t have to be a photo of you. It could be a cartoon avatar, an animal, or even a minimalist illustration.
Here’s what usually makes an image feel cute rather than just “nice”:
- Soft or pastel color tones
- A genuine smile or playful expression
- Round, friendly shapes (think circles over sharp edges)
- A touch of whimsy, like stickers, filters, or props
- Simplicity — cute rarely means cluttered
Cuteness is subjective, but these visual cues tend to trigger a warm, approachable feeling in viewers.
Types of Cute Profile Pictures
Not everyone wants a selfie as their avatar. Thankfully, there are several categories to choose from depending on your personality and platform.
Real Photo Avatars
These are actual pictures of you, often edited with soft filters, warm lighting, or a cozy background. They work well on LinkedIn, Facebook, and dating apps where authenticity matters.
Cartoon and Anime-Style Avatars
Illustrated versions of yourself are hugely popular on Discord, Twitter/X, and gaming platforms. Apps like Bitmoji or anime avatar generators let you build a stylized version of your face in minutes.
Animal and Pet Avatars
Nothing beats a photo of your dog, cat, or even a cartoon bunny for instant cuteness. Pet avatars are especially popular among younger users and pet lovers who want a lighthearted online identity.
Minimalist and Aesthetic Avatars
Think soft gradients, simple line art, or a single flower against a pastel backdrop. These work beautifully for Pinterest boards, blogs, or anyone chasing a clean, curated aesthetic.
Best Platforms for Cute Profile Pictures

Different platforms call for different styles. Here’s a quick breakdown to help you match your avatar to the right space.
| Platform | Best Style of Avatar | Why It Works |
|---|---|---|
| Real photo with soft filter or aesthetic edit | Builds personal connection and visual consistency | |
| Discord | Cartoon or anime-style avatar | Matches gaming and community culture |
| Simple, warm photo or illustrated avatar | Keeps things casual and recognizable | |
| Professional yet friendly headshot | Balances credibility with approachability | |
| Minimalist or aesthetic graphic | Fits the curated, visual-first feed |
Choosing the right style for the right platform makes your online presence feel intentional rather than random.
How to Create Your Own Cute Profile Picture
You don’t need professional editing skills to design a great avatar. Here’s a simple step-by-step approach.
- Pick your base image. Choose a clear photo, a favorite pet picture, or start from scratch with an avatar builder.
- Choose a soft color palette. Pastels, warm neutrals, and muted tones tend to feel more inviting than harsh, saturated colors.
- Add a light filter or edit. Slightly brighten the image and soften shadows for a friendlier look.
- Keep the background simple. A cluttered background distracts from the main subject.
- Crop it as a circle or square. Most platforms display avatars as circles, so center your subject accordingly.
- Test it small. Profile pictures often appear tiny in comment sections, so make sure yours is still clear at a small size.
This process takes just a few minutes but makes a noticeable difference in how polished your profile looks.
Practical Examples
Here are a few real-world scenarios to spark inspiration:
- A college student on Discord uses a soft-shaded anime avatar with pastel hair to match their gaming community’s aesthetic.
- A small business owner on Instagram uses a warm, well-lit photo with a slight smile to build trust with followers.
- A pet influencer account rotates seasonal photos of their golden retriever wearing tiny accessories.
- A freelancer on LinkedIn uses a friendly, well-cropped headshot with a soft neutral background to appear both professional and personable.
Each of these examples shows how the “right” cute profile picture depends entirely on context and audience.
Pros and Cons of Using Cute Profile Pictures
| Pros | Cons |
|---|---|
| Makes your profile more memorable and approachable | May seem too casual for formal or corporate settings |
| Easy to personalize with filters, stickers, or illustrations | Can look outdated if trends change quickly |
| Works well across multiple platforms | Might not accurately represent you if it’s overly stylized |
| Boosts engagement on social platforms | Requires occasional updates to stay fresh |
| Builds a consistent personal brand aesthetic | Some platforms compress images, reducing quality |
Weighing these factors helps you decide how far to lean into the “cute” aesthetic versus a more neutral or professional look.
Common Mistakes to Avoid
Even a great photo can turn into a poor avatar if you’re not careful. Watch out for these common pitfalls.
- Using a group photo. People can’t tell which person is you, especially at small sizes.
- Overusing filters. Heavy filters can make your image look unnatural or dated fast.
- Ignoring the crop. A poorly centered photo can cut off your face or the main subject.
- Choosing low-resolution images. Blurry avatars look unprofessional, even in a casual context.
- Not updating it regularly. An old photo can feel disconnected from who you are today.
- Mismatching platform tone. A silly meme avatar might not suit a professional networking site.
Avoiding these mistakes instantly elevates how polished your profile picture feels.
Best Practices for Choosing the Perfect Avatar
- Stick to one consistent style across platforms for stronger personal branding.
- Choose lighting that’s soft and natural rather than harsh or shadowy.
- Keep the subject centered and clearly visible, even at thumbnail size.
- Refresh your avatar every few months to keep your profile feeling current.
- Match the vibe of the picture to the tone of the platform you’re using.
- When in doubt, simplicity wins over busy, over-edited images.
Following these best practices ensures your profile picture works for you, not against you.
Conclusion
Choosing cute profile pictures doesn’t have to be complicated. Once you understand your platform, your audience, and the visual style that fits your personality, the process becomes simple and even fun.
Whether you go with a warm selfie, an illustrated avatar, or a photo of your favorite pet, the goal is the same: make your first impression count. A thoughtful, well-chosen profile picture builds recognition, trust, and a bit of personality into every interaction you have online.
Take a few minutes today to update your avatar using the tips above. Small changes like better lighting or a cleaner crop can make a surprisingly big difference.
Frequently Asked Questions
1. What are the best cute profile pictures for Instagram?
Soft, well-lit photos with a genuine smile or aesthetic filter tend to perform best on Instagram, since the platform favors a warm, personal feel.
2. Can I use a cartoon avatar as my main profile picture?
Yes, cartoon and anime-style avatars are widely accepted, especially on platforms like Discord, Twitter/X, and gaming communities.
3. How do I make my profile picture look more aesthetic?
Use a soft color palette, simple background, and light editing to brighten the image without over-processing it.
4. Is it okay to use a pet photo as a profile picture?
Absolutely. Pet avatars are popular and convey a friendly, approachable personality, especially on casual social platforms.
5. How often should I update my profile picture?
Updating every few months keeps your online presence fresh and ensures your avatar still reflects who you are today.
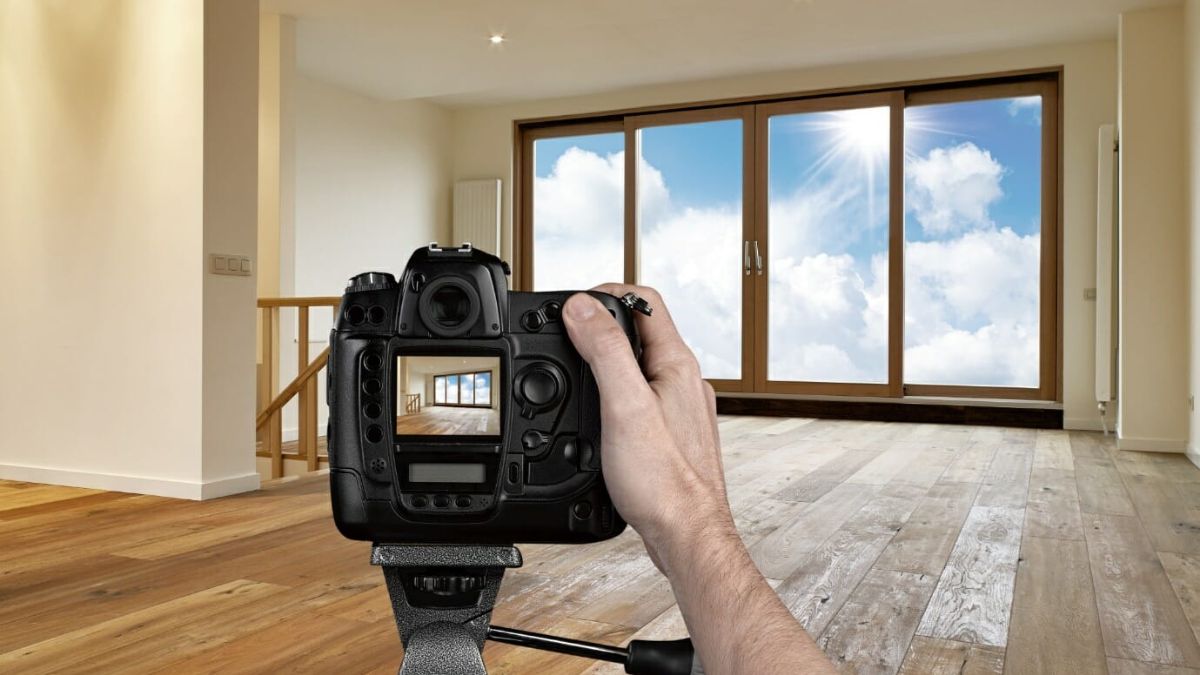
Selling a home starts long before an open house. It starts with the very first photo a buyer sees online. A skilled real estate photographer can turn an ordinary listing into a scroll-stopping one, and that difference often decides whether a property gets a showing or gets skipped entirely.
Whether you’re an agent building your brand or a homeowner preparing to sell, understanding what makes real estate photography effective will save you time, money, and frustration. Let’s break down everything you need to know.
What Does a Real Estate Photographer Actually Do?
A real estate photographer specializes in capturing homes, condos, and commercial spaces in a way that highlights their best features while staying true to reality. This isn’t the same as general portrait or event photography.
Their job typically includes:
- Shooting interior and exterior spaces with wide-angle lenses
- Editing photos for brightness, color balance, and lens correction
- Capturing twilight or dusk shots for dramatic curb appeal
- Offering drone photography for aerial views
- Creating virtual tours or 3D walkthroughs
- Delivering MLS-ready, high-resolution images quickly
Good real estate photography isn’t just about pretty pictures. It’s about strategic storytelling that helps buyers imagine themselves living in the space.
Why Professional Photos Matter So Much
Listings with professional photography consistently attract more online views and sell faster than those with amateur, phone-shot images. Buyers browse dozens of listings in minutes, so the first impression has to work instantly.
Poor lighting, crooked angles, or cluttered rooms can make even a beautiful home look unappealing. On the flip side, sharp, well-composed images build trust before a buyer ever steps through the front door.
How to Choose the Right Real Estate Photographer
Not every photographer with a camera is equipped to shoot real estate well. This niche requires specific technical skills and an understanding of how buyers browse listings.
Here’s what to look for:
1. A Strong, Relevant Portfolio
Ask to see recent work, ideally from homes similar in size and style to yours. Look for consistency in lighting, color accuracy, and composition across multiple properties.
2. Proper Equipment
Wide-angle lenses, tripods, and external lighting are non-negotiable for interior shots. If drone footage or twilight photography is important to you, confirm they offer it.
3. Fast Turnaround Time
In real estate, timing matters. Most professionals deliver edited photos within 24 to 48 hours, since listings need to go live quickly.
4. Editing Style
Some photographers lean toward bright, airy edits, while others prefer natural, true-to-life tones. Pick a style that matches your target buyer’s expectations.
5. Clear Pricing Packages
Rates vary based on square footage, location, and add-ons like drone shots or floor plans. Get a detailed quote upfront to avoid surprises.
Real Estate Photography Pricing Breakdown
Pricing varies widely depending on location, property size, and services included. Here’s a general overview to help set expectations.
| Service Type | Typical Price Range | Best For |
|---|---|---|
| Standard interior/exterior shoot | $150 – $300 | Homes under 2,500 sq ft |
| Twilight photography | $75 – $150 add-on | Luxury or high-end listings |
| Drone/aerial photography | $100 – $250 add-on | Large lots, acreage, waterfront homes |
| Virtual 3D tour | $150 – $400 | Competitive urban markets |
| Floor plan creation | $50 – $150 | Buyers comparing layouts |
These numbers can shift based on region and photographer experience, so always request a personalized quote.
Practical Examples of Great Real Estate Photography
Consider two identical three-bedroom homes listed in the same neighborhood. One is photographed with a phone camera under dim overhead lighting. The other uses a wide-angle lens, staged furniture, and natural daylight streaming through open curtains.
The second listing almost always generates more inquiries, even if the homes are priced identically. Buyers respond to visual clarity and warmth, not just square footage numbers on a spec sheet.
Another example: a hillside property with a modest interior but a stunning view. A photographer who captures a twilight exterior shot showcasing the view at golden hour can completely shift how buyers perceive the home’s value.
Pros and Cons of Hiring a Professional Real Estate Photographer
Every decision has trade-offs. Here’s a balanced look.
Pros
- Higher-quality images that attract more online engagement
- Faster sale times in competitive markets
- Professional editing corrects lighting and lens distortion
- Builds credibility for agents and sellers alike
- Access to specialized services like drone shots and virtual tours
Cons
- Upfront cost, especially for smaller budgets
- Scheduling can be tight during peak selling seasons
- Some photographers require minimum booking fees
- Editing style preferences may not always match expectations
Common Mistakes to Avoid
Even with a professional booked, certain missteps can hurt the final result.
- Not decluttering before the shoot. Photographers can’t hide excess furniture or personal items well in wide shots.
- Skipping staging. Empty or messy rooms photograph poorly, even with great lighting.
- Shooting at the wrong time of day. Harsh midday sun can create unflattering shadows indoors.
- Ignoring exterior curb appeal. Overgrown lawns or cluttered driveways distract from the home’s features.
- Choosing price over experience. The cheapest option isn’t always the best value for a listing that needs to perform well online.
Best Practices for a Successful Photo Shoot
Preparing properly makes a measurable difference in the final images.
- Turn on all lights, even during the day, to add warmth to interior shots
- Remove clutter from countertops, tables, and floors
- Open curtains and blinds to maximize natural light
- Mow the lawn and clear walkways before exterior shots
- Hide pet items, trash bins, and personal photos
- Stage key rooms like the living room, kitchen, and primary bedroom first
Following this checklist helps photographers work efficiently and produce stronger results in less time.
Comparing Photography Styles for Different Property Types
| Property Type | Recommended Approach | Why It Works |
|---|---|---|
| Starter homes | Bright, natural lighting, wide shots | Appeals to first-time buyers seeking space and simplicity |
| Luxury properties | Twilight shots, staged interiors, drone footage | Emphasizes prestige and lifestyle appeal |
| Rural/acreage listings | Drone aerials, landscape context | Highlights land size and surroundings |
| Urban condos | Tight interior framing, city view shots | Showcases efficient use of space and location perks |
Matching the photography style to the property type helps listings resonate with the right buyer segment.
Conclusion
Great real estate photography isn’t a luxury anymore. It’s a baseline expectation in a market where most buyers start their search online. A skilled real estate photographer helps a property stand out, sell faster, and attract serious buyers from the very first click.
Taking time to prepare the space, choose the right professional, and understand pricing options ensures you get the most value from every shoot. In a visually driven market, quality photos aren’t just nice to have. They’re one of the smartest investments you can make in a successful sale.
Frequently Asked Questions
1. How much does a real estate photographer typically cost?
Prices generally range from $150 to $300 for a standard shoot, with add-ons like drone photography or twilight shots costing extra.
2. How long does a real estate photo shoot take?
Most residential shoots take between 45 minutes and 2 hours, depending on the home’s size and the number of services requested.
3. Do I need to stage my home before the photographer arrives?
Yes. Decluttering, cleaning, and light staging significantly improve photo quality and buyer engagement.
4. What’s the difference between twilight and daytime photography?
Twilight photography is shot at dusk to create a warm, dramatic exterior look, while daytime shots focus on bright, natural interior lighting.
5. Can I use a smartphone instead of hiring a professional?
While smartphones have improved, professional cameras with wide-angle lenses and proper editing consistently produce sharper, more accurate listing photos.

Your profile picture says a lot about you, but it can also be misused if the wrong people get their hands on it. That’s exactly why learning how to turn on profile picture guard has become such a popular search among social media users today. This simple feature adds an extra layer of protection to your profile photo, stopping strangers from downloading, screenshotting, or sharing it without your permission.
In this guide, we’ll walk through everything you need to know about enabling this feature, why it matters, and how to make the most of it.
What Is Profile Picture Guard?
Profile picture guard is a privacy feature offered by platforms like Facebook that restricts what other users can do with your profile photo. Once activated, people outside your friend list generally cannot download your picture, take a screenshot without notification, share it, or send it to others through the app.
Think of it as a digital lock placed directly over your profile image. It doesn’t remove your photo or hide it completely, but it does limit how far that photo can travel once it’s online.
This feature became especially useful after growing concerns around fake profiles, catfishing, and photo misuse. Many users, particularly women, started using it as a first line of defense against unwanted attention.
Why This Feature Matters
Social media profile pictures are often public by default. That means anyone, even people you’ve never met, can view and potentially save your image. Profile picture guard closes that gap.
Here’s what it typically prevents:
- Random users from downloading your photo
- Others from sharing your picture across the platform
- Screenshots being taken silently, in some cases
- Your photo appearing in someone else’s search results outside your network
How to Turn On Profile Picture Guard
Now let’s get into the actual steps. The process is fairly quick and doesn’t require any technical knowledge.
Step-by-Step Instructions
- Open the app on your phone and log into your account.
- Go to your profile page by tapping your profile icon.
- Tap on your current profile picture to open it.
- Look for the three-dot menu or options icon near the photo.
- Select the option labeled “Turn on profile picture guard” or similar wording depending on the app version.
- Confirm the action when prompted.
Once enabled, you’ll usually see a small shield icon appear around your profile photo, letting others know the guard is active.
Doing It From a Desktop Browser
If you prefer using a computer, the steps are slightly different but just as simple.
- Log into your account on the browser.
- Click on your profile picture.
- Choose the edit or options icon.
- Select the profile picture guard setting.
- Save your changes.
Keep in mind that some features work best when updated through the mobile app first, since certain privacy tools roll out there before reaching desktop versions.
Comparing Protected vs Unprotected Profile Pictures
Understanding the difference can help you decide why this feature is worth activating.
| Feature | Unprotected Profile Picture | Profile Picture with Guard Enabled |
|---|---|---|
| Downloading by strangers | Allowed | Blocked |
| Sharing outside friend list | Allowed | Restricted |
| Visual shield indicator | Not shown | Displayed around photo |
| Screenshot alerts | Not available | Available on some platforms |
| Visibility to public | Fully visible | Still visible, but protected |
As shown above, your photo remains visible to the public, but the actions people can take with it become much more limited.
Practical Examples of When This Feature Helps
Let’s look at a few real-world situations where turning on this feature makes a real difference.
- A college student notices someone using their photo for a fake dating profile. With the guard enabled beforehand, that download would have been blocked.
- A small business owner wants their profile photo visible to potential clients but doesn’t want competitors reusing it elsewhere.
- A parent managing their teen’s account activates the feature to reduce the risk of image misuse by strangers.
These examples highlight how the setting works quietly in the background without affecting your everyday social media experience.
Pros and Cons of Using Profile Picture Guard
Every privacy tool comes with trade-offs. Here’s a balanced look at both sides.
| Pros | Cons |
|---|---|
| Reduces risk of photo theft or misuse | Doesn’t fully hide the photo from public view |
| Free and easy to activate | Some older app versions may lack the option |
| Adds visible shield as a deterrent | Determined users may still take screenshots |
| Works automatically once enabled | May not apply to previously shared copies of the photo |
| Builds trust, especially for public profiles | Slight increase in image loading time on some devices |
Overall, the benefits outweigh the minor limitations, especially if privacy is a priority for you.
Common Mistakes People Make
Even a simple feature like this can be misused or misunderstood. Watch out for these common errors.
- Assuming it hides the photo completely. The picture is still public; only certain actions are restricted.
- Forgetting to check if it’s actually enabled. Always look for the shield icon to confirm activation.
- Not updating the app before trying to enable it. Older versions may not display the option at all.
- Ignoring other privacy settings. Profile picture guard works best alongside strong overall privacy controls.
- Expecting it to stop all forms of screenshotting. Some devices and third-party tools can bypass this protection.
Best Practices for Better Profile Protection
To get the most out of this feature, pair it with a few smart habits.
Strengthen Your Overall Privacy Settings
Review who can see your posts, friend list, and personal details. A protected photo means less if everything else is wide open.
Update Your App Regularly
New privacy tools often roll out through updates. Keeping your app current ensures you have access to the latest protections.
Avoid Reusing the Same Photo Everywhere
If your picture is already public on another platform without protection, enabling the guard here won’t undo that exposure.
Combine It With a Friends-Only Audience Setting
For maximum protection, consider limiting profile photo visibility to friends only, in addition to enabling the guard.
Summary Table: Quick Setup Checklist
| Task | Status Check |
|---|---|
| App updated to latest version | Required before setup |
| Profile picture uploaded | Needed to enable guard |
| Guard option located in settings | Tap photo, then options menu |
| Shield icon visible after activation | Confirms feature is active |
| Overall privacy settings reviewed | Recommended for full protection |
Conclusion
Learning how to turn on profile picture guard takes just a few minutes, but it adds meaningful protection to something as personal as your photo. While it won’t make your picture invisible, it does stop many common forms of misuse, from unauthorized downloads to easy sharing by strangers.
Pair this feature with strong overall privacy habits, and you’ll create a much safer experience for yourself online. Take a moment today to check your settings and activate the guard if you haven’t already.
Frequently Asked Questions
1. Does profile picture guard hide my photo completely?
No, your photo remains publicly visible. The feature only restricts actions like downloading and sharing.
2. Is this feature available on all social media platforms?
Not universally. It’s most commonly associated with Facebook, though similar tools exist on other platforms under different names.
3. Can someone still screenshot my protected profile picture?
In most cases, yes, though the platform may limit certain sharing actions or notify you depending on the device.
4. Will enabling this feature slow down my profile loading?
There may be a very slight delay in some cases, but it’s generally not noticeable during normal use.
5. How do I know if profile picture guard is active?
Look for a small shield icon displayed around your profile photo once the feature is enabled.
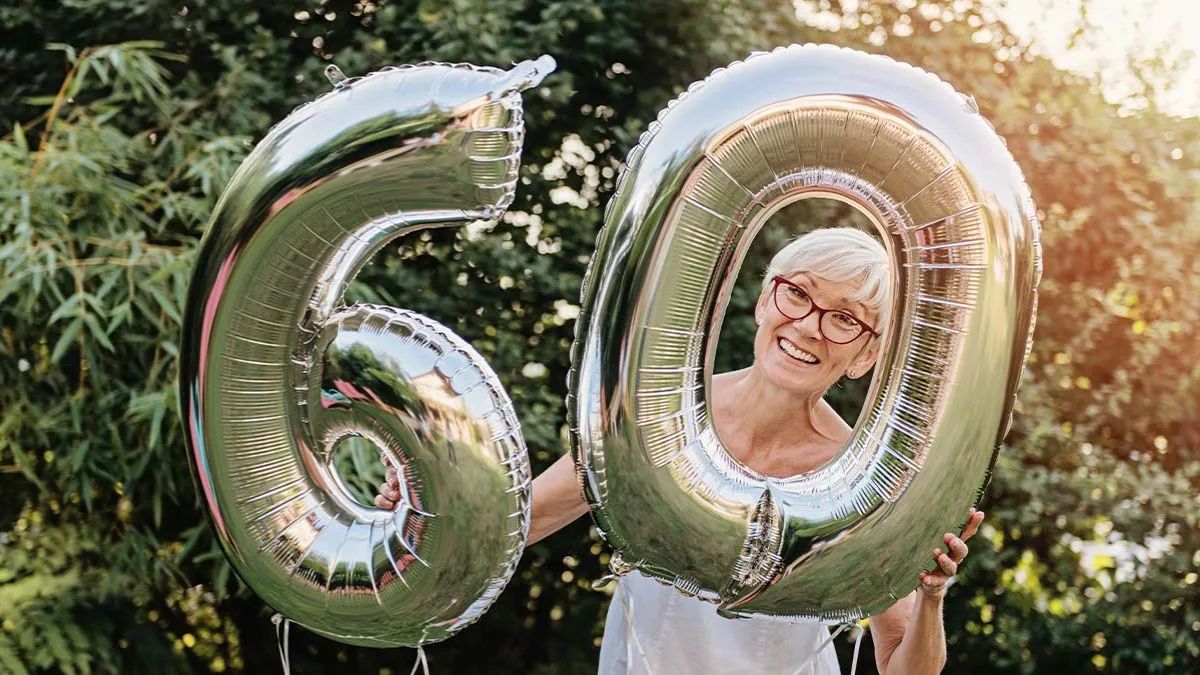
Turning 60 is a big deal, and capturing that moment the right way matters. If you’re searching for pictures of 60 for inspiration, you’re probably planning a birthday shoot, designing an invitation, or just looking for fresh ideas to celebrate this milestone in style. The good news? You don’t need a professional studio or a huge budget to get stunning, memorable shots.
This guide walks you through everything you need to know about planning and capturing beautiful 60th birthday pictures, from location ideas to posing tips and common mistakes to avoid.
Why Pictures of 60 Matter So Much
A 60th birthday isn’t just another year. It’s a milestone that deserves to be documented properly.
These photos often become:
- Keepsakes shared across generations
- Centerpieces for anniversary or retirement celebrations
- Social media highlights that friends and family cherish
- Printed keepsakes for photo albums or wall art
Because this occasion carries emotional weight, the pictures should feel authentic, warm, and personal rather than staged or stiff.
What Makes a Great 60th Birthday Photo
Great photos share a few common traits. They usually include:
- Natural lighting that flatters skin tone
- Genuine expressions instead of forced smiles
- A meaningful location or backdrop
- Props or elements that reflect the person’s personality
- Comfortable, well-fitted outfits in complementary colors
When these elements come together, the result feels timeless rather than trendy.
Best Locations for Capturing Pictures of 60
Location sets the tone for the entire shoot. Here are some ideas that consistently work well.
Outdoor Settings
Outdoor locations offer natural light and organic backdrops. Popular choices include:
- Botanical gardens
- Beaches during golden hour
- Parks with mature trees
- Vineyards or rooftop terraces
Natural light softens wrinkles and adds warmth, which makes outdoor shoots especially flattering for milestone birthdays.
Indoor and Home Settings
Not everyone wants an outdoor shoot, and that’s completely fine. Indoor options work beautifully too:
- A cozy living room decorated with balloons
- A dining table set for a celebratory dinner
- A home library or study for a more elegant look
- A decorated backdrop wall for portrait-style shots
Indoor settings give you more control over lighting and weather, which reduces stress on the big day.
Posing and Styling Tips for Natural-Looking Photos
Posing doesn’t have to feel awkward. The goal is to look relaxed, confident, and genuinely happy.
Here are a few tried-and-tested tips:
- Angle the body slightly instead of facing the camera head-on
- Encourage natural movement, like walking or laughing
- Use props such as flowers, balloons, or a favorite drink
- Take candid shots between posed ones to capture real emotion
- Keep hands relaxed instead of stiff at the sides
Outfit and Color Suggestions
| Outfit Style | Best For | Recommended Colors |
|---|---|---|
| Elegant formal wear | Indoor dinner or evening party | Deep blue, emerald, burgundy |
| Casual chic | Outdoor daytime shoot | Soft pastels, cream, blush |
| Bold statement piece | Studio or backdrop photography | Gold, black, jewel tones |
| Traditional or cultural attire | Family or heritage-themed shoot | Rich, vibrant patterns |
Choosing colors that complement the background and skin tone makes a noticeable difference in how polished the final images look.
Popular Themes for 60th Birthday Photoshoots
Themes give structure to the shoot and make planning easier. Some popular choices include:
- Golden anniversary theme, using gold and champagne tones
- Vintage or retro theme, celebrating the decade someone was born
- Garden party theme, with florals and pastel decor
- Elegant black-tie theme, for a formal evening celebration
- Family reunion theme, focusing on multi-generational shots
Comparing Popular Photoshoot Themes
| Theme | Mood | Ideal Location | Effort Level |
|---|---|---|---|
| Golden Anniversary | Glamorous, celebratory | Indoor or evening outdoor | Medium |
| Vintage/Retro | Nostalgic, playful | Studio or decorated home | Medium |
| Garden Party | Fresh, natural | Botanical garden, backyard | Low |
| Black-Tie Formal | Sophisticated, elegant | Banquet hall, upscale venue | High |
| Family Reunion | Warm, sentimental | Park, home, banquet space | Low |
Picking a theme early helps streamline decisions about location, outfits, and props.
Pros and Cons of Professional vs. DIY Photoshoots
| Factor | Professional Photoshoot | DIY Photoshoot |
|---|---|---|
| Image Quality | Consistently high | Varies based on skill and equipment |
| Cost | Higher investment | Budget-friendly |
| Flexibility | Limited to scheduled time | Unlimited retakes and timing |
| Editing | Professionally retouched | Requires manual editing |
| Personal Touch | Guided by photographer’s style | Fully controlled by you |
Both options can produce beautiful results. The right choice depends on your budget, timeline, and how much creative control you want.
Common Mistakes to Avoid
Even with the best intentions, a few mistakes tend to show up repeatedly.
- Overlooking lighting: Harsh midday sun or dim indoor lighting can ruin otherwise great shots.
- Forcing smiles: Stiff, unnatural expressions stand out in photos.
- Ignoring the background: Cluttered backgrounds distract from the main subject.
- Ill-fitting outfits: Loose or overly tight clothing can affect how comfortable someone looks on camera.
- Rushing the shoot: Good photos take a little patience and multiple attempts.
Avoiding these pitfalls goes a long way toward getting pictures of 60 you’ll actually want to display.
Best Practices for Stunning 60th Birthday Pictures
To wrap up the planning process, keep these best practices in mind:
- Shoot during golden hour for the most flattering natural light
- Take a mix of posed, candid, and group shots
- Test a few locations beforehand if possible
- Bring a few outfit changes for variety
- Include meaningful props that reflect hobbies or achievements
- Capture emotional moments like hugs, laughter, or toasts
Following these steps ensures the final pictures feel authentic and worth cherishing for years to come.
Conclusion
Finding the right pictures of 60 doesn’t have to be complicated. With thoughtful planning around location, lighting, outfits, and themes, you can create photos that beautifully capture this milestone. Whether you go the professional route or plan a DIY shoot at home, the goal remains the same: authentic, joyful images that reflect a lifetime of memories and the excitement of what’s ahead.
Frequently Asked Questions
1. What is the best time of day to take 60th birthday photos?
Golden hour, roughly an hour before sunset, offers the softest and most flattering natural light for outdoor photoshoots.
2. Should I hire a professional photographer for a 60th birthday shoot?
It depends on your budget and desired image quality. Professionals offer polished results, while DIY shoots offer flexibility and lower cost.
3. What colors work best for 60th birthday photo outfits?
Deep jewel tones, soft pastels, and metallic gold or champagne shades tend to photograph beautifully and suit most skin tones.
4. How can I make posed photos look more natural?
Encourage subtle movement, genuine laughter, and candid interactions rather than stiff, static poses.
5. What are popular themes for 60th birthday photoshoots?
Golden anniversary, vintage, garden party, black-tie formal, and family reunion themes are among the most popular choices.
-

 Photography Tips4 weeks ago
50+ Creative Photoshoot Ideas to Try in 2026
-
 Lifestyle3 months ago
Family Photography: Best Poses, Locations & Expert Tips for Stunning Shots
-

 Blog2 months ago
How to Turn On Profile Picture Guard: A Complete Step-by-Step Guide
-
 Photography Tips3 months ago
Challenges of Photography: Common Obstacles Every Photographer Faces and How to Overcome Them
-

 Photography Tips3 months ago
Photography in the Studio: Essential Tips and Setup Guide for Better Shots
-
 Blog2 months ago
Profile Picture Guide: How to Choose a Photo That Gets Noticed
-
 Studio Photography4 weeks ago
Types of Lighting in Photography: A Complete Beginner-to-Pro Guide
-
 Photography Tips2 months ago
Portraits and Photography: Your Complete Guide to Capturing Stunning Images in 2026